Encryption
Encrypt any cloud storage in 3 minutes
Walk through setting up client-side encryption with RcloneView — it works on Google Drive, OneDrive, Dropbox, S3 and 70+ other providers. Files are encrypted on your device before they reach the cloud, so your provider only sees scrambled data.
- Add an encrypted remote on top of any cloud or local storage
- Encrypt both file names and file contents
- Zero-knowledge privacy powered by rclone Crypt
The demo player couldn’t load. Use “Open in new tab” instead.
Watch next
See all demos →
Step-by-step guide
How to encrypt your cloud storage with rclone Crypt
The same 25 steps as the interactive demo, with screenshots — skim it, or jump into the demo at any step.
-
-
2Try this step ↗
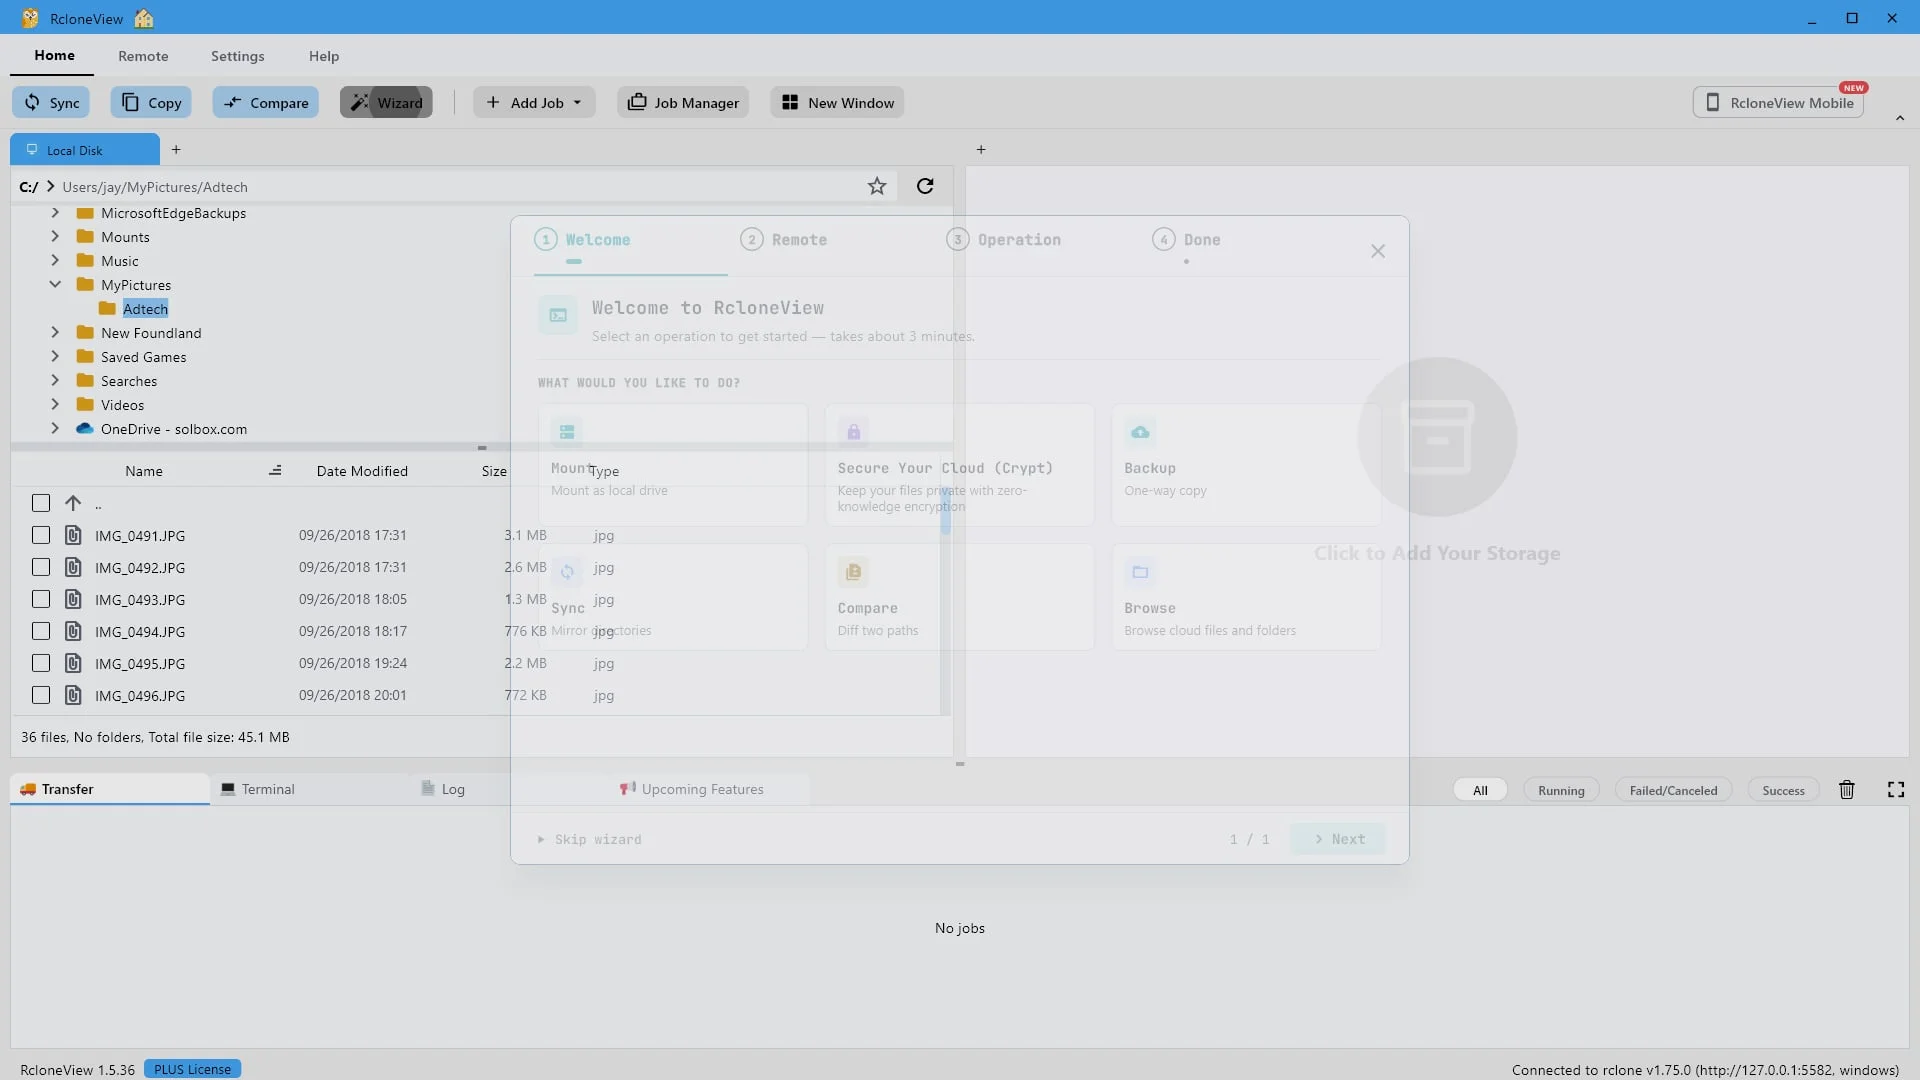
Choose "Secure Your Cloud (Crypt)" to add zero-knowledge encryption.
The wizard can handle several steps. Choose Secure Your Cloud, Crypt, to keep your files private with zero knowledge encryption.
-
3Try this step ↗
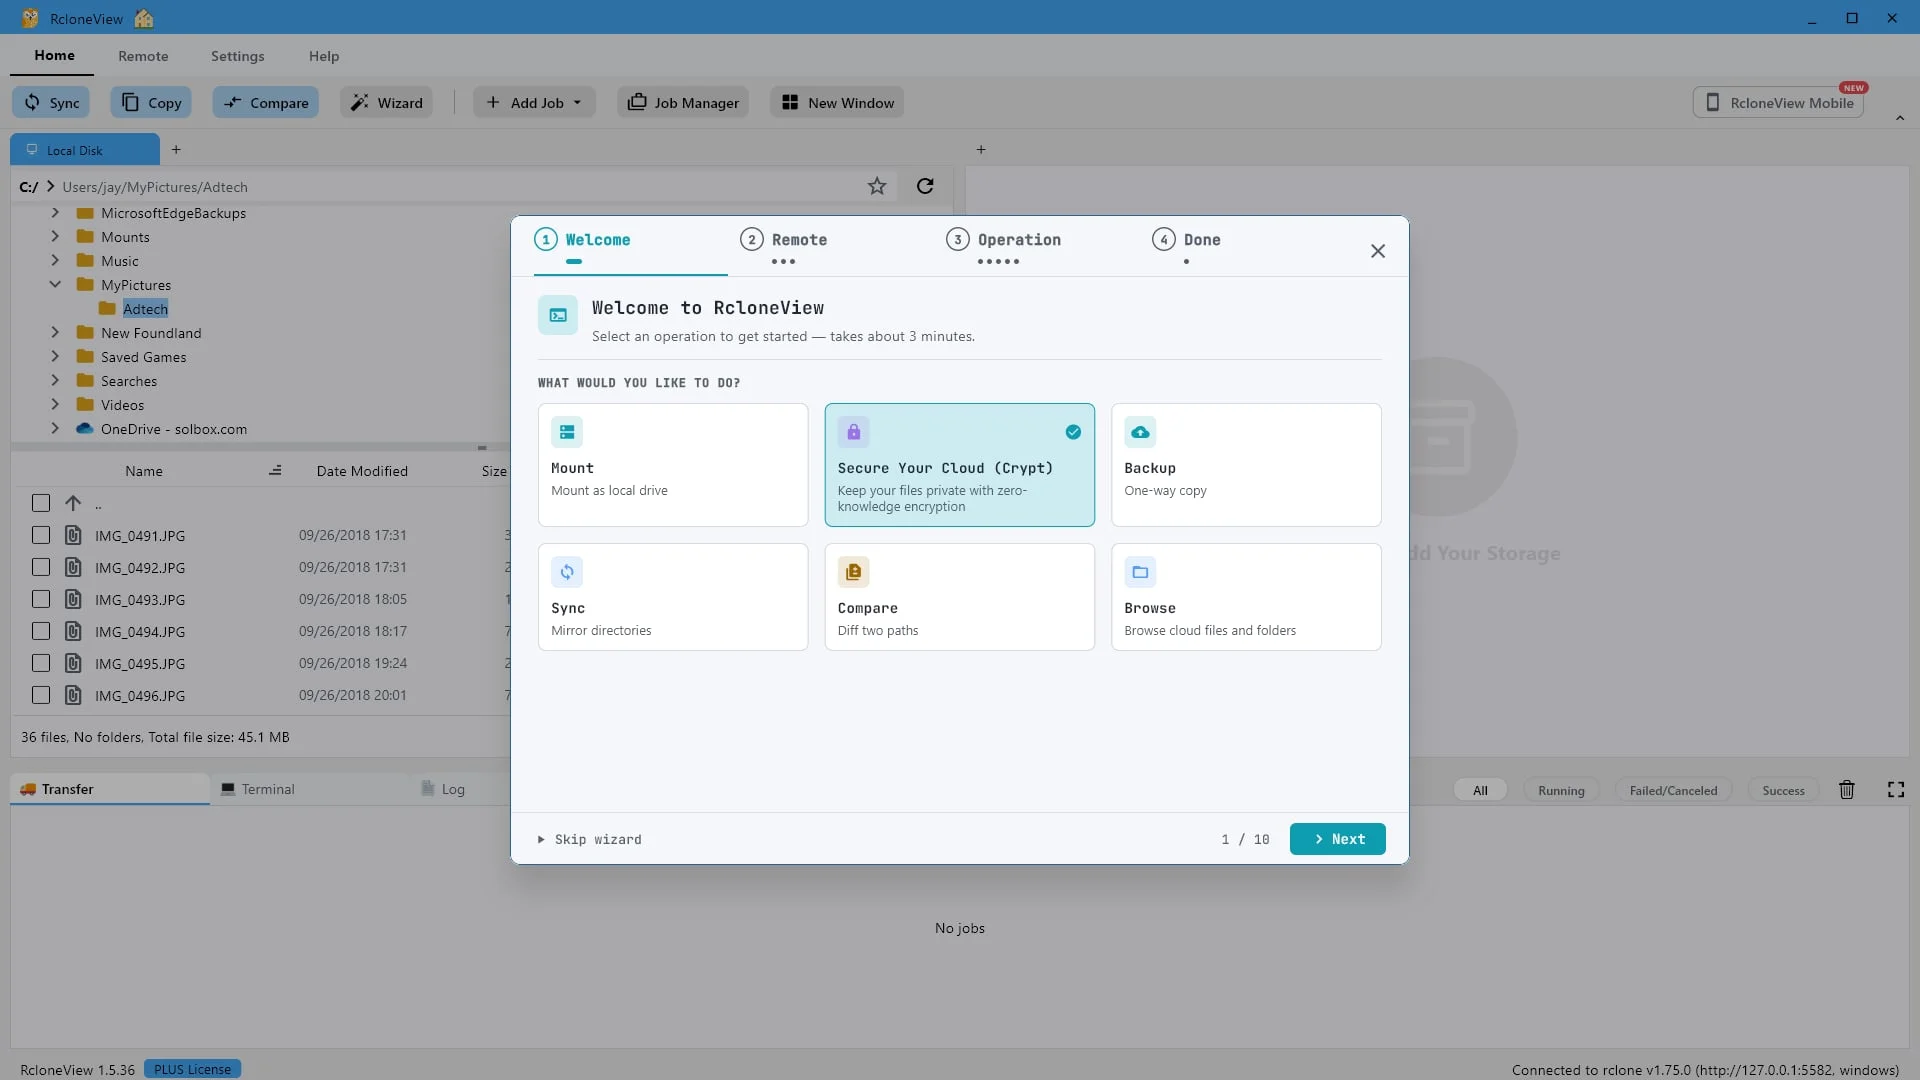
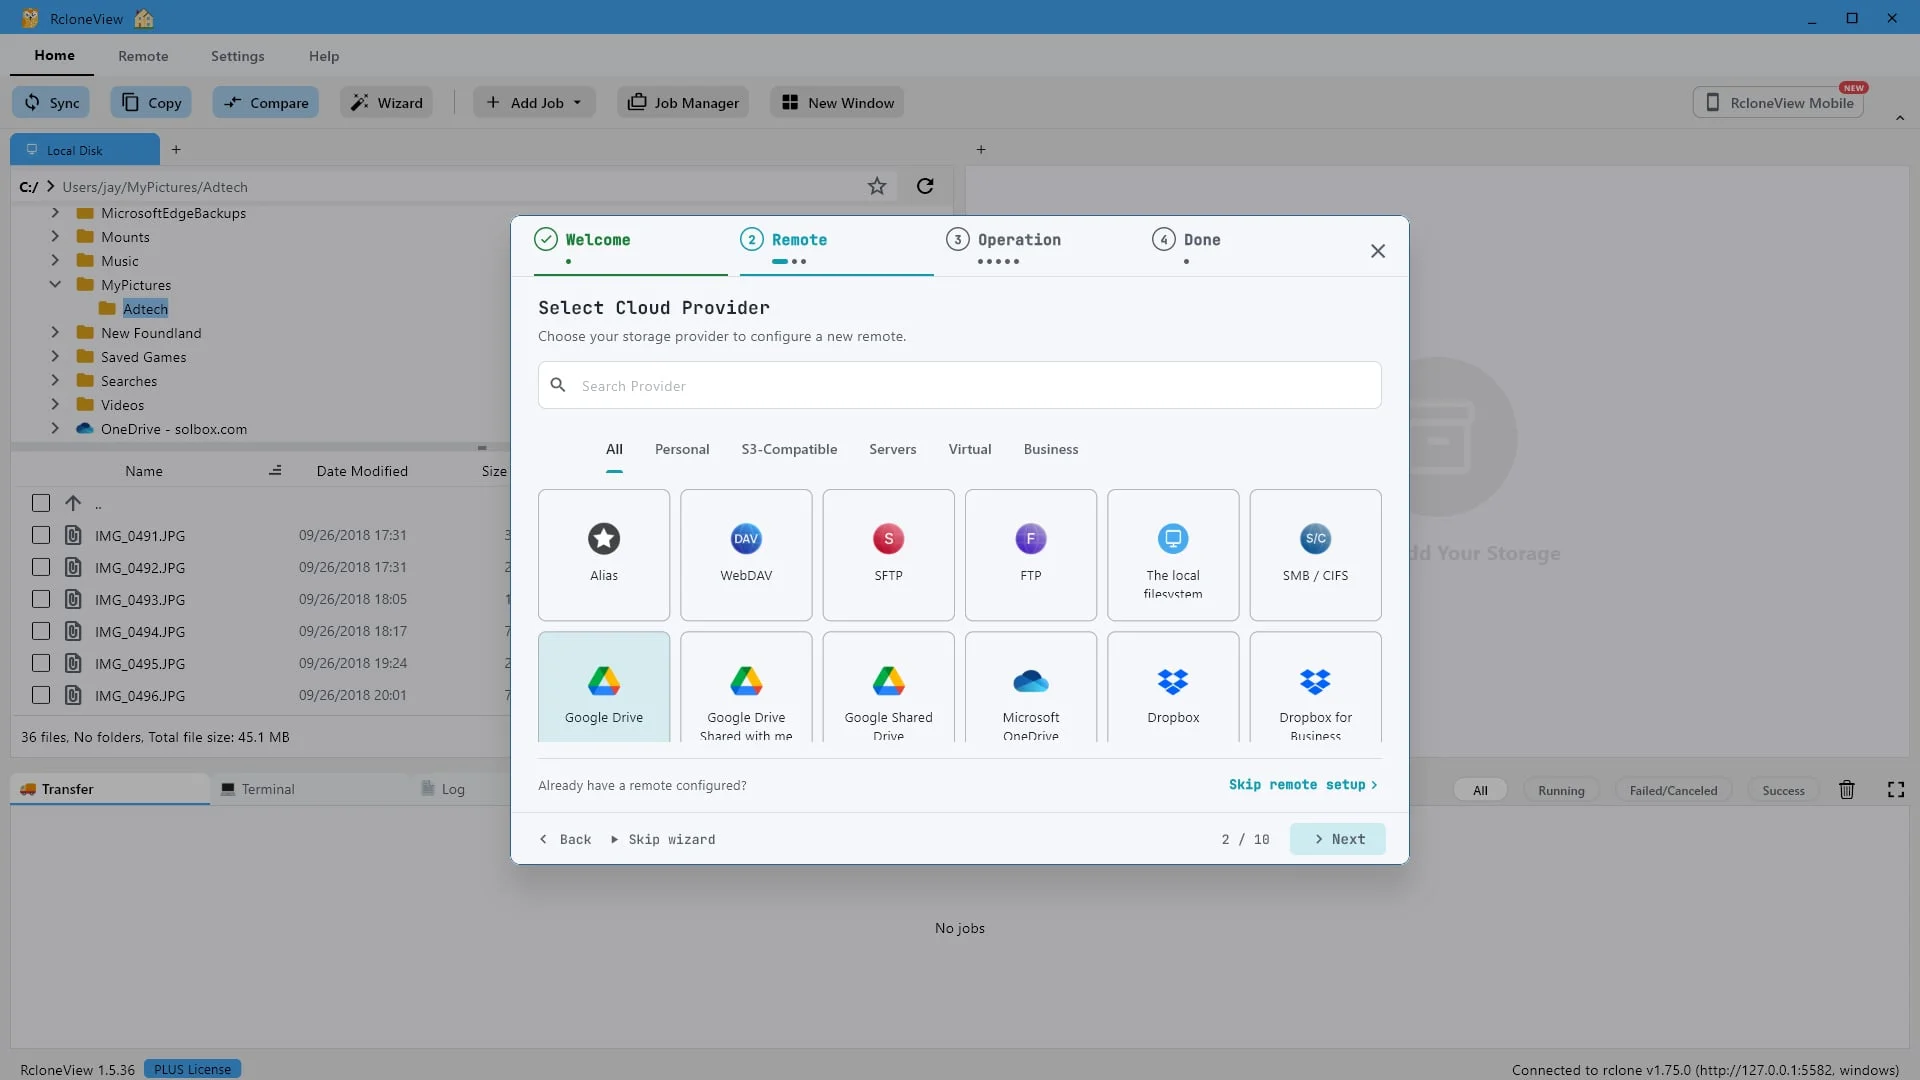
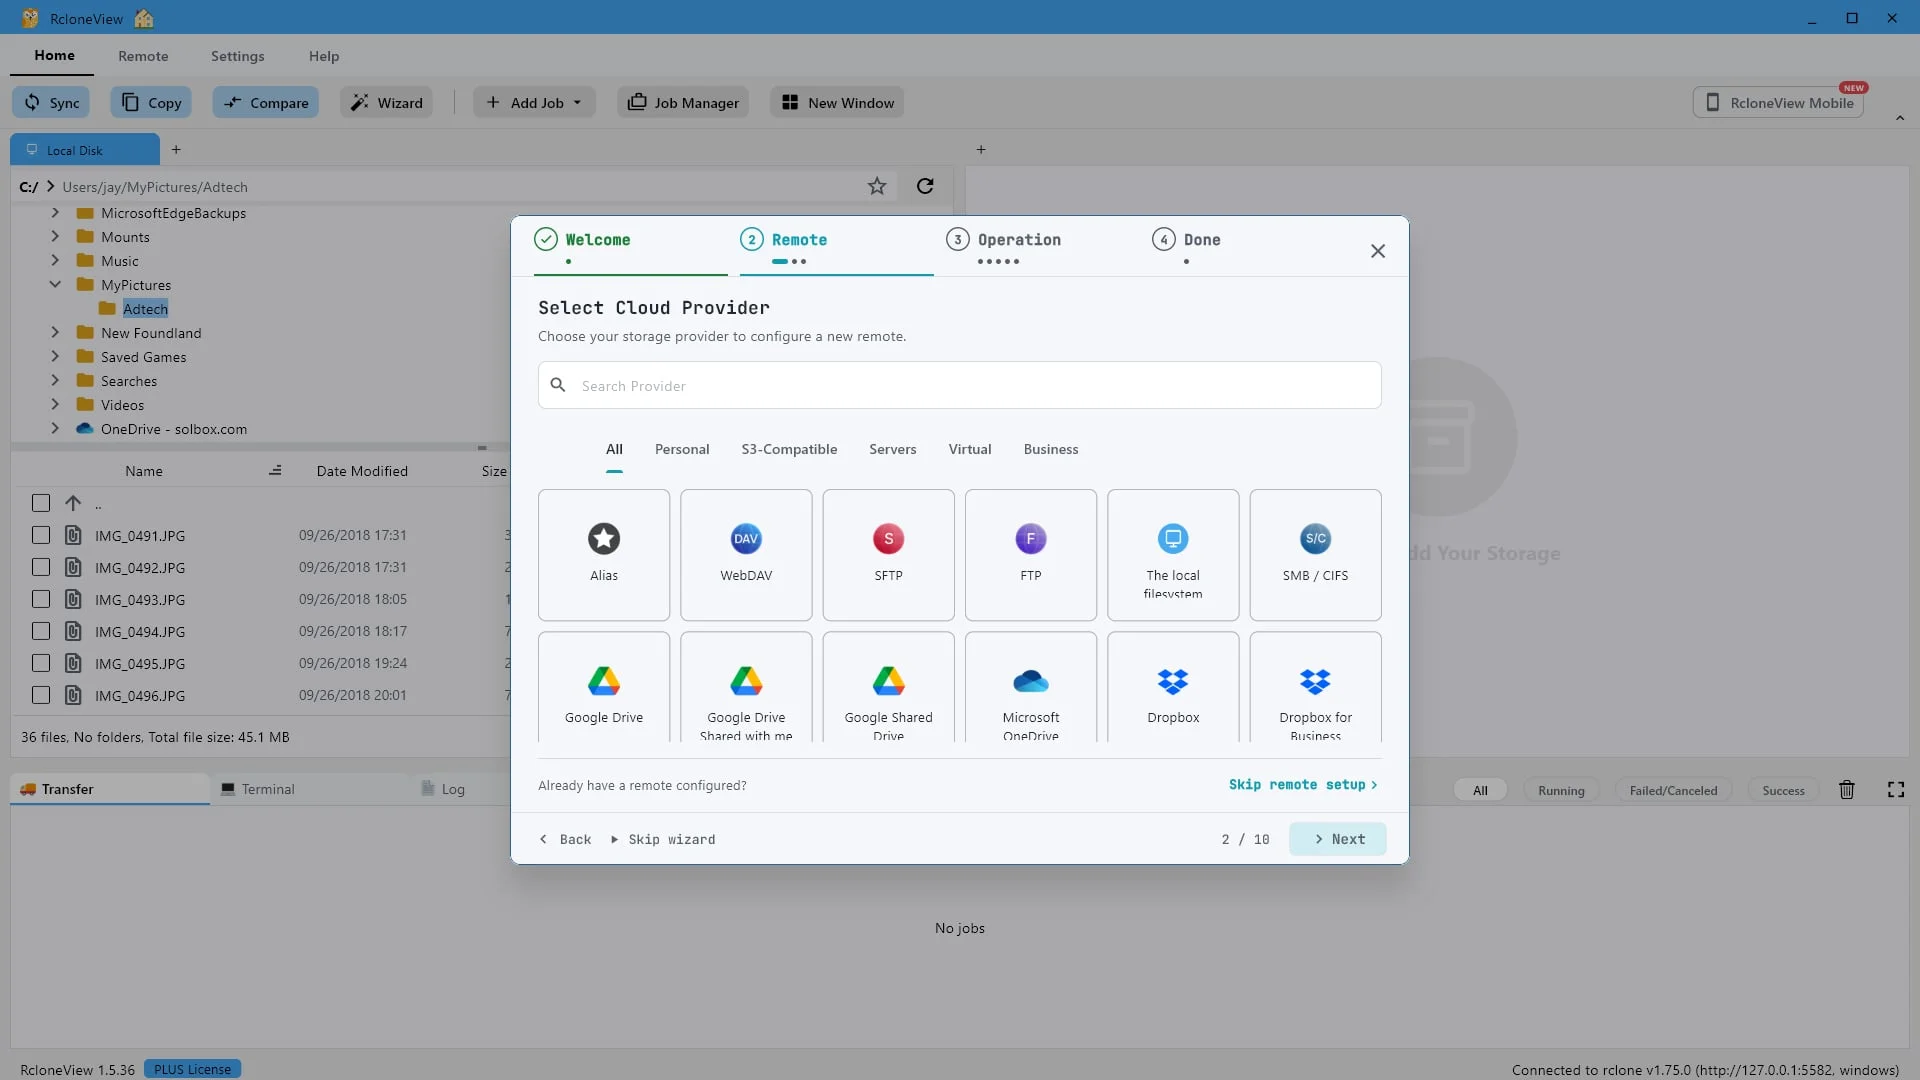
Pick the storage you want to protect. We'll use Google Drive.
Next, pick the storage that will hold your encrypted files. RcloneView supports more than eighty backends. For this demo we will use Google Drive.
-
-
5Try this step ↗
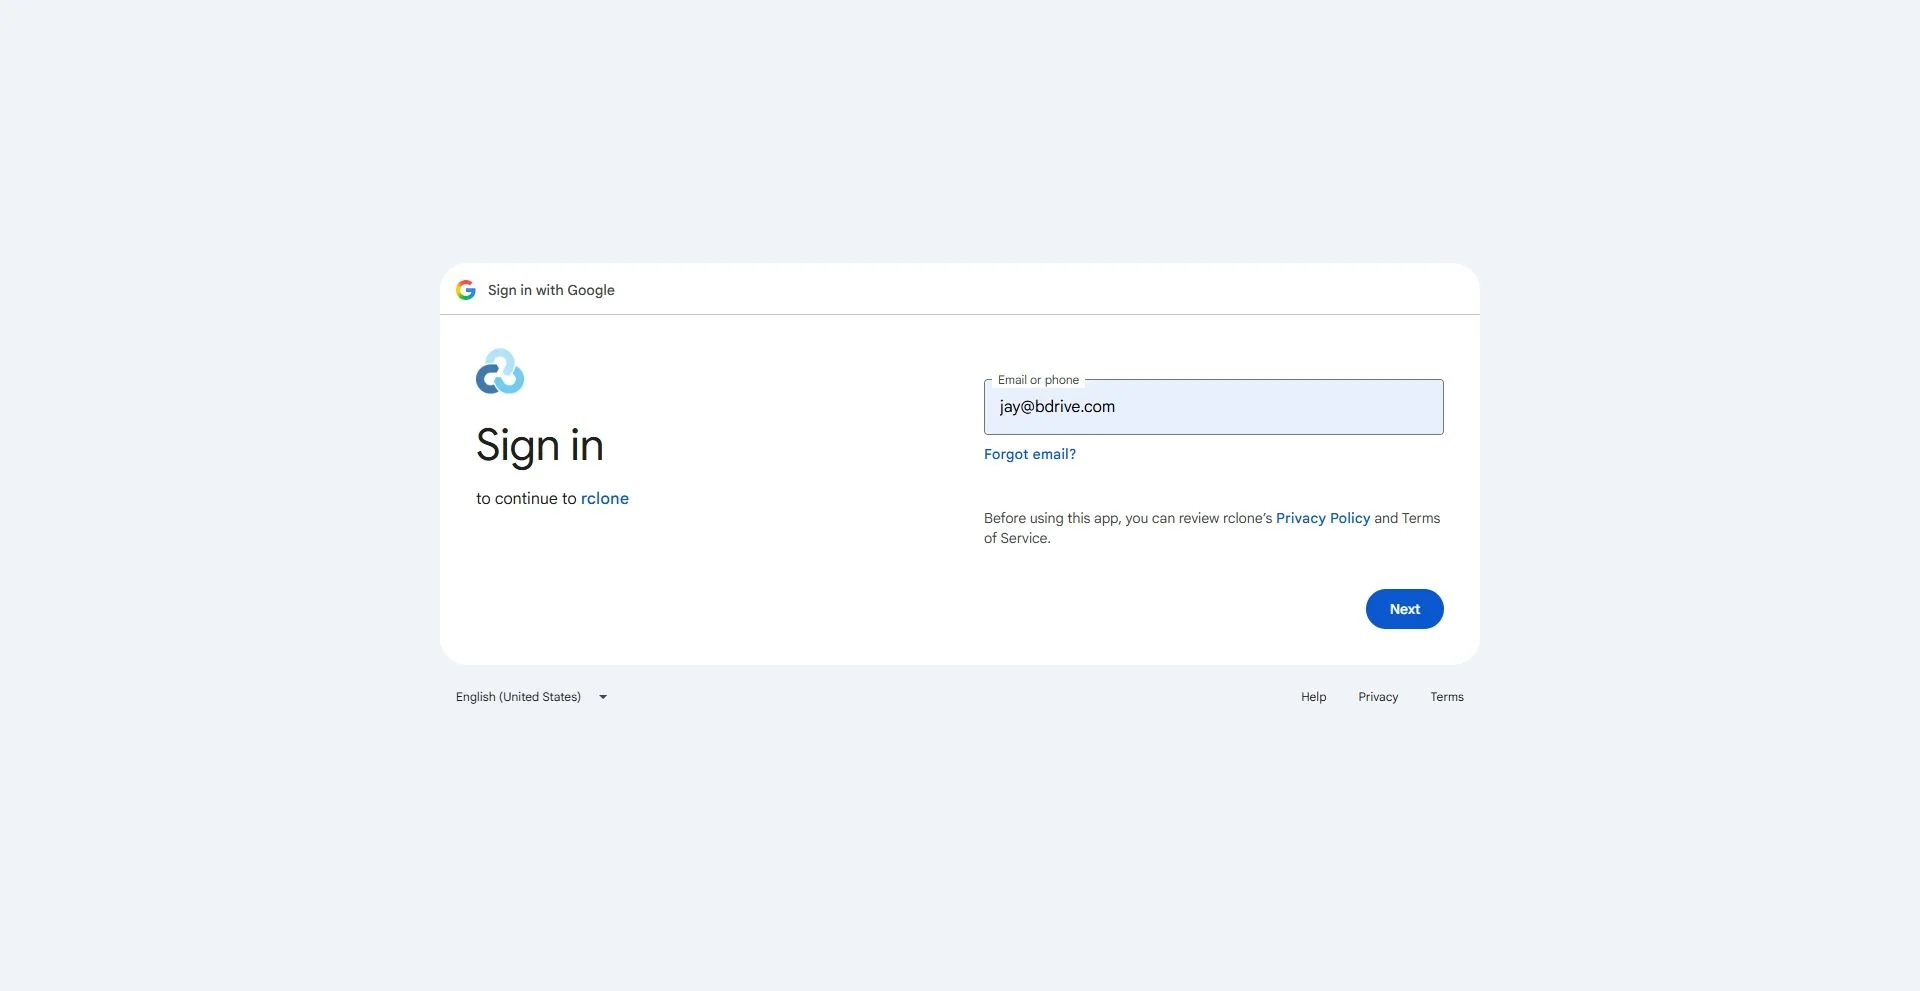
Sign in and authorize. RcloneView never sees your password.
Your provider's own sign in page opens. Authorize the connection there. The access token is stored locally on your computer, and RcloneView never sees your password.
-
6Try this step ↗
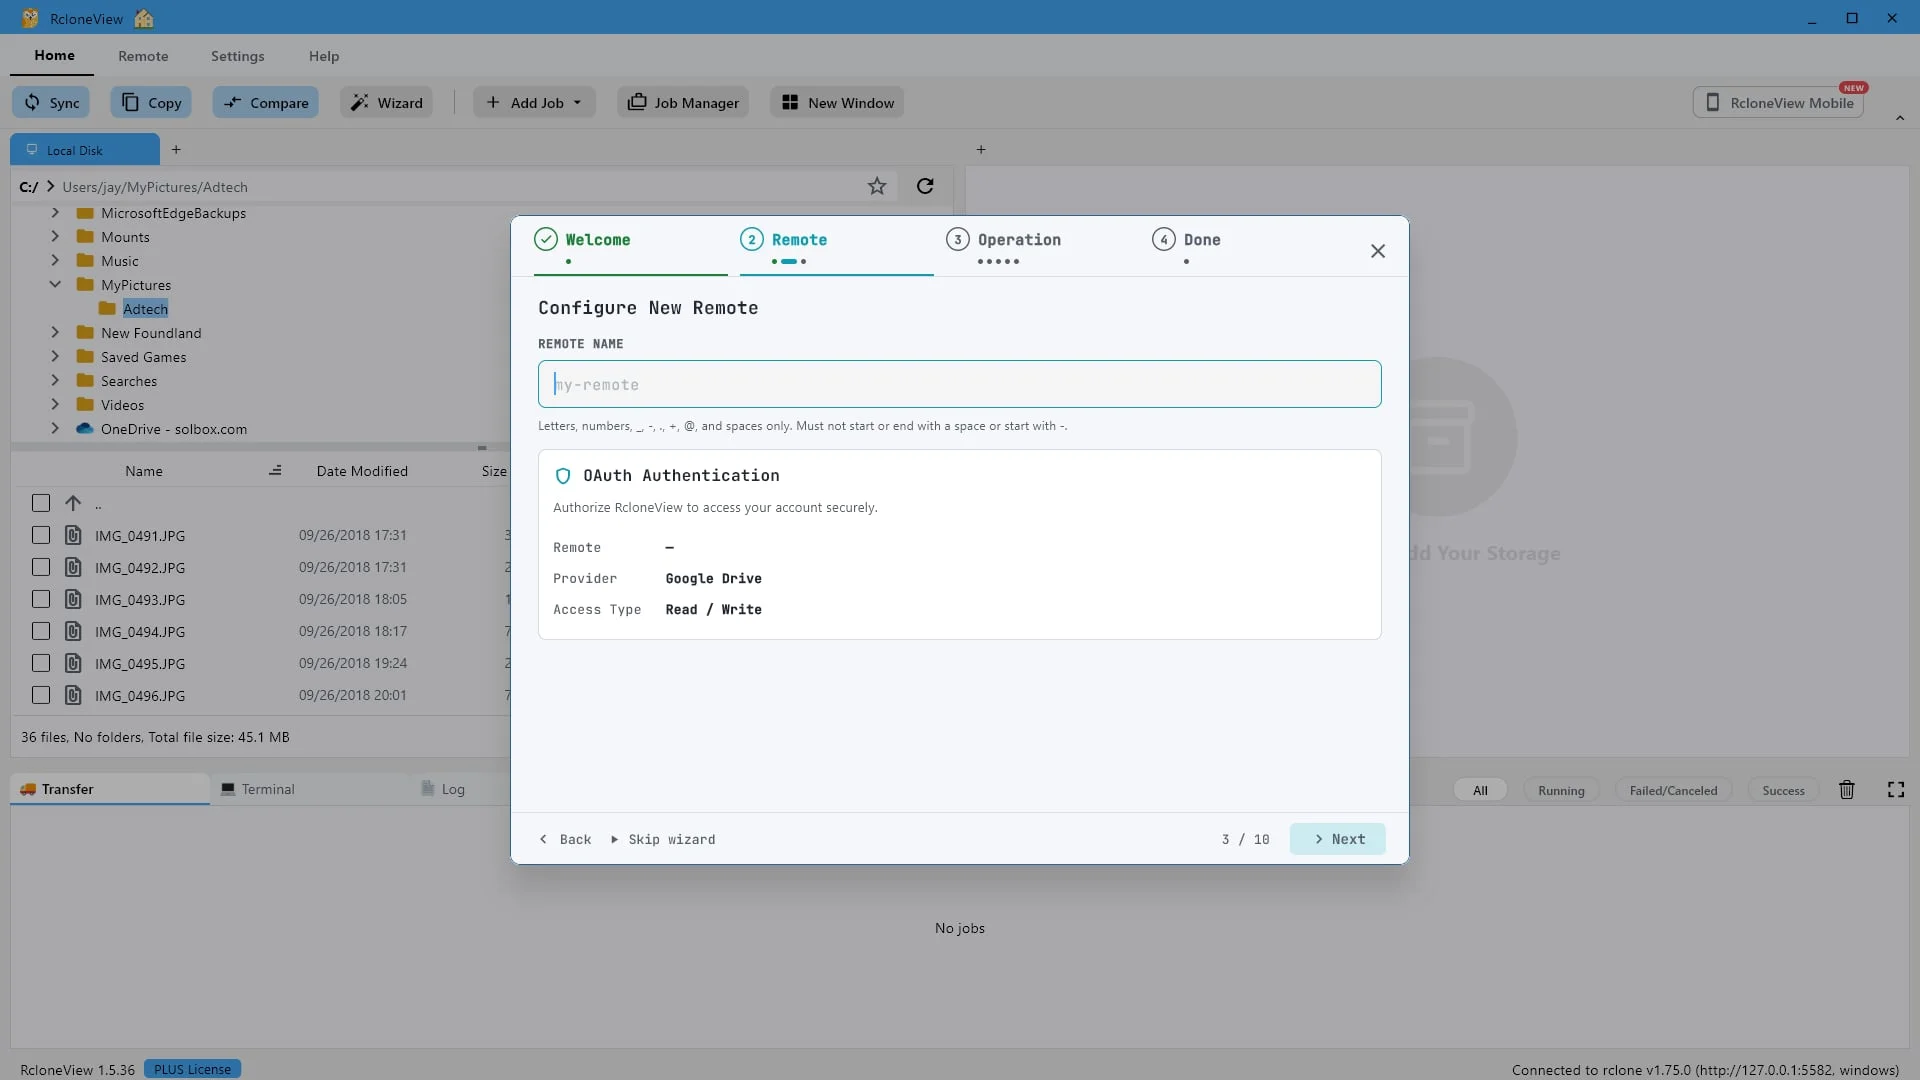
Give this cloud connection a name you'll recognize later.
Back in the wizard, give the new remote a short name you will recognize later.
-
7Try this step ↗
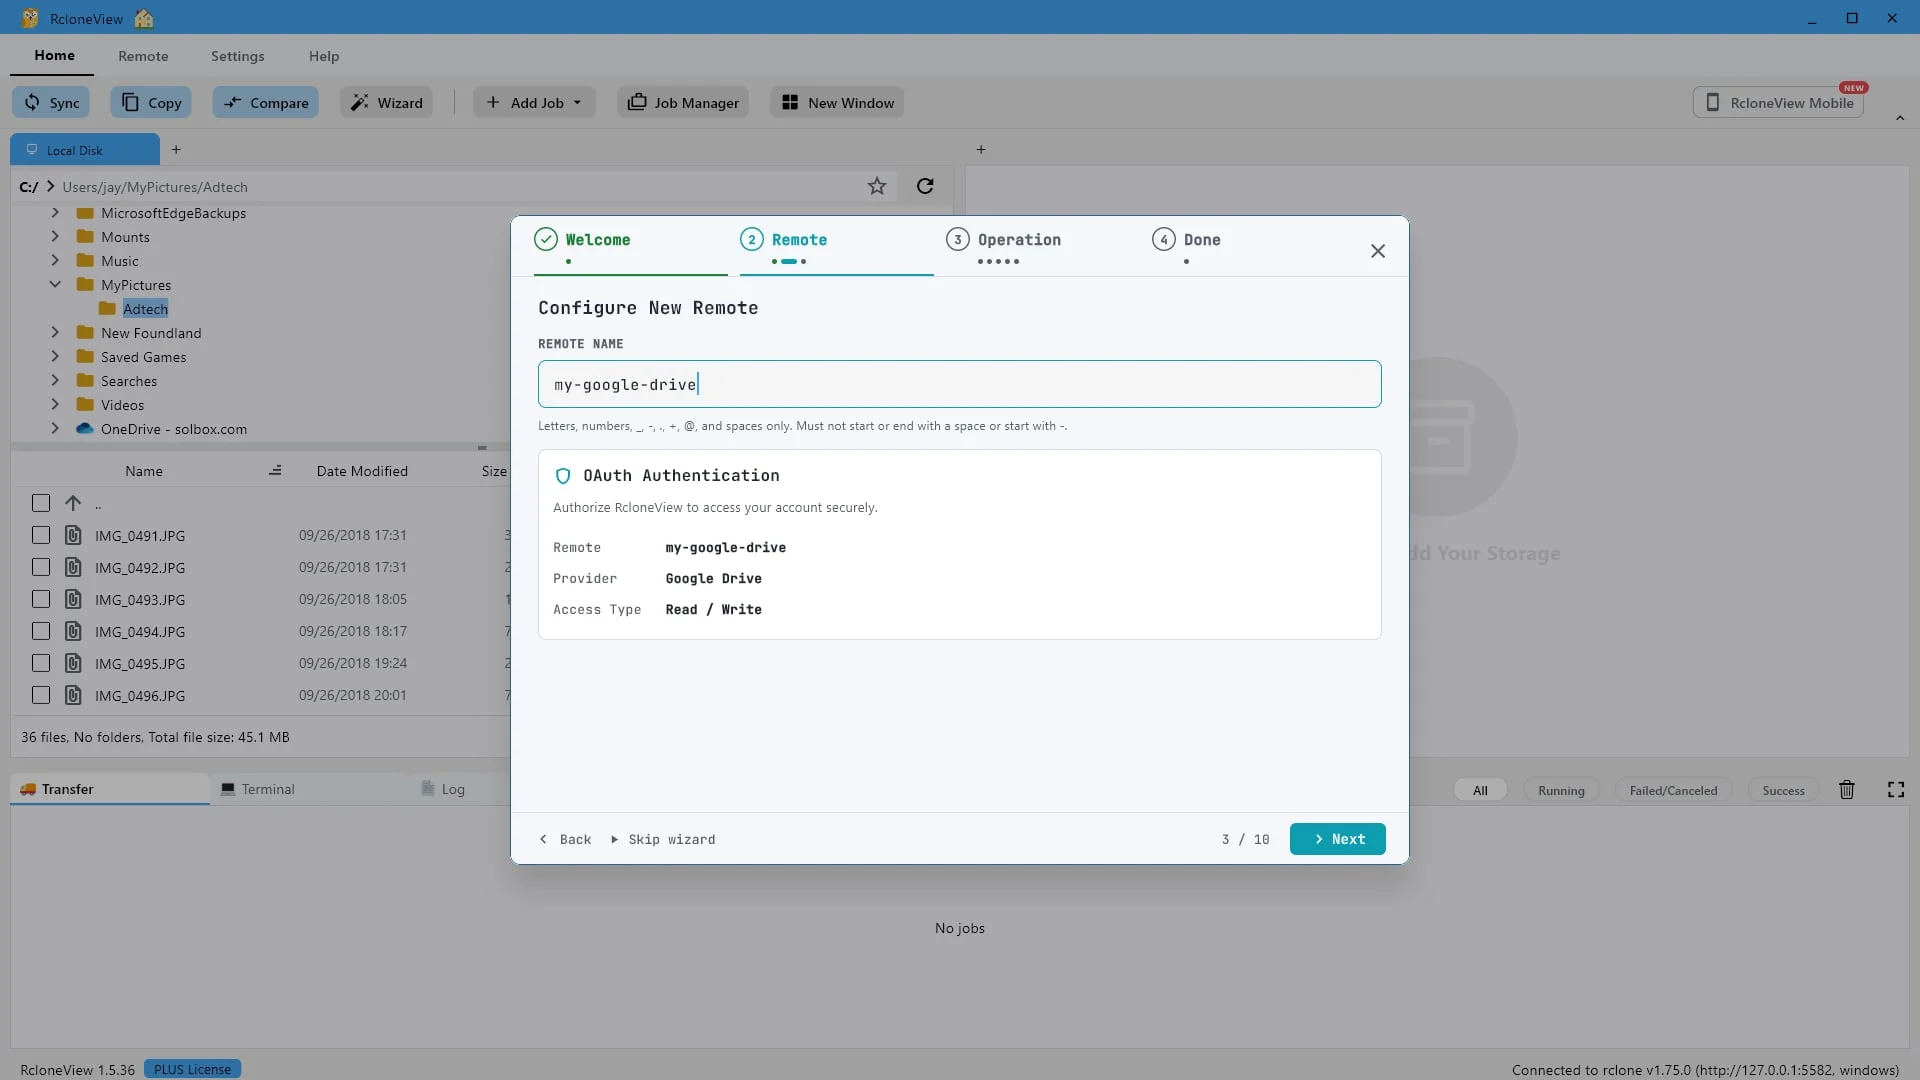
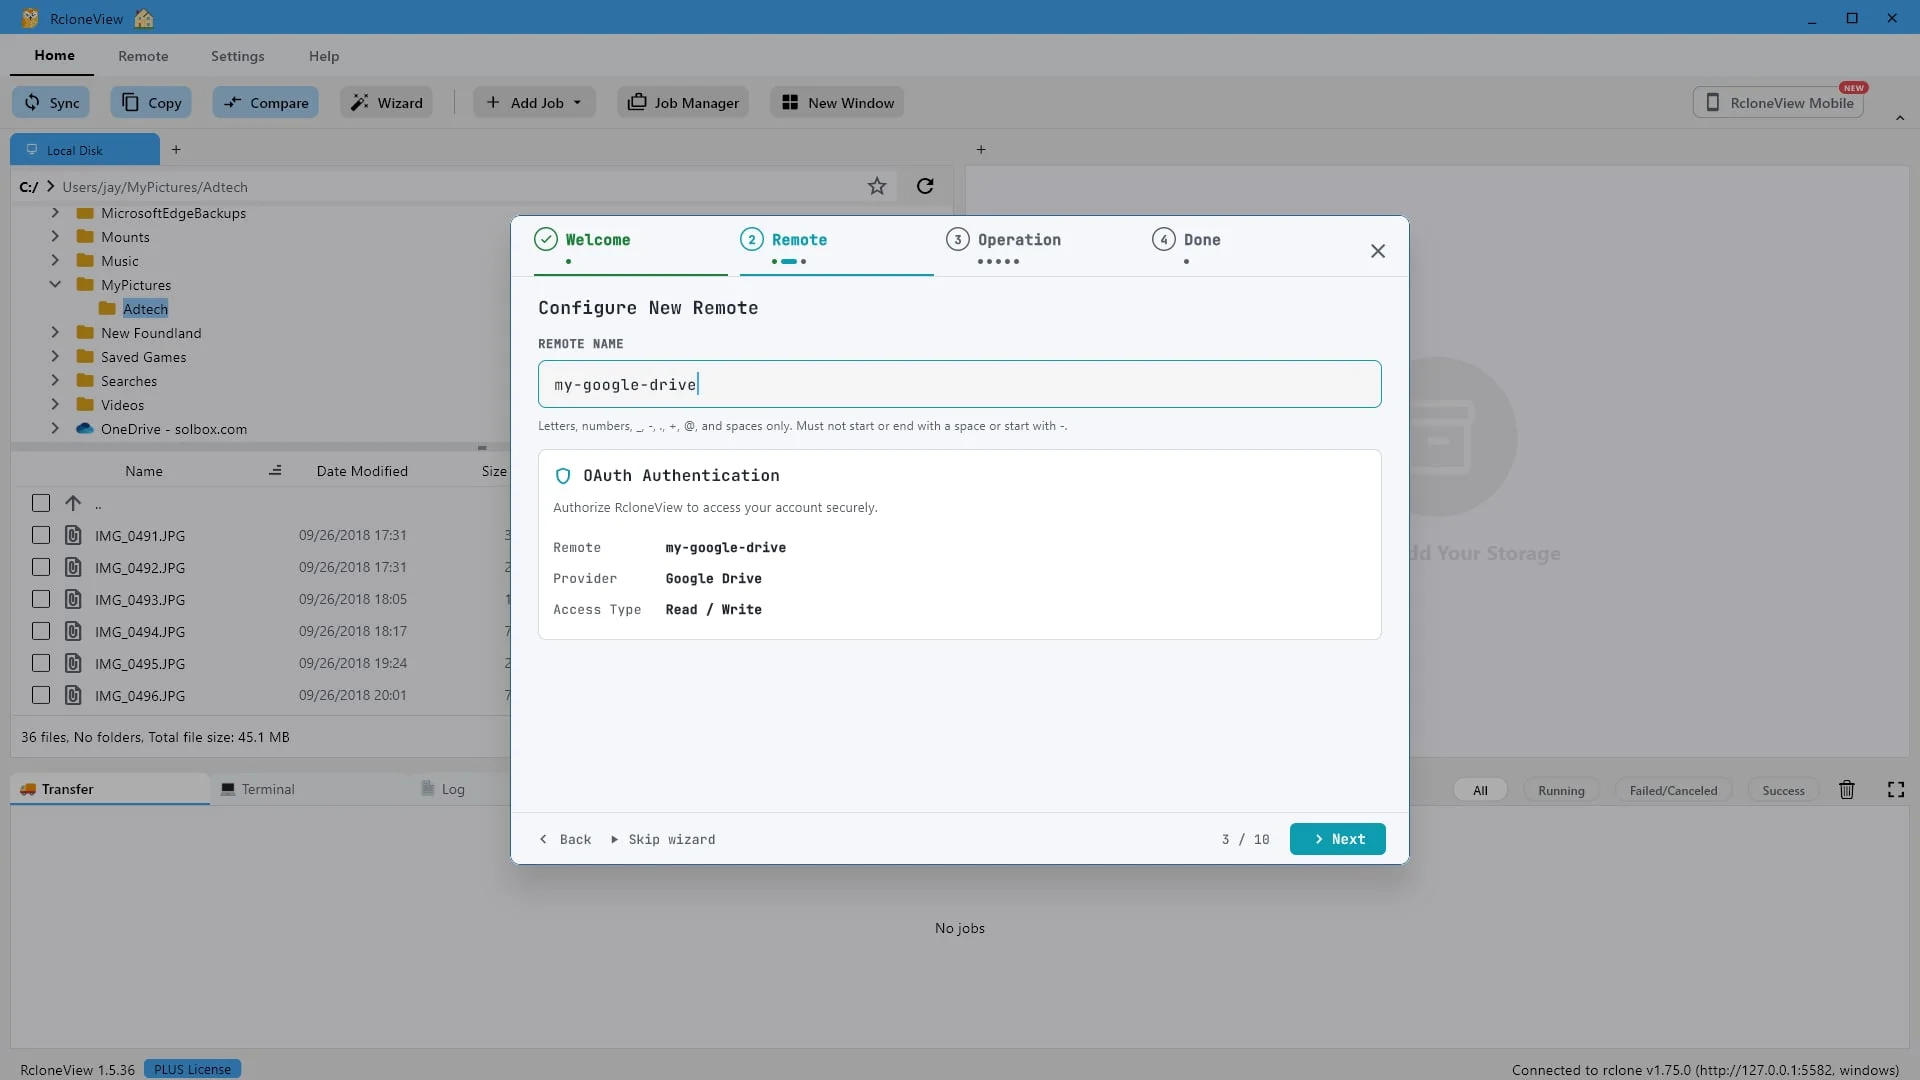
We'll call this one "my-google-drive".
We will call ours my google drive. This is simply a label for the cloud connection, not the encrypted remote.
-
-
9Try this step ↗
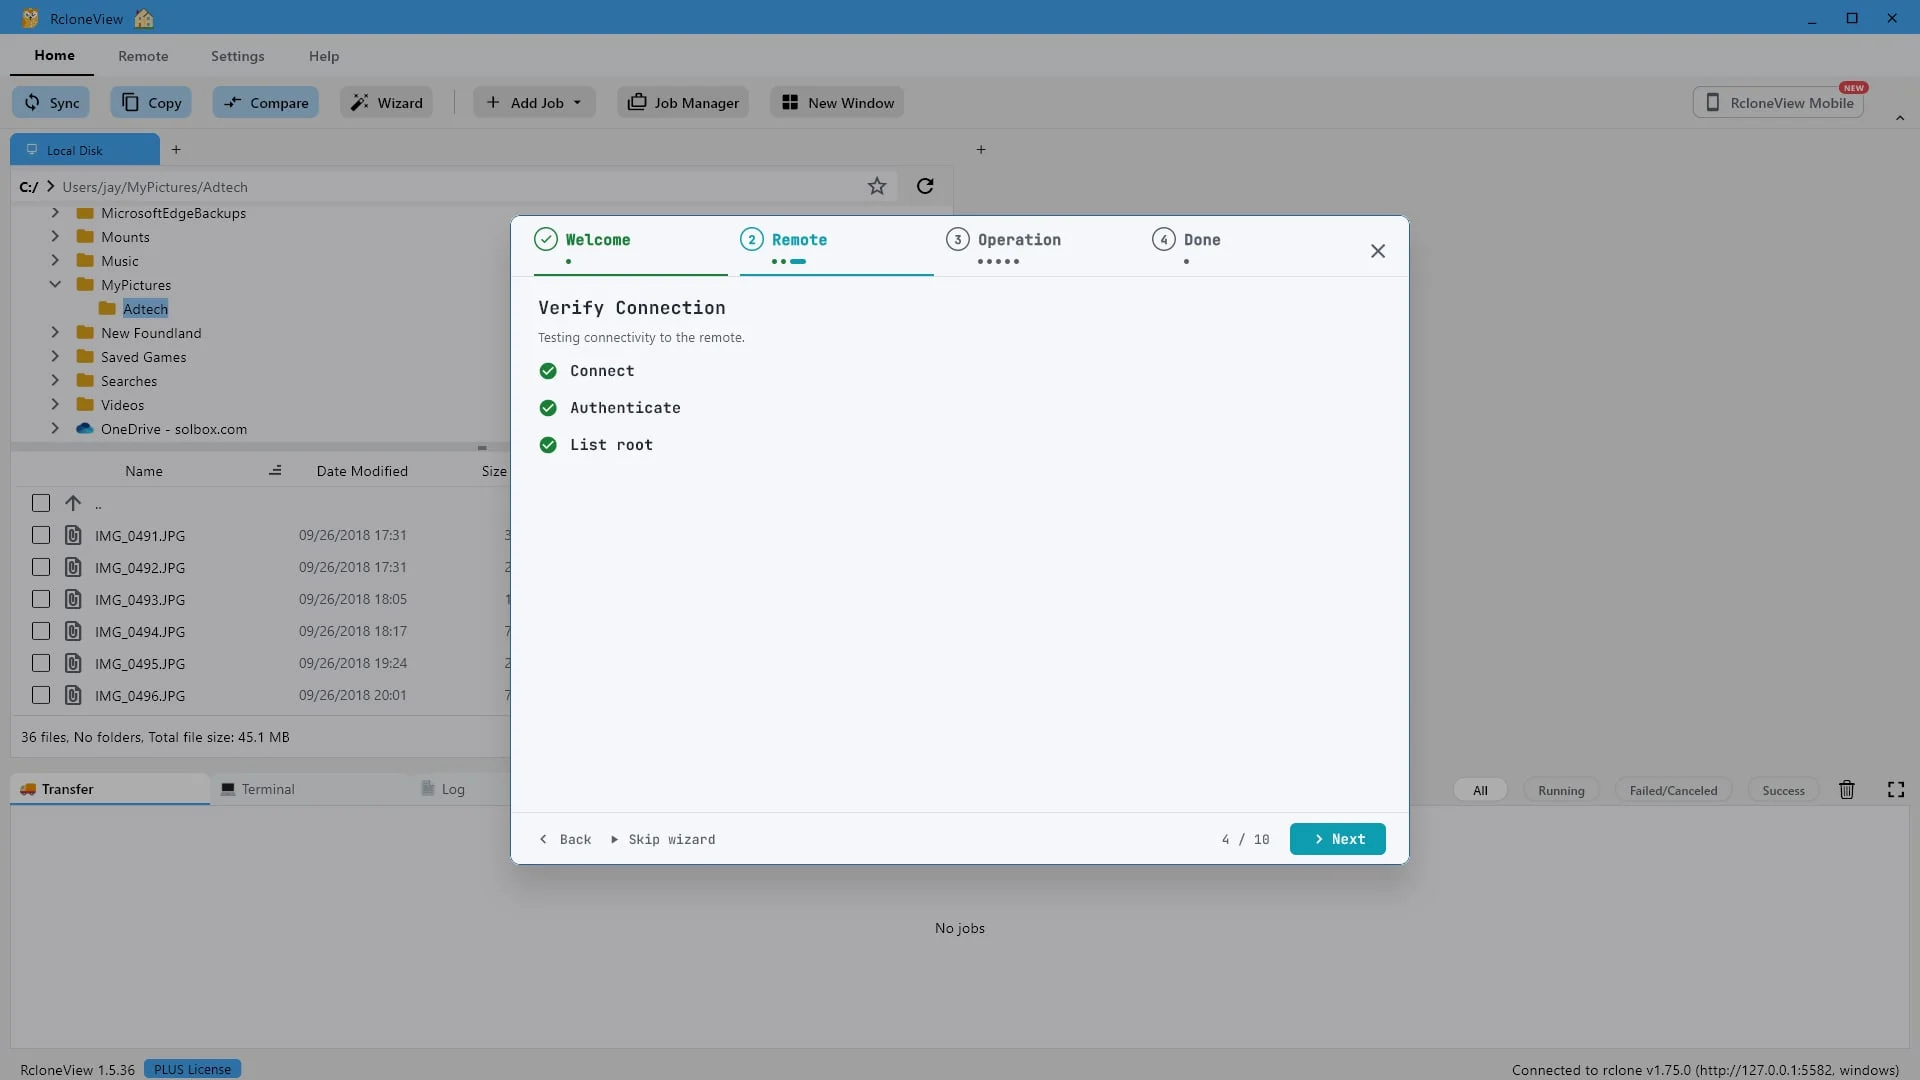
Connect, authenticate and list root all passed. Click "Next".
RcloneView verifies the connection right away. Connect, authenticate, and list root all pass, so you know the remote works before going any further.
-
10Try this step ↗
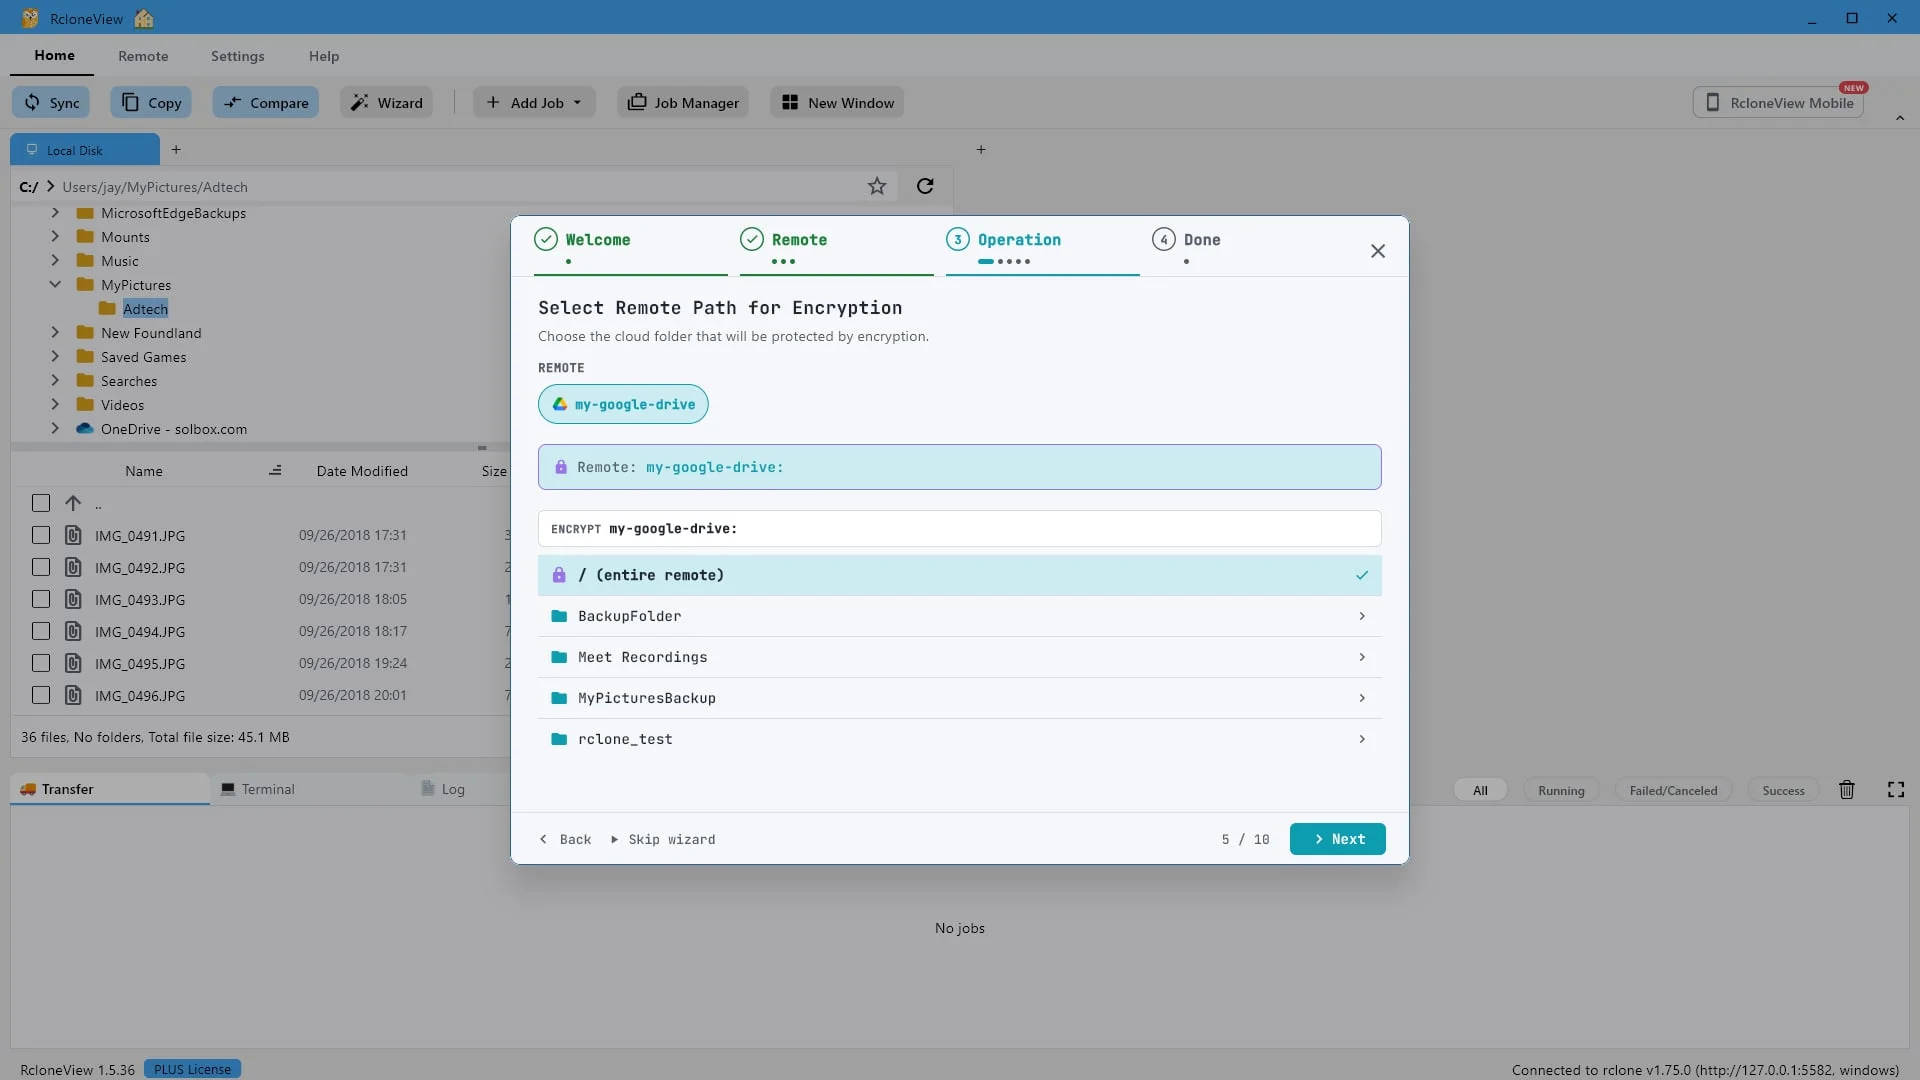
Choose the cloud folder to encrypt. We'll pick "MyPicturesBackup".
Now choose what to protect. You can encrypt the entire remote, or just a single folder. We will select My Pictures Backup. Everything else in your Drive stays untouched.
-
11Try this step ↗
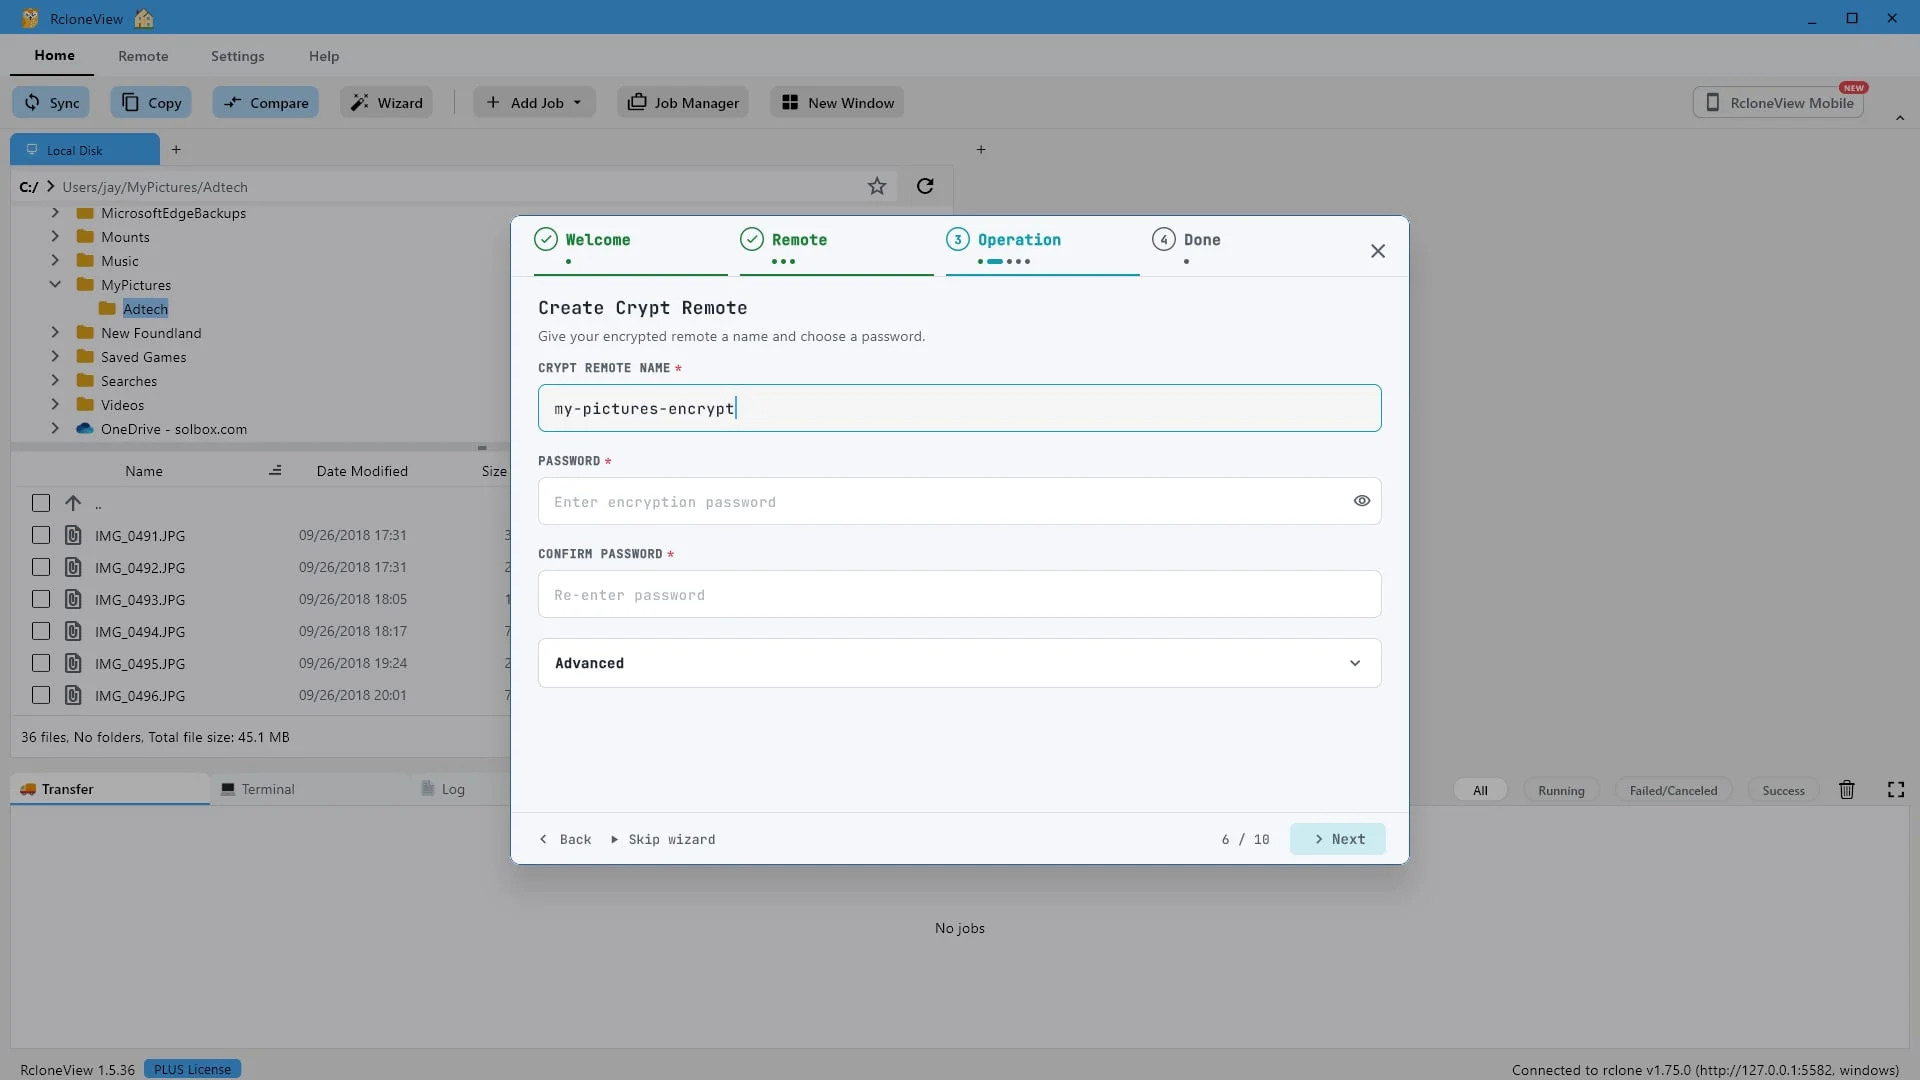
Name the encrypted remote. We'll use "my-pictures-encrypt".
This encrypted remote is the private view of that folder. We will name it my pictures encrypt.
-
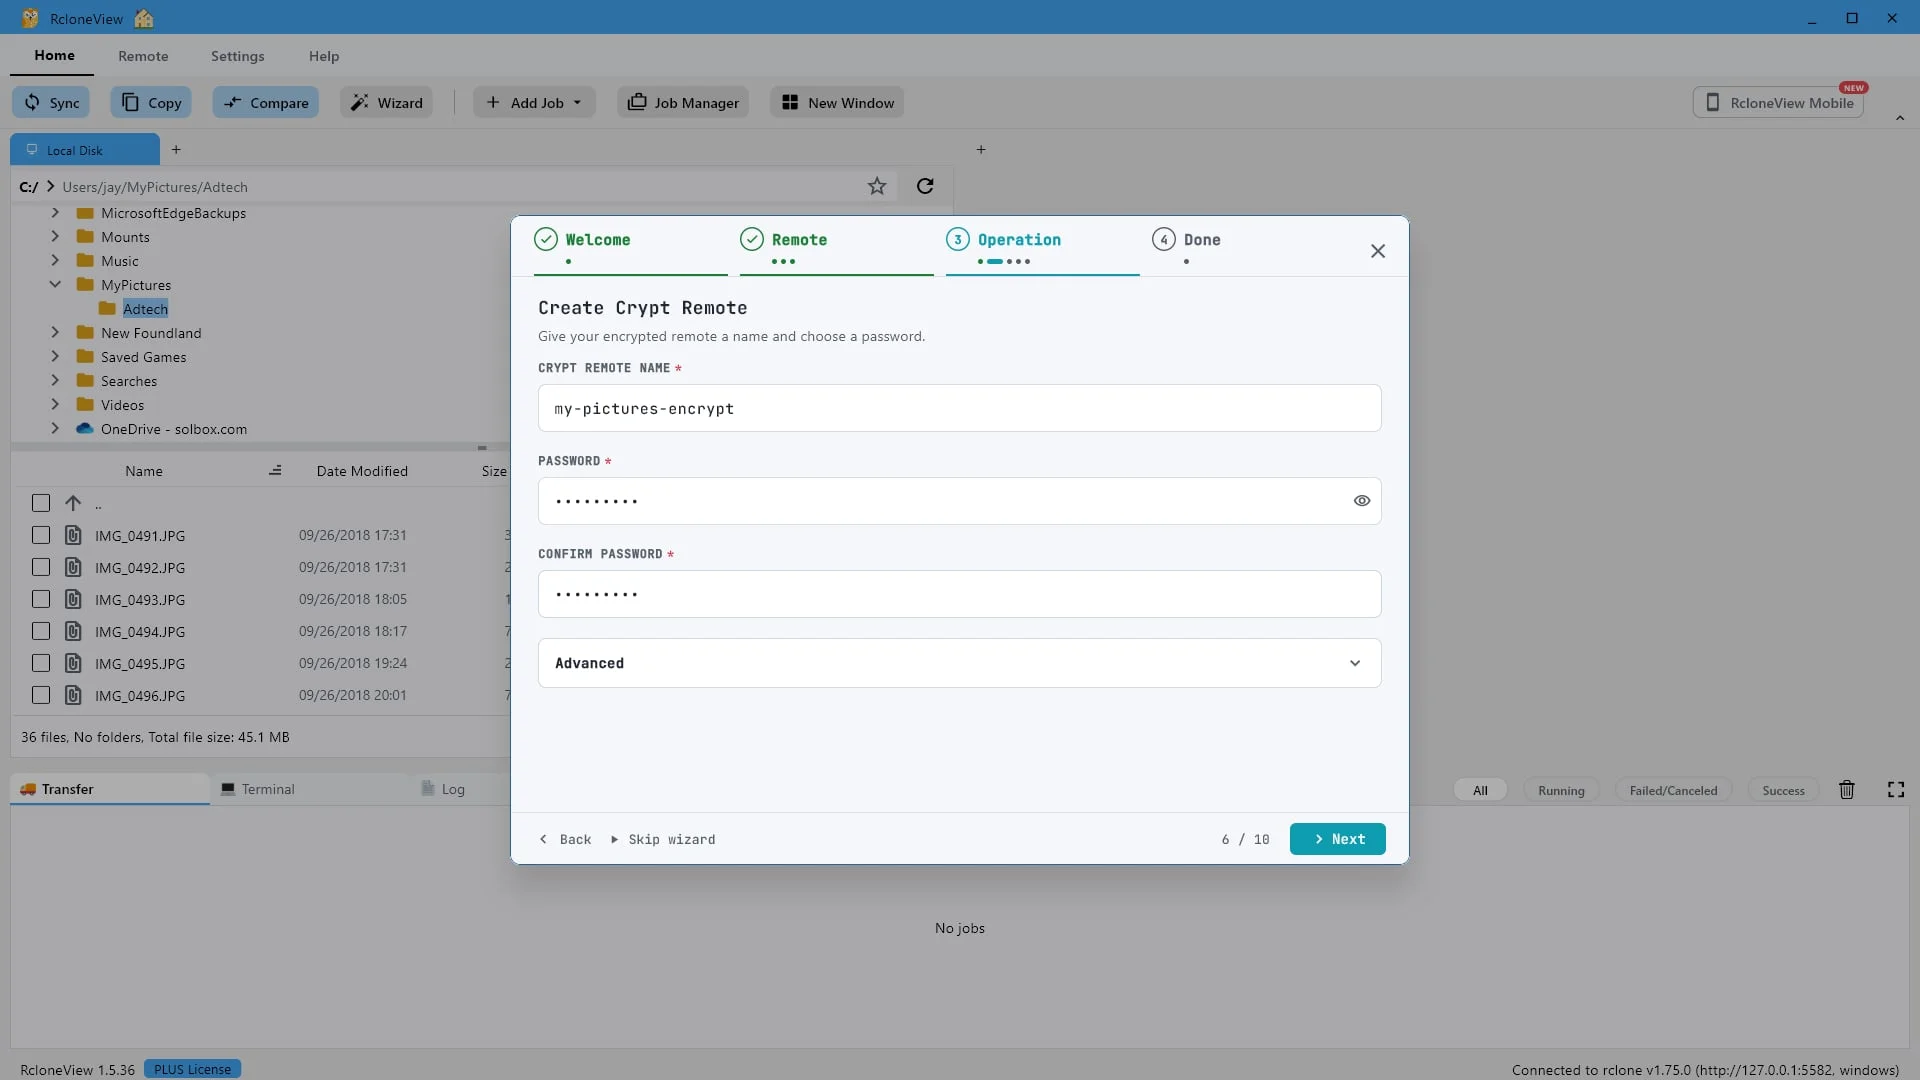
12Try this step ↗
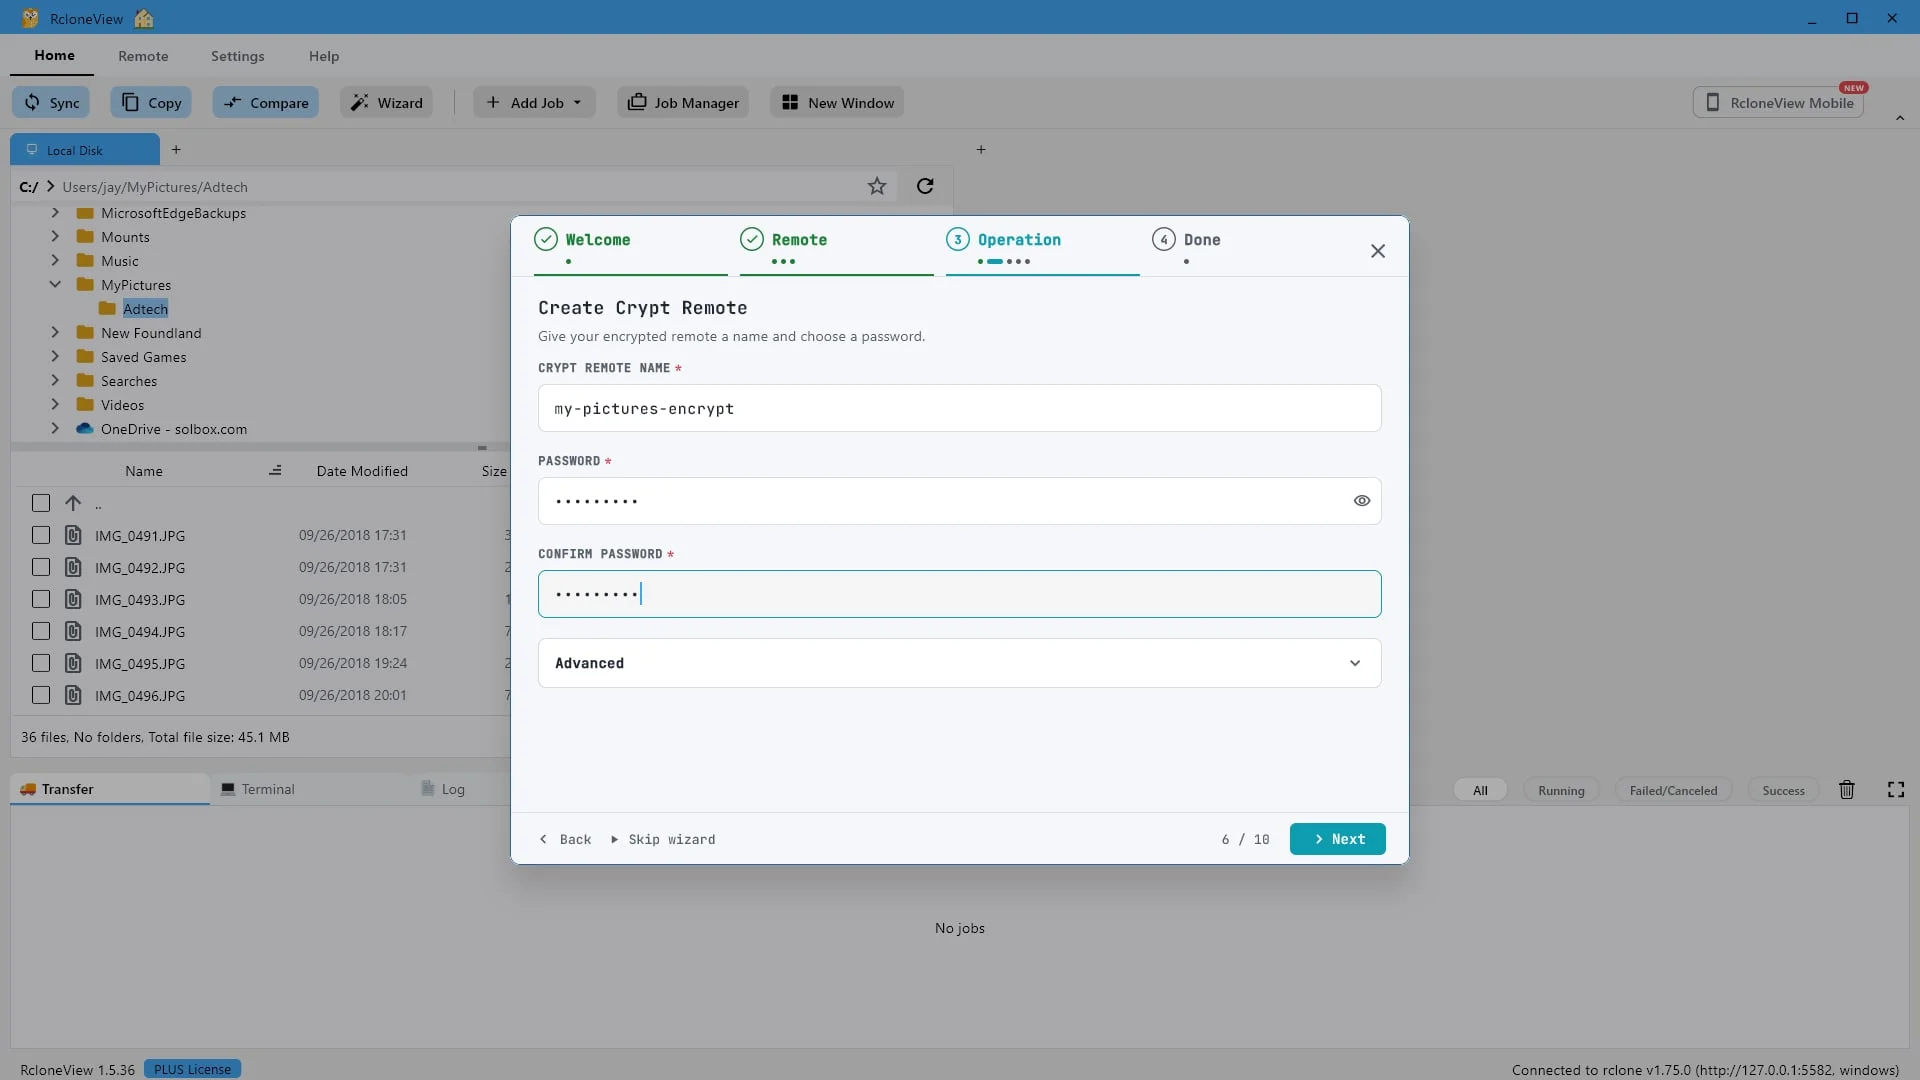
Set your password and confirm it. This is the only key to your data.
Choose a strong password and confirm it. This password is the only key to your data, so store it somewhere safe. If you lose it, the files cannot be recovered.
-
-
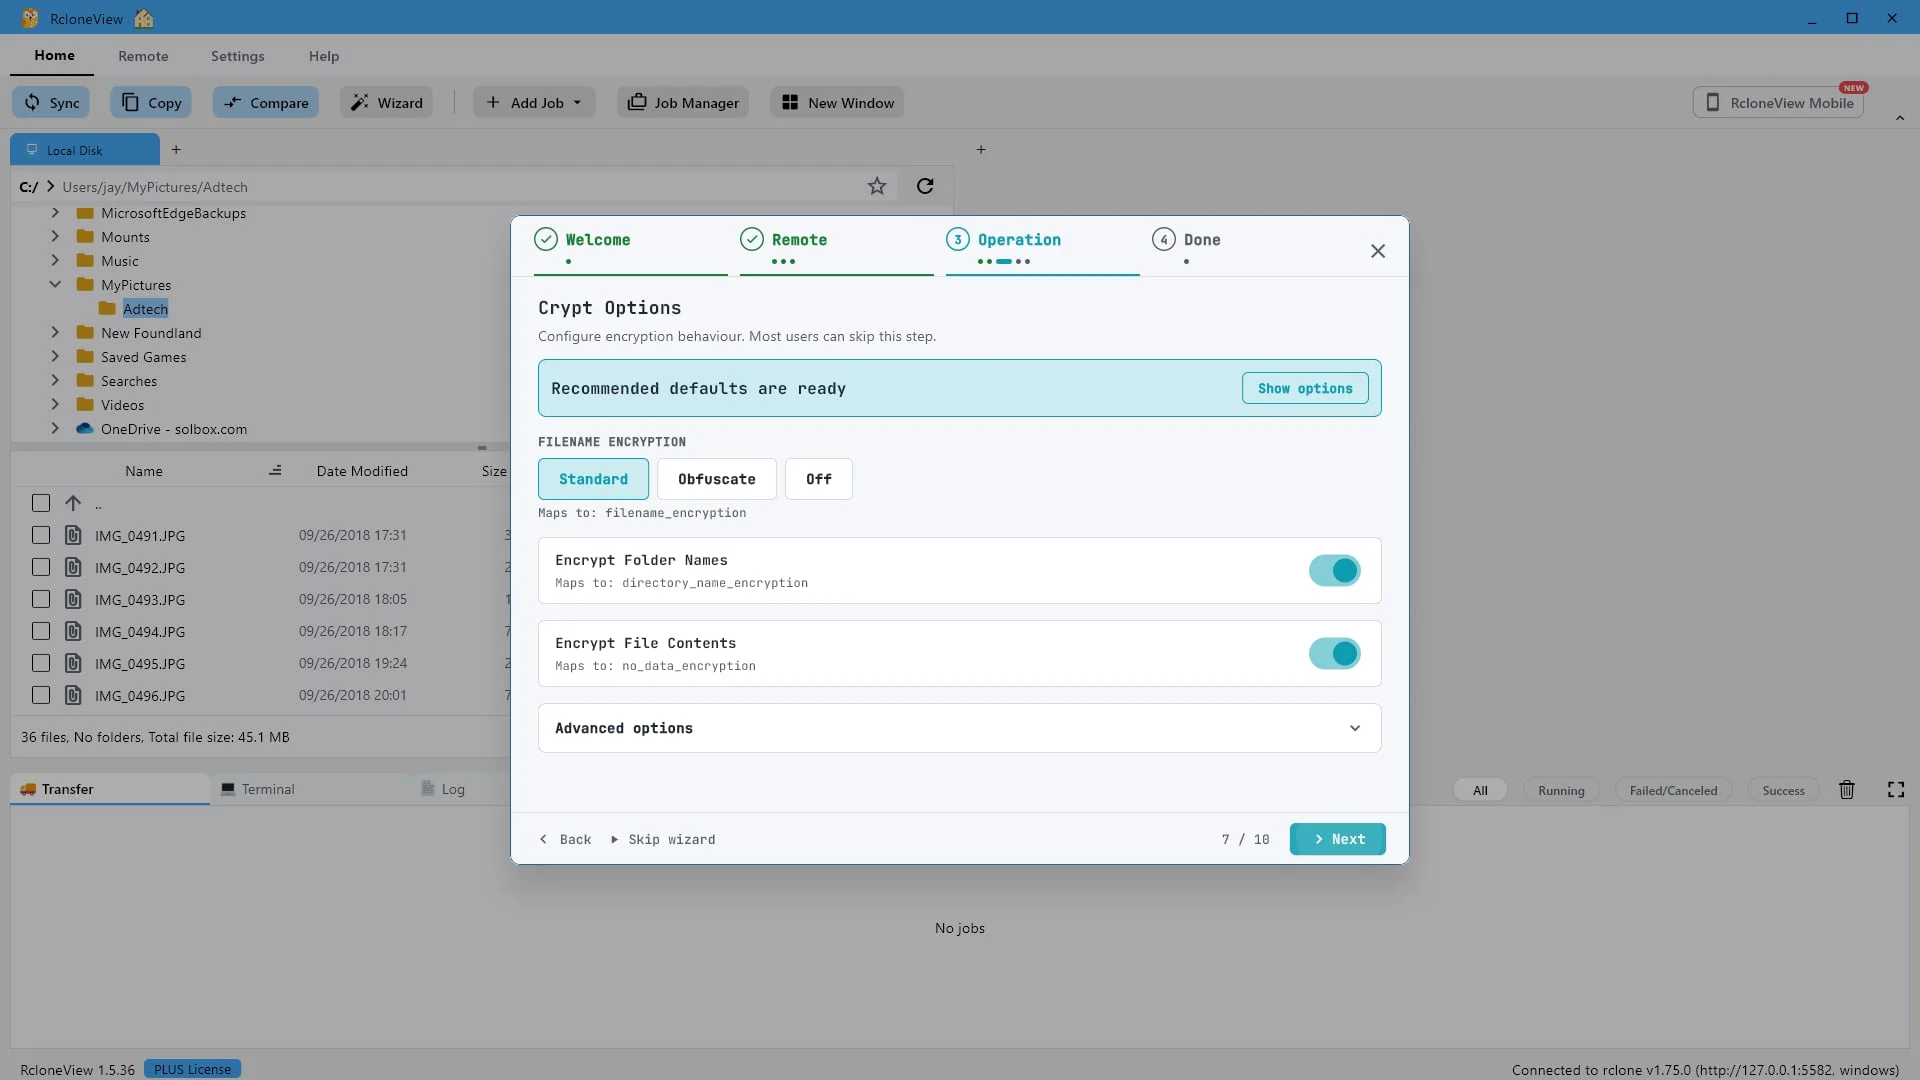
14Try this step ↗
Recommended defaults are ready. Click "Next".
The crypt options are already set to the recommended defaults. Standard file name encryption, folder names encrypted, and file contents encrypted. Most users can simply click Next.
-
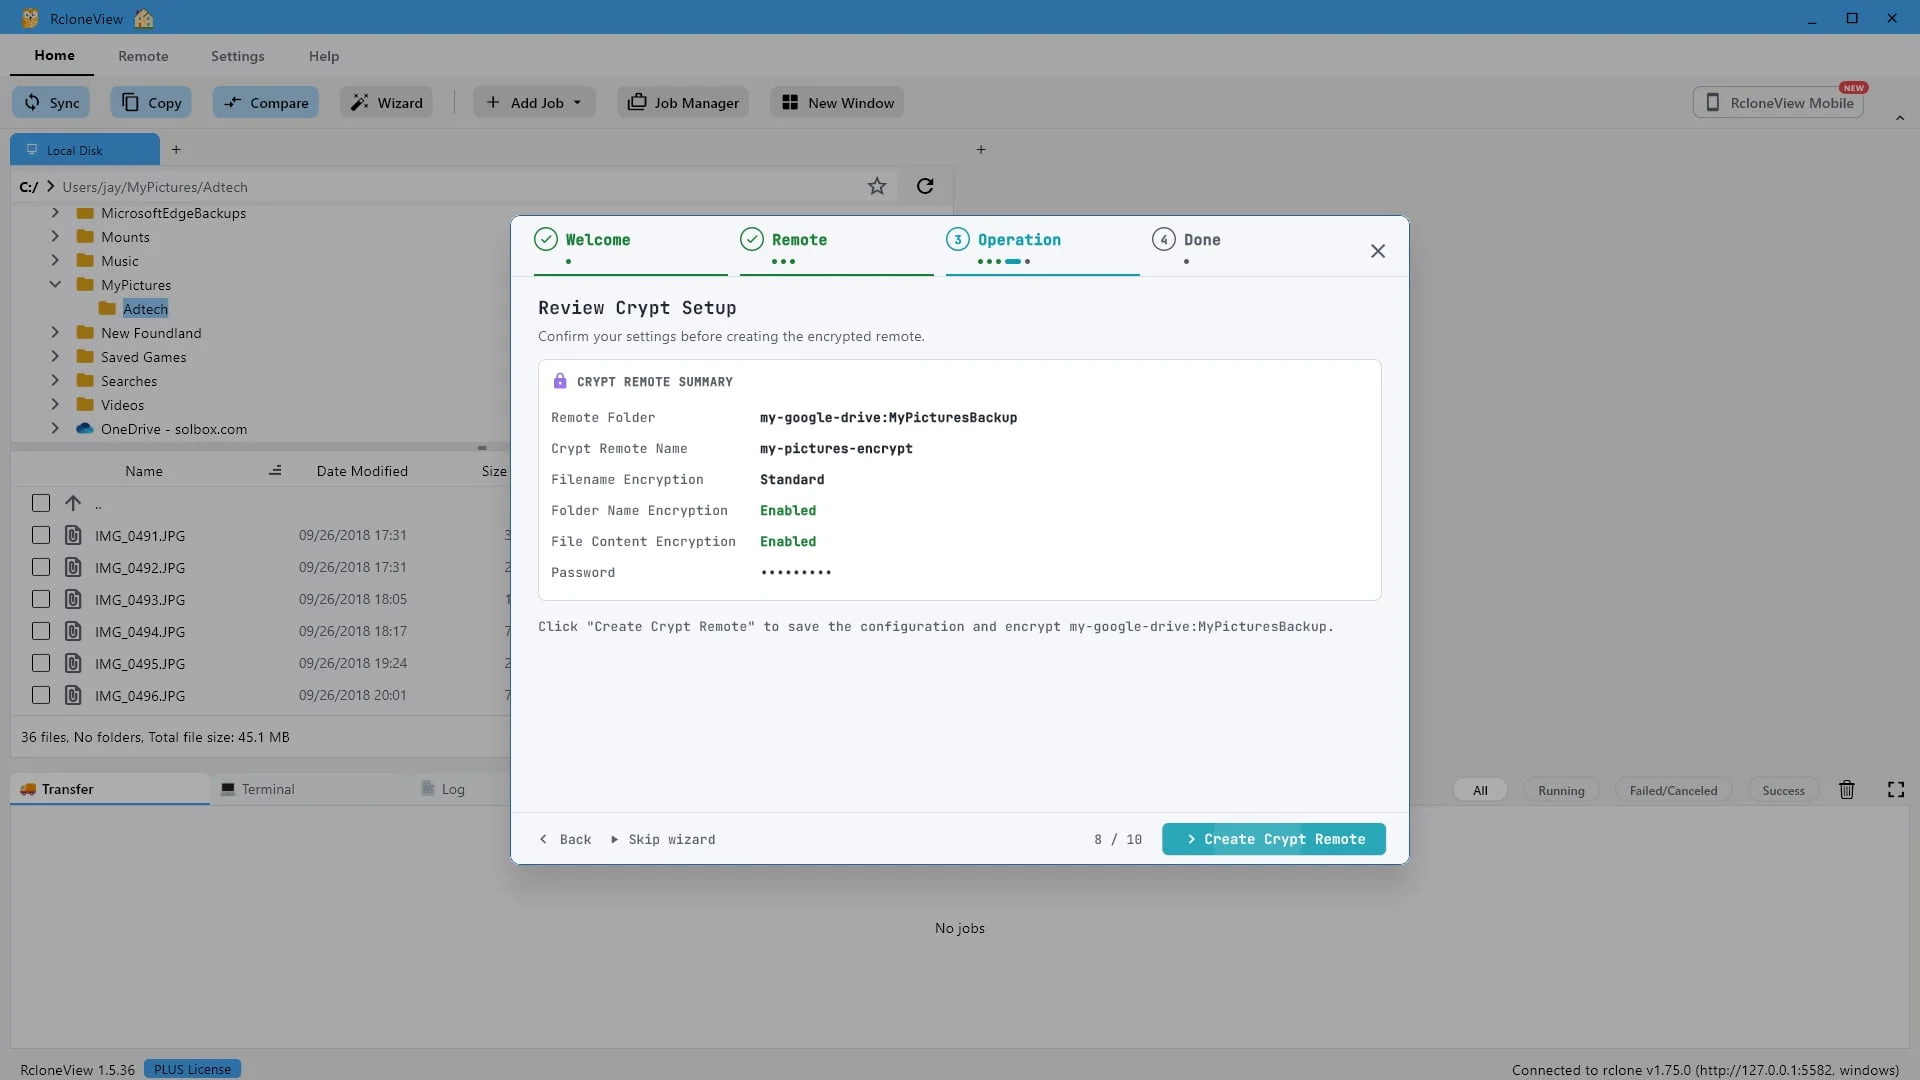
15Try this step ↗
Check the summary, then click "Create Crypt Remote".
Take a moment to review the summary. When everything looks right, click Create Crypt Remote.
-
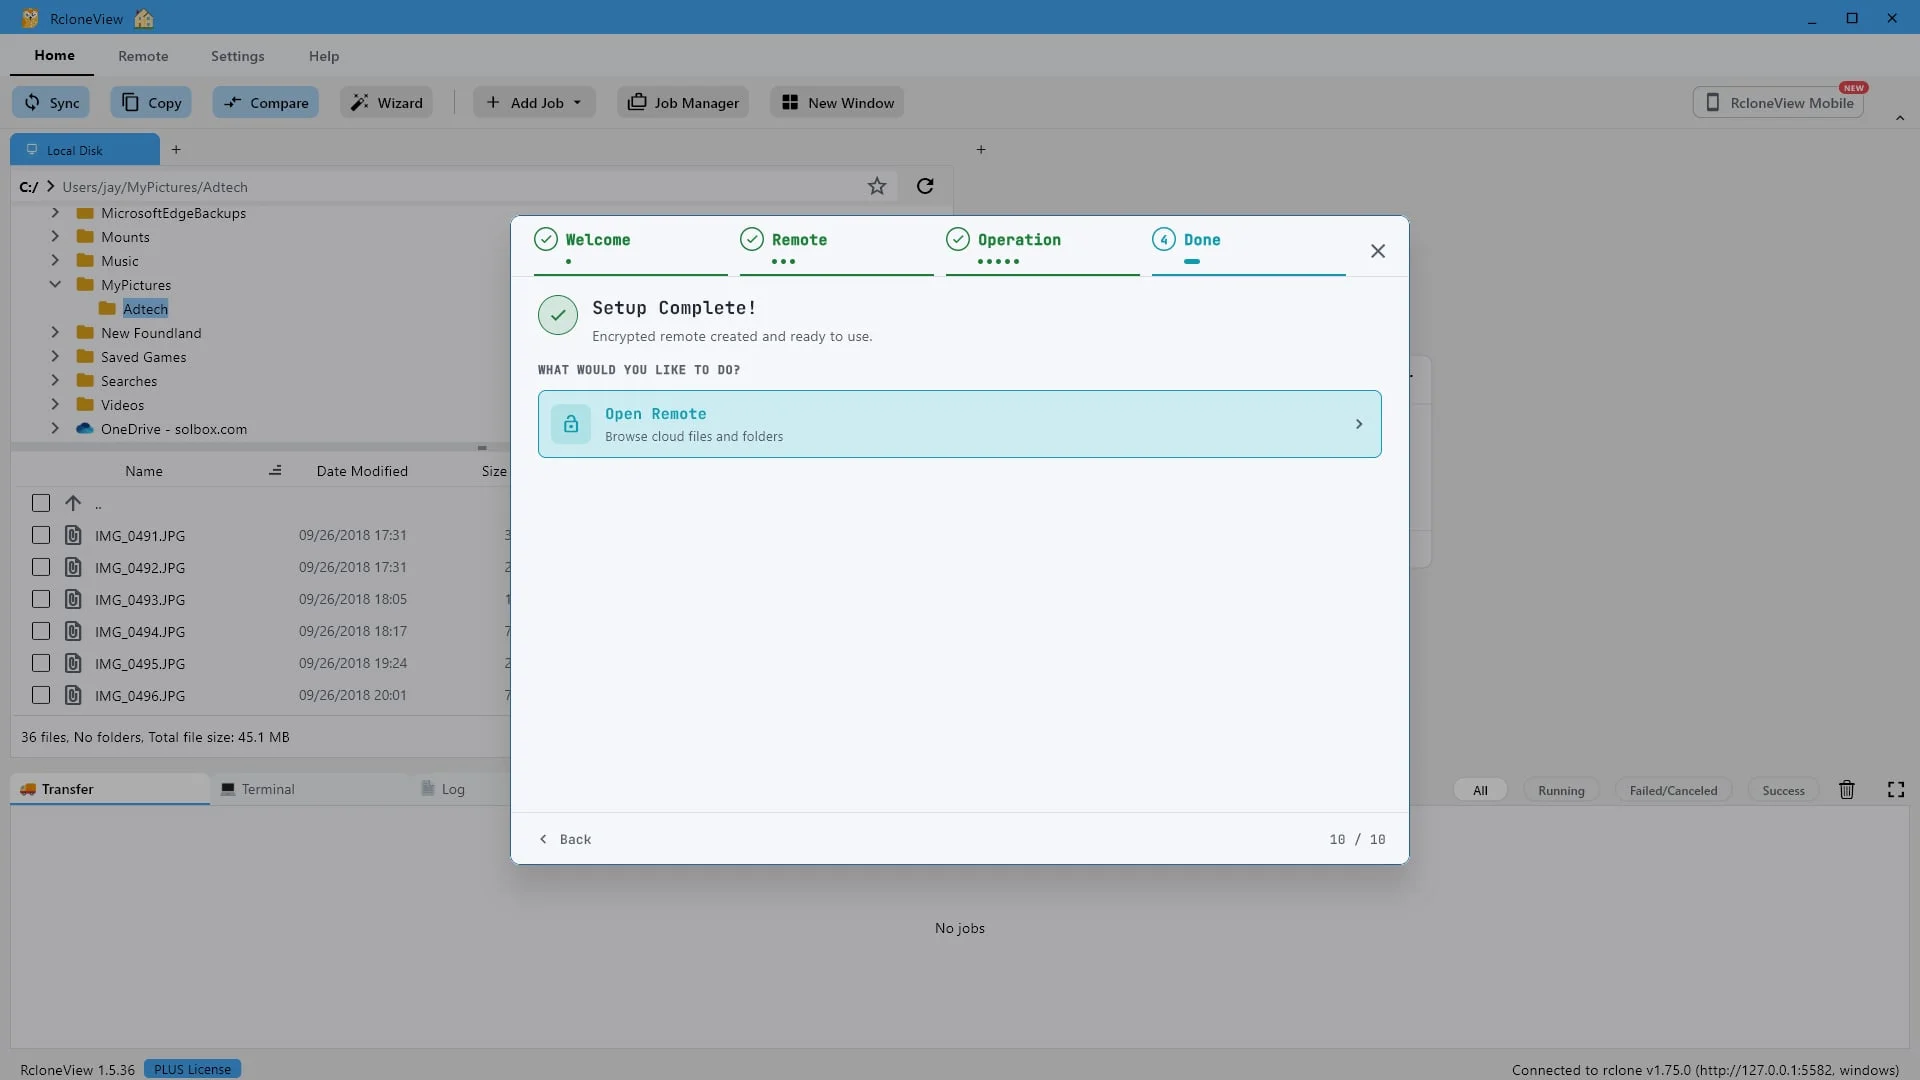
16Try this step ↗
Done. Click "Open Remote" to start browsing it.
That is it. Your encrypted remote is created and ready to use.
-
17Try this step ↗
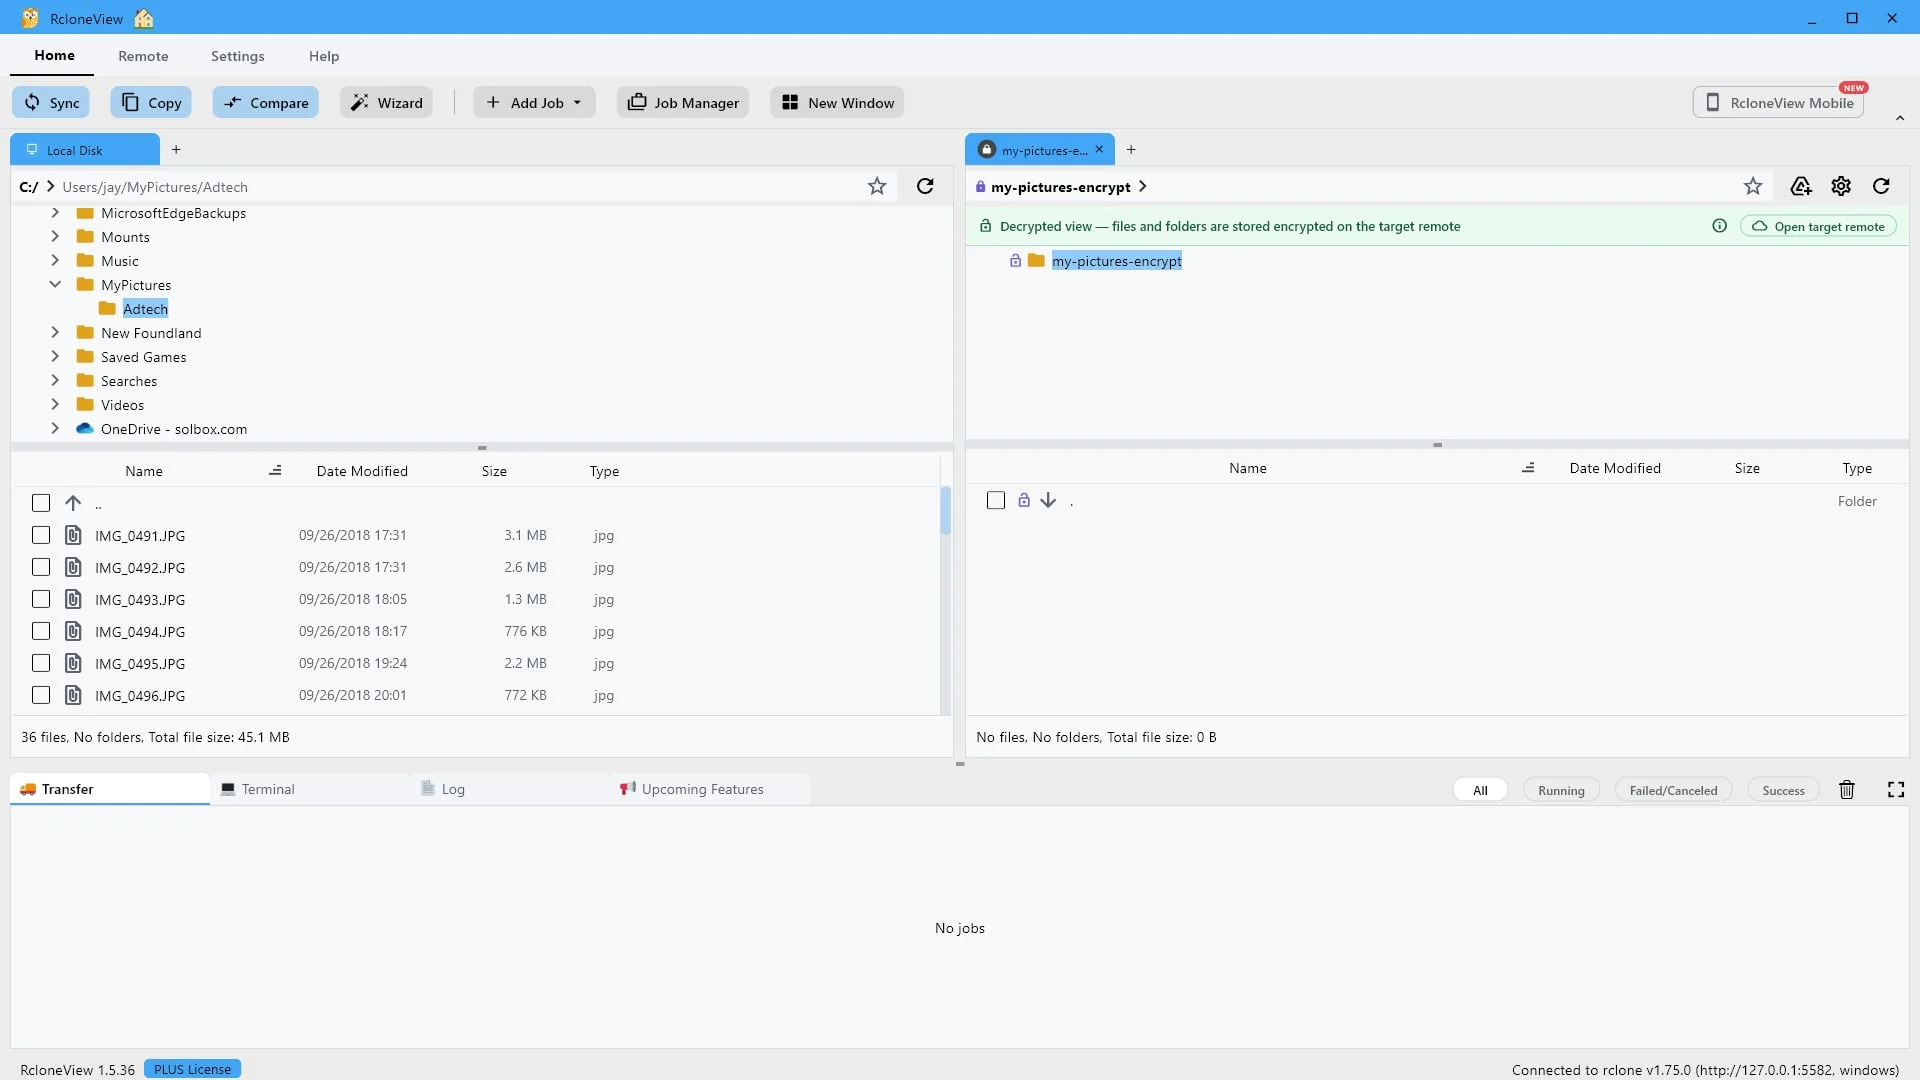
This isn't new storage. It's a virtual remote that locks your files on the way to target remote (Google Drive).
Here is the key idea. My pictures encrypt is not a new place to store files. It is a virtual remote that sits in front of your Google Drive folder, like a locked door. Whatever you put through this door is scrambled on your computer before it uploads, and unscrambled again with your password when you read it back. The files themselves always live in Google Drive.
-
18Try this step ↗
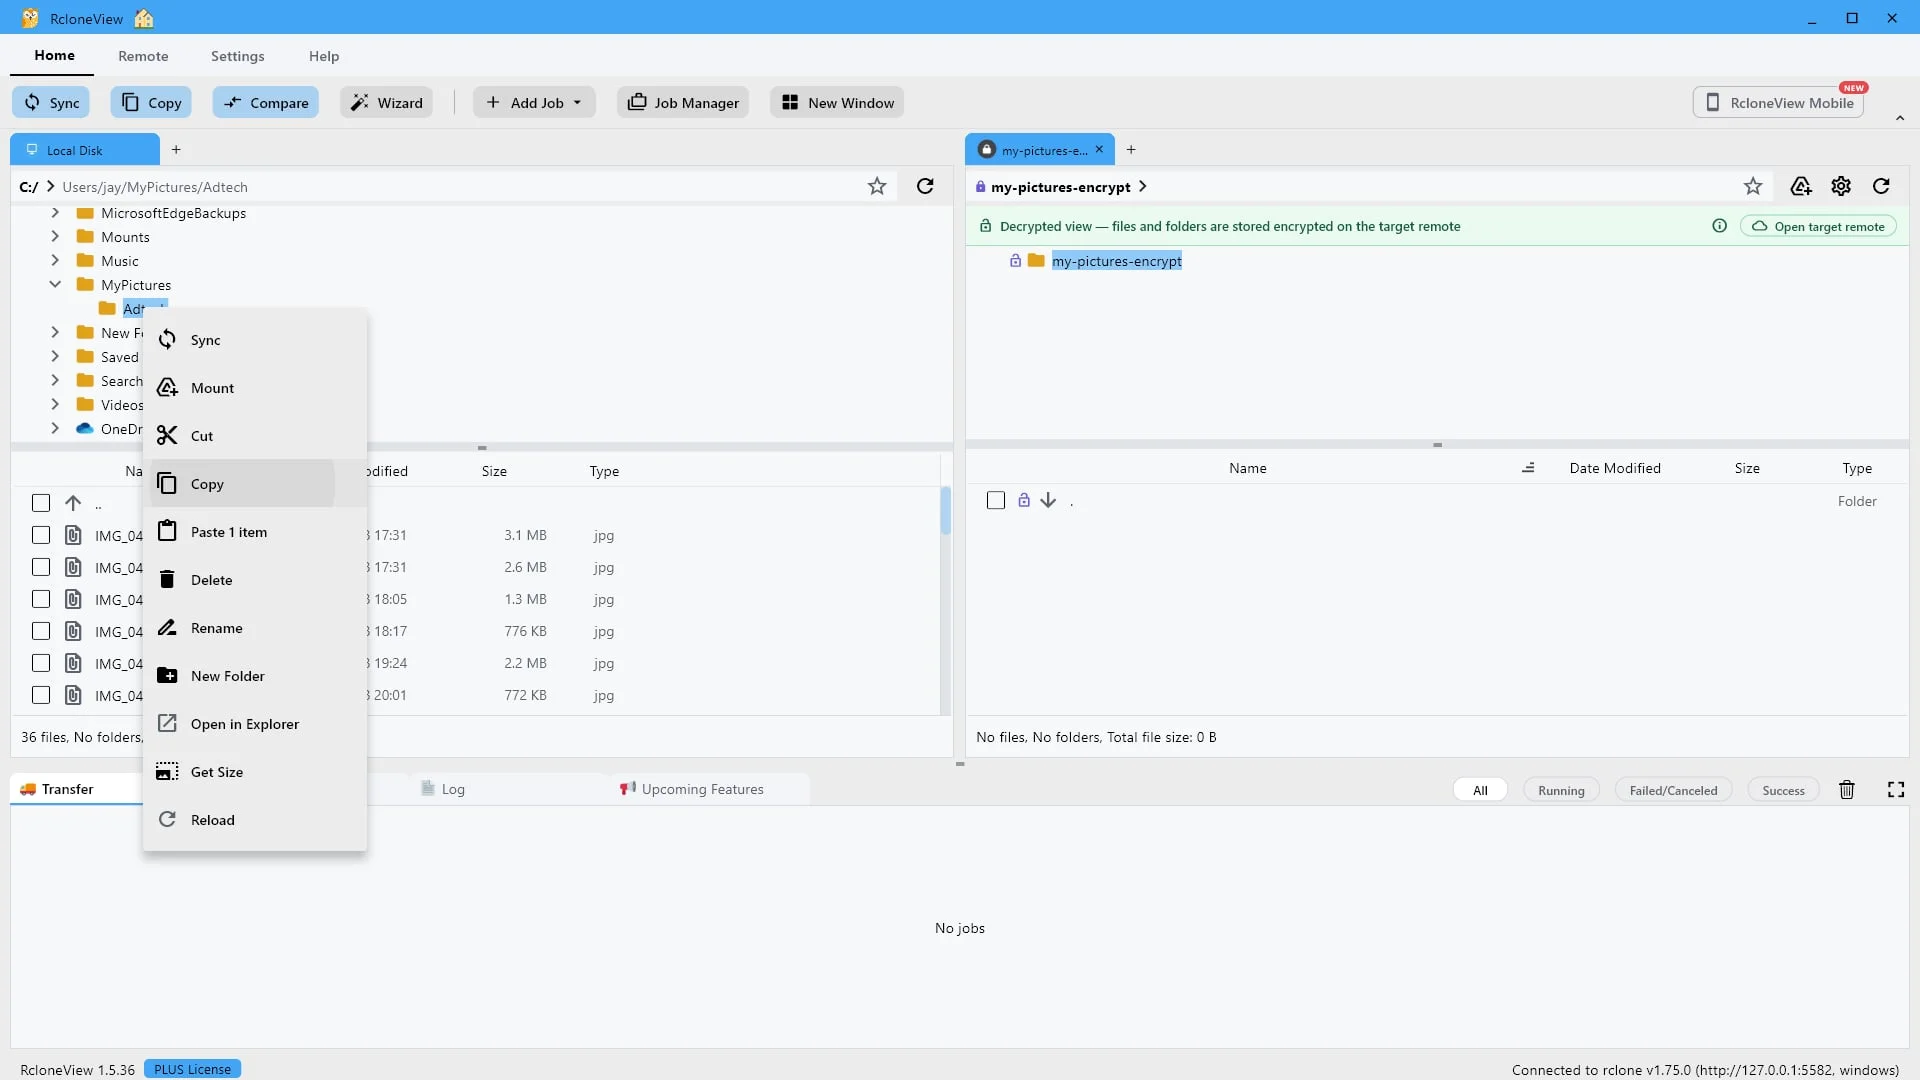
Let's back up real photos. Copy the local "Adtech" folder.
Now let's back up something real. These thirty six photos sit on your local disk as ordinary, unencrypted image files. Right click the Adtech folder and choose Copy.
-
19Try this step ↗
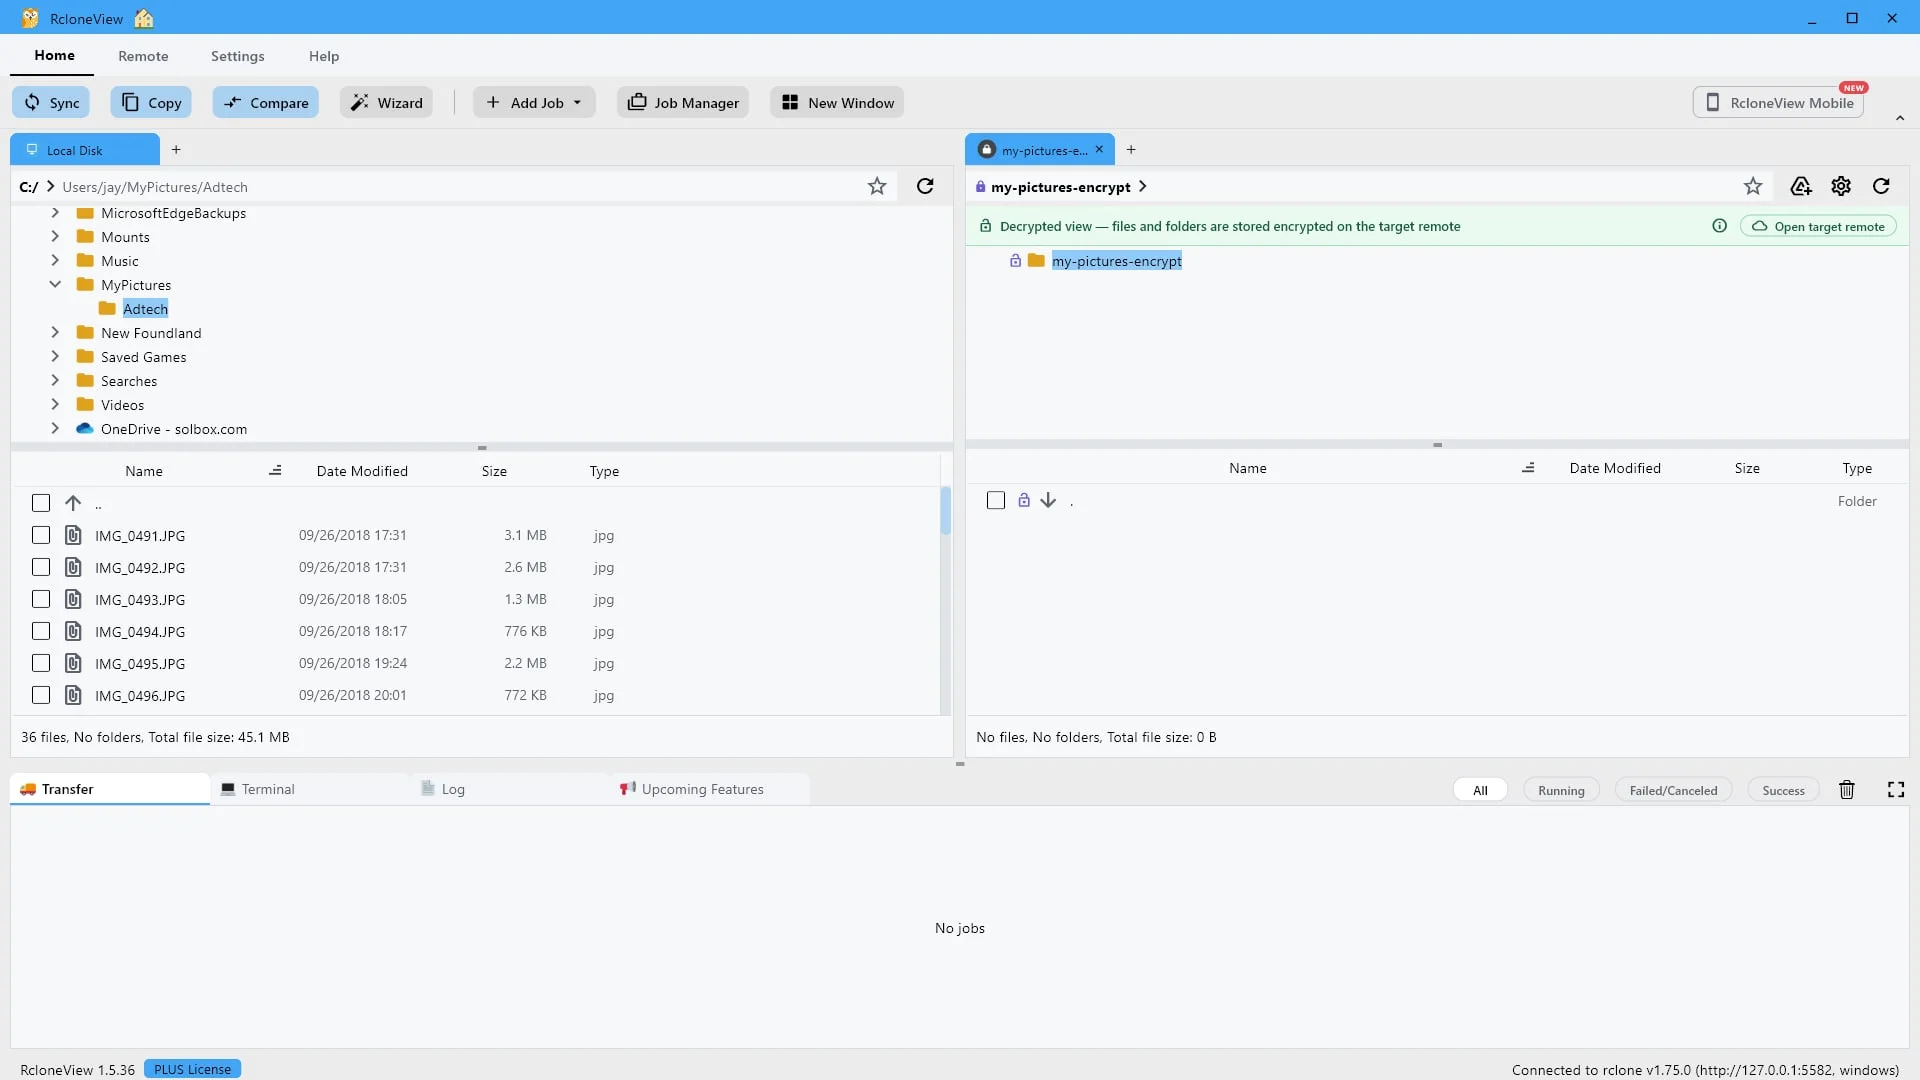
Paste into the Crypt remote, not into Google Drive directly. That's what encrypts them.
The destination is what matters here. If you copied these photos straight into Google Drive, they would arrive exactly as they are, readable by anyone with access. By sending them through the crypt remote instead, RcloneView encrypts them on the way. Select the destination folder here.
-
20Try this step ↗
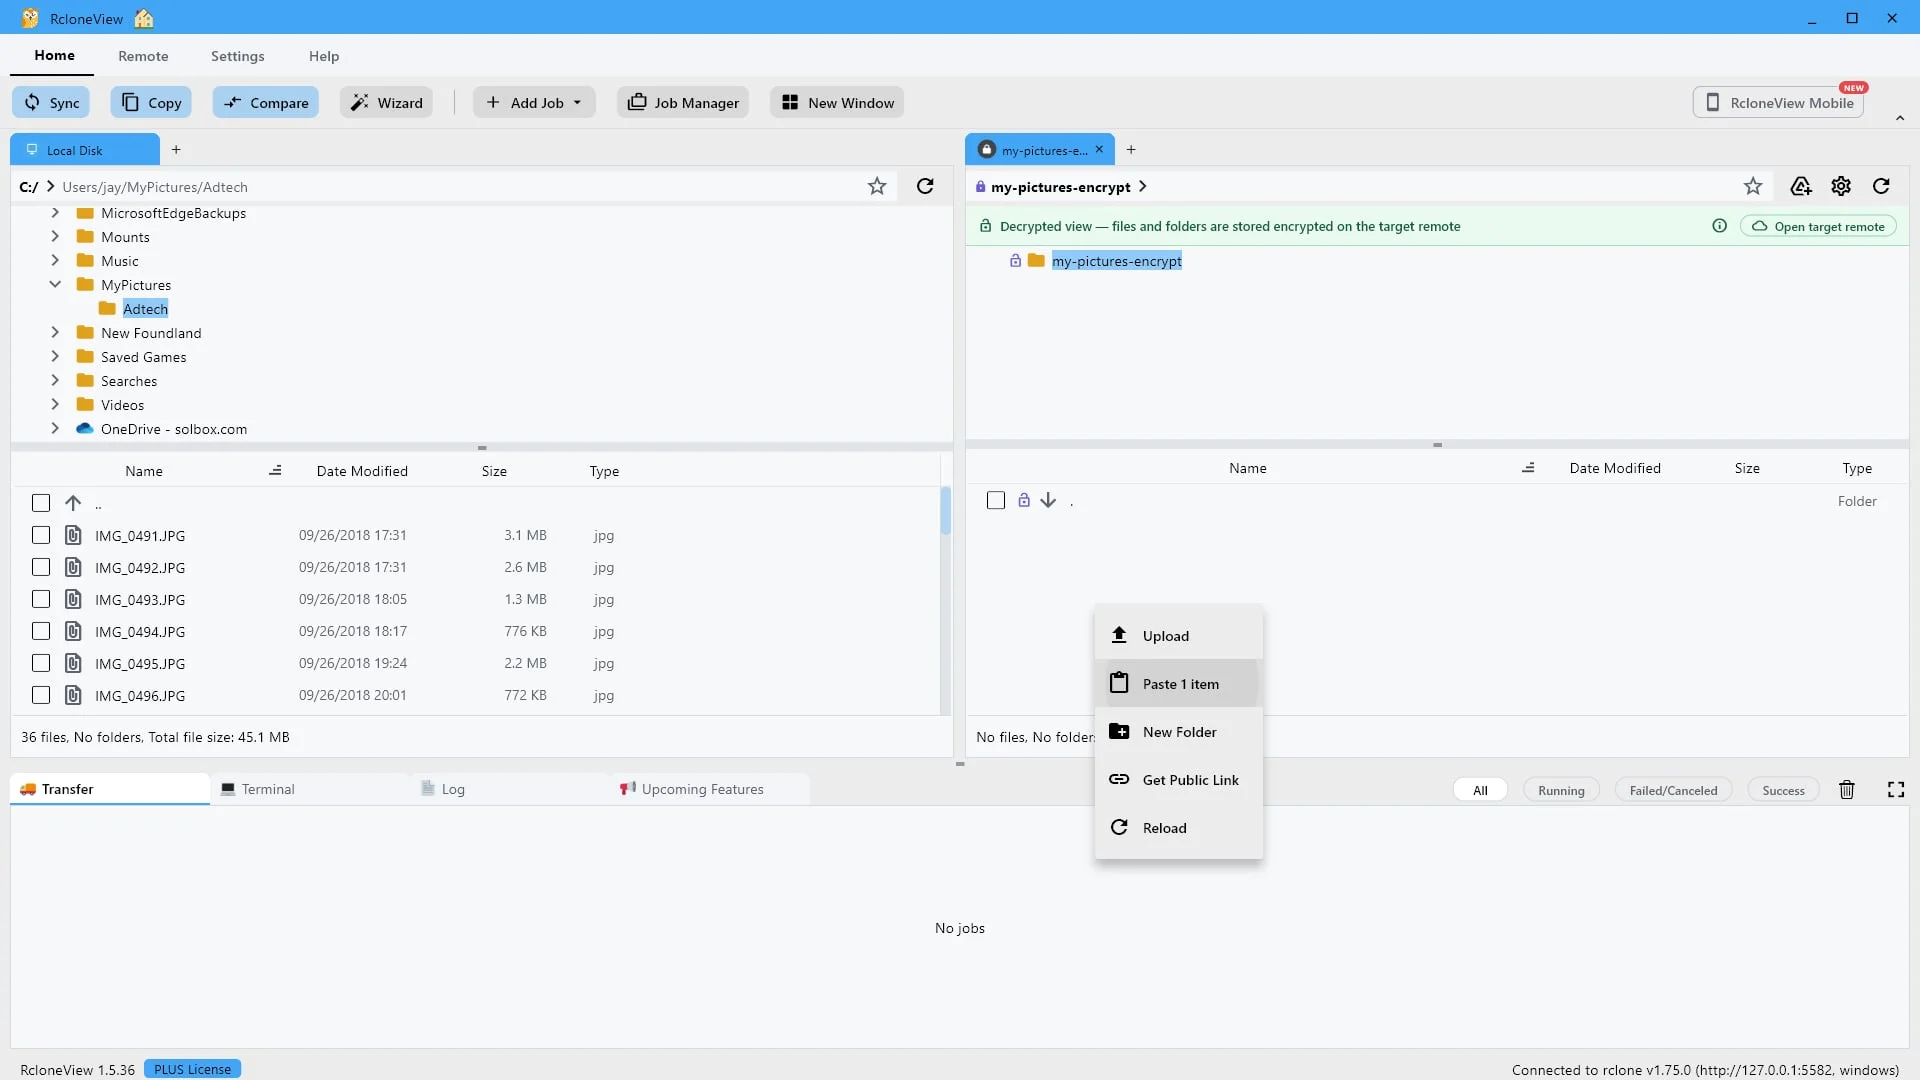
Paste here. Every file is encrypted on your computer, then uploaded.
Choose Paste one item. From this moment, RcloneView encrypts every file and every file name on your own computer first, and uploads only the encrypted result to Google Drive. Nothing readable ever leaves your machine.
-
21Try this step ↗
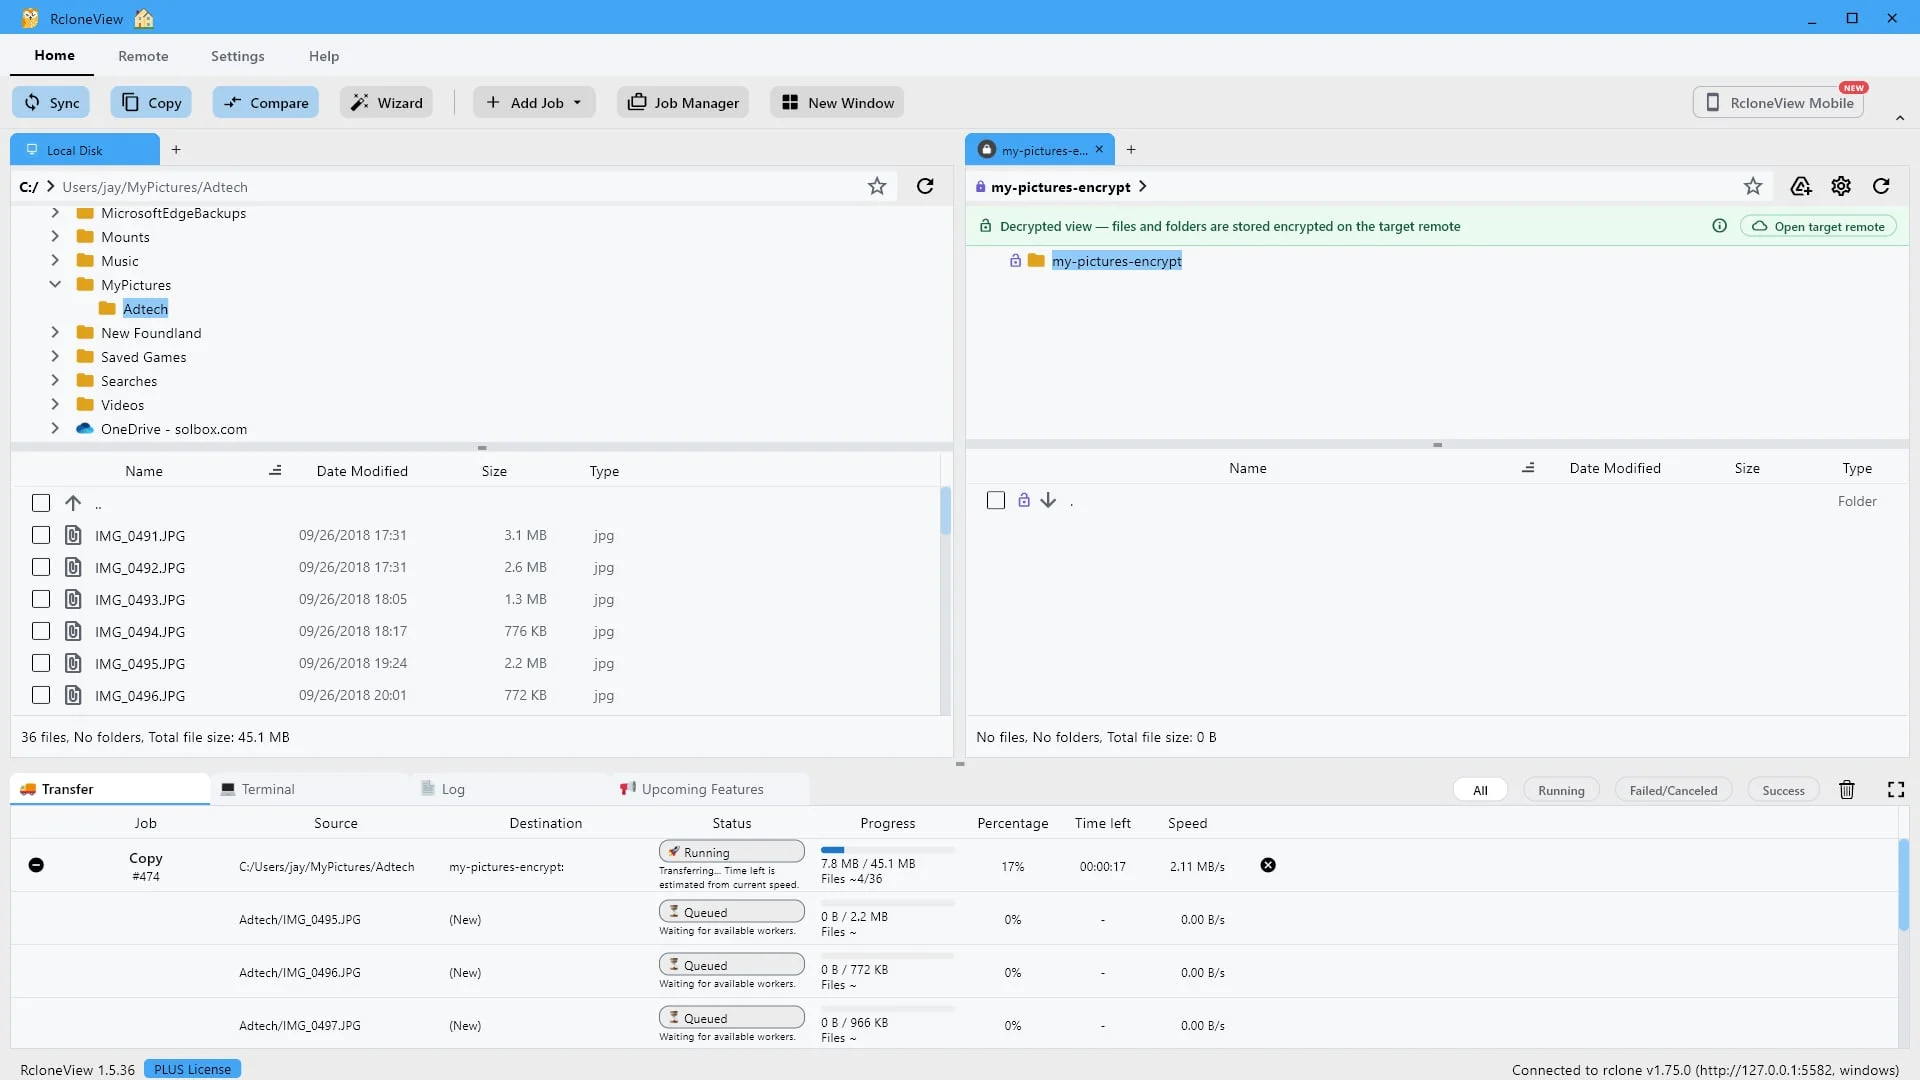
Track the encrypted upload in the "Transfer" panel.
The Transfer panel tracks the job. Thirty six files, about forty five megabytes, being encrypted and uploaded as it runs.
-
22Try this step ↗
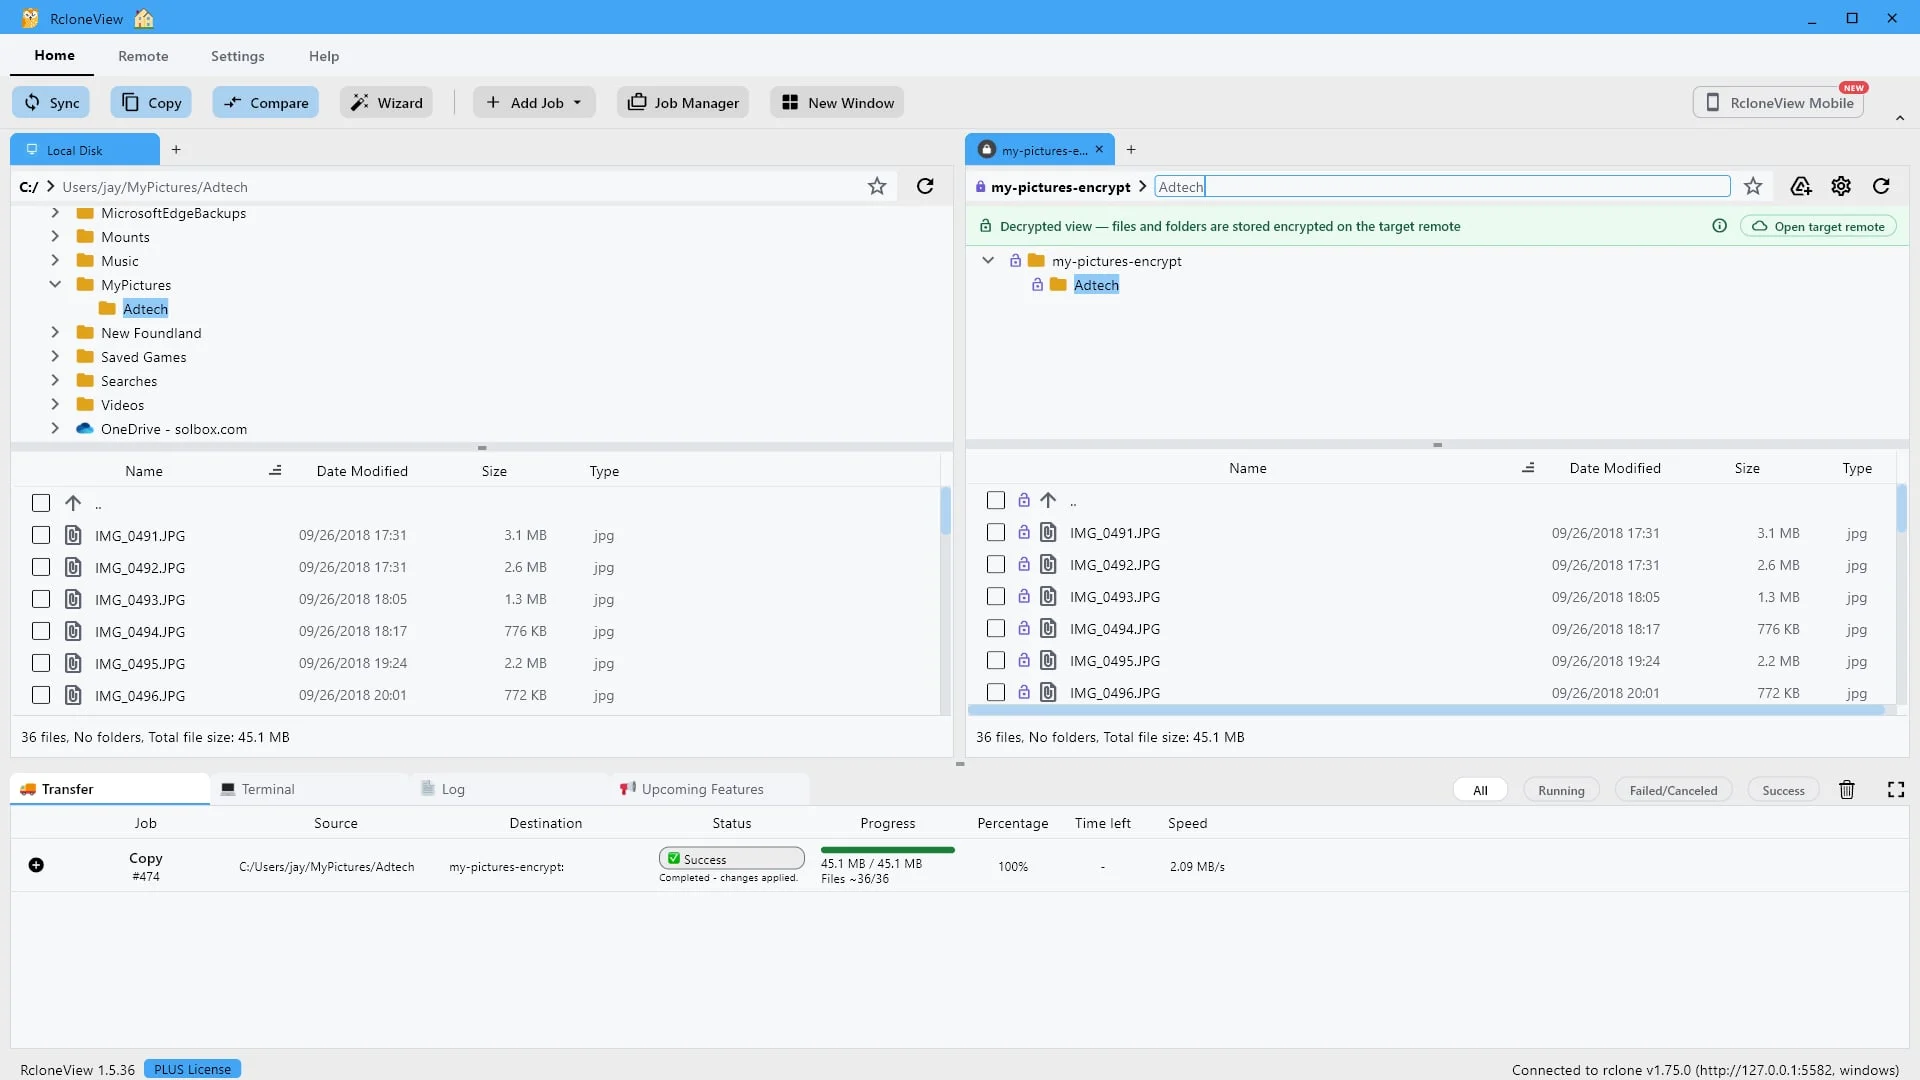
They look normal because the Crypt remote decrypts them with your password.
The copy is complete. Open the Adtech folder and your photos look completely normal, with their original names, sizes and dates. That is because you are looking through the crypt remote, which decrypts everything on the fly using your password. This is the decrypted view. It is not how the files are actually stored.
-
23Try this step ↗
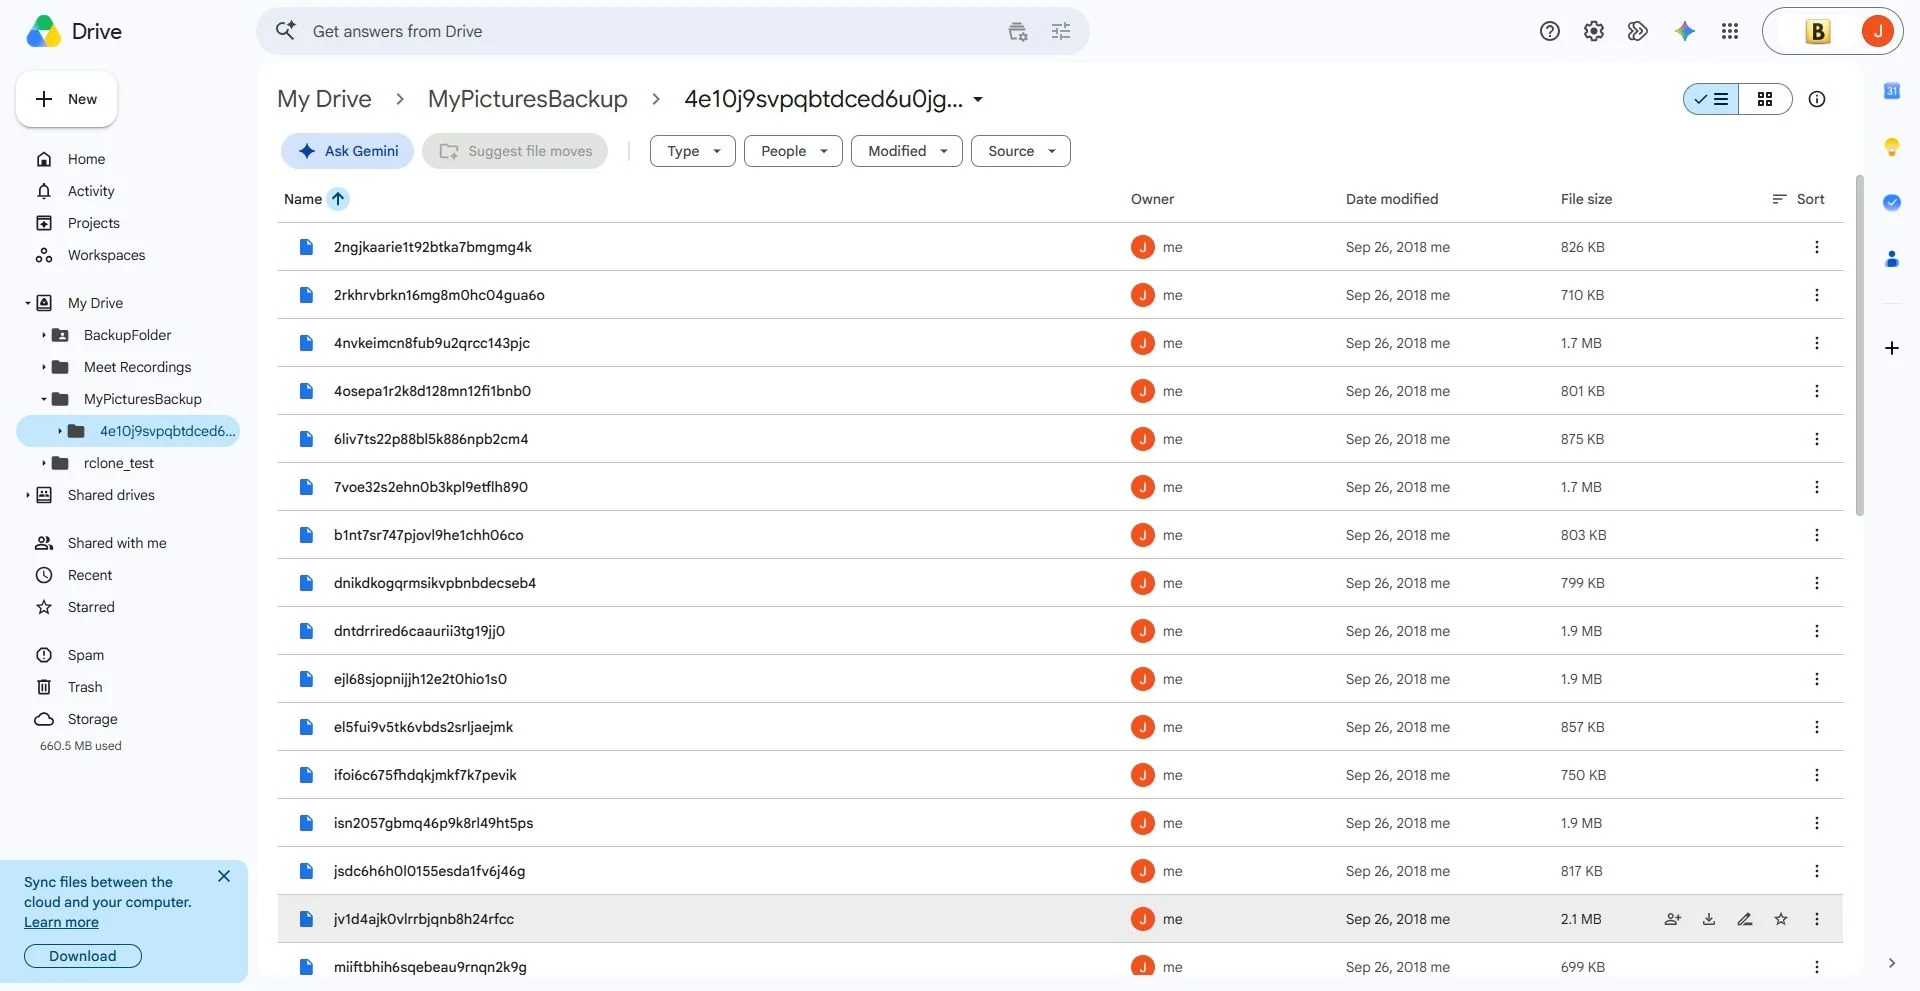
And this is how they're really stored — the same folder, opened in Google Drive.
So how are they really stored? Here is that same folder opened directly in Google Drive. The folder name is scrambled, every file name is scrambled, and every file is unreadable. This is what actually sits on Google's servers. Without your password, not even Google can tell what these files are.
-
24Try this step ↗
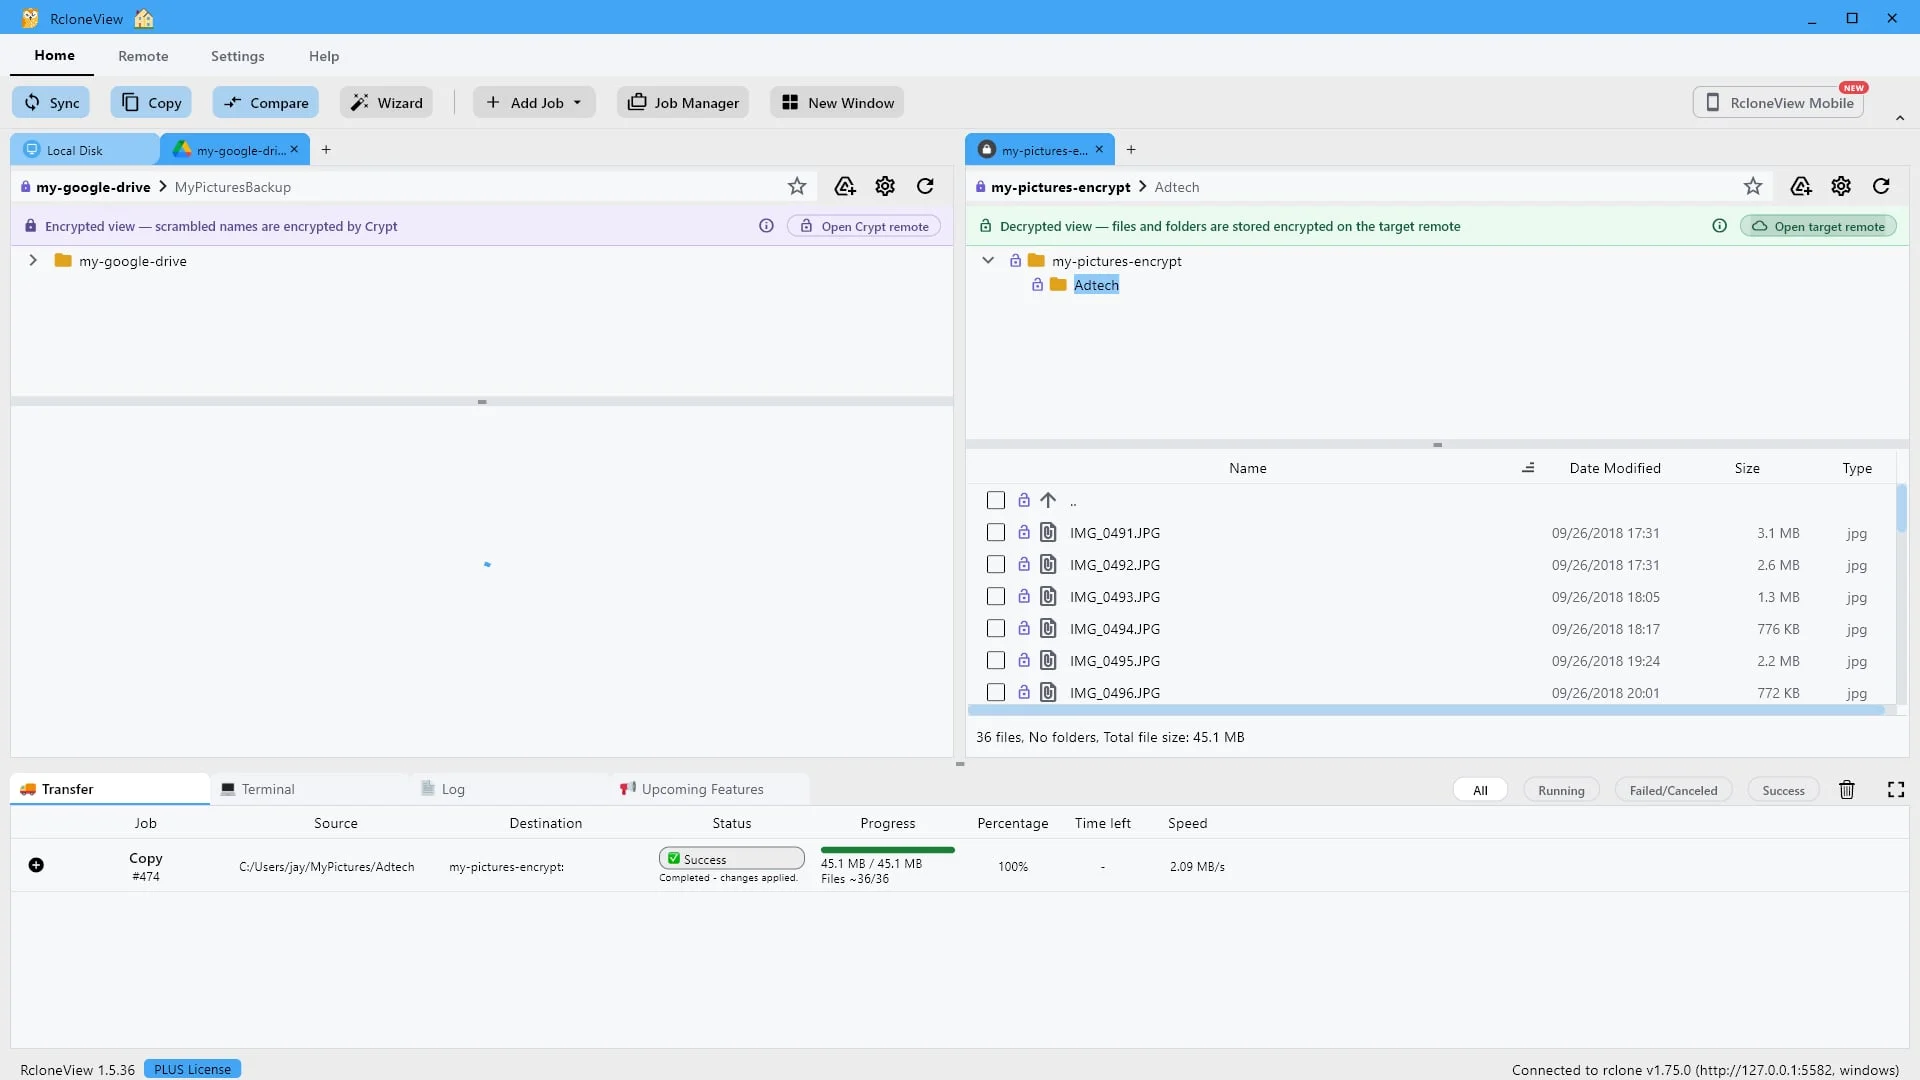
No browser needed. Click "Open target remote" to see that same encrypted folder here.
You do not need a web browser to confirm any of that. Click Open target remote, and RcloneView opens the real Google Drive folder that sits behind the crypt remote, showing you exactly what Google Drive shows.
-
25Try this step ↗
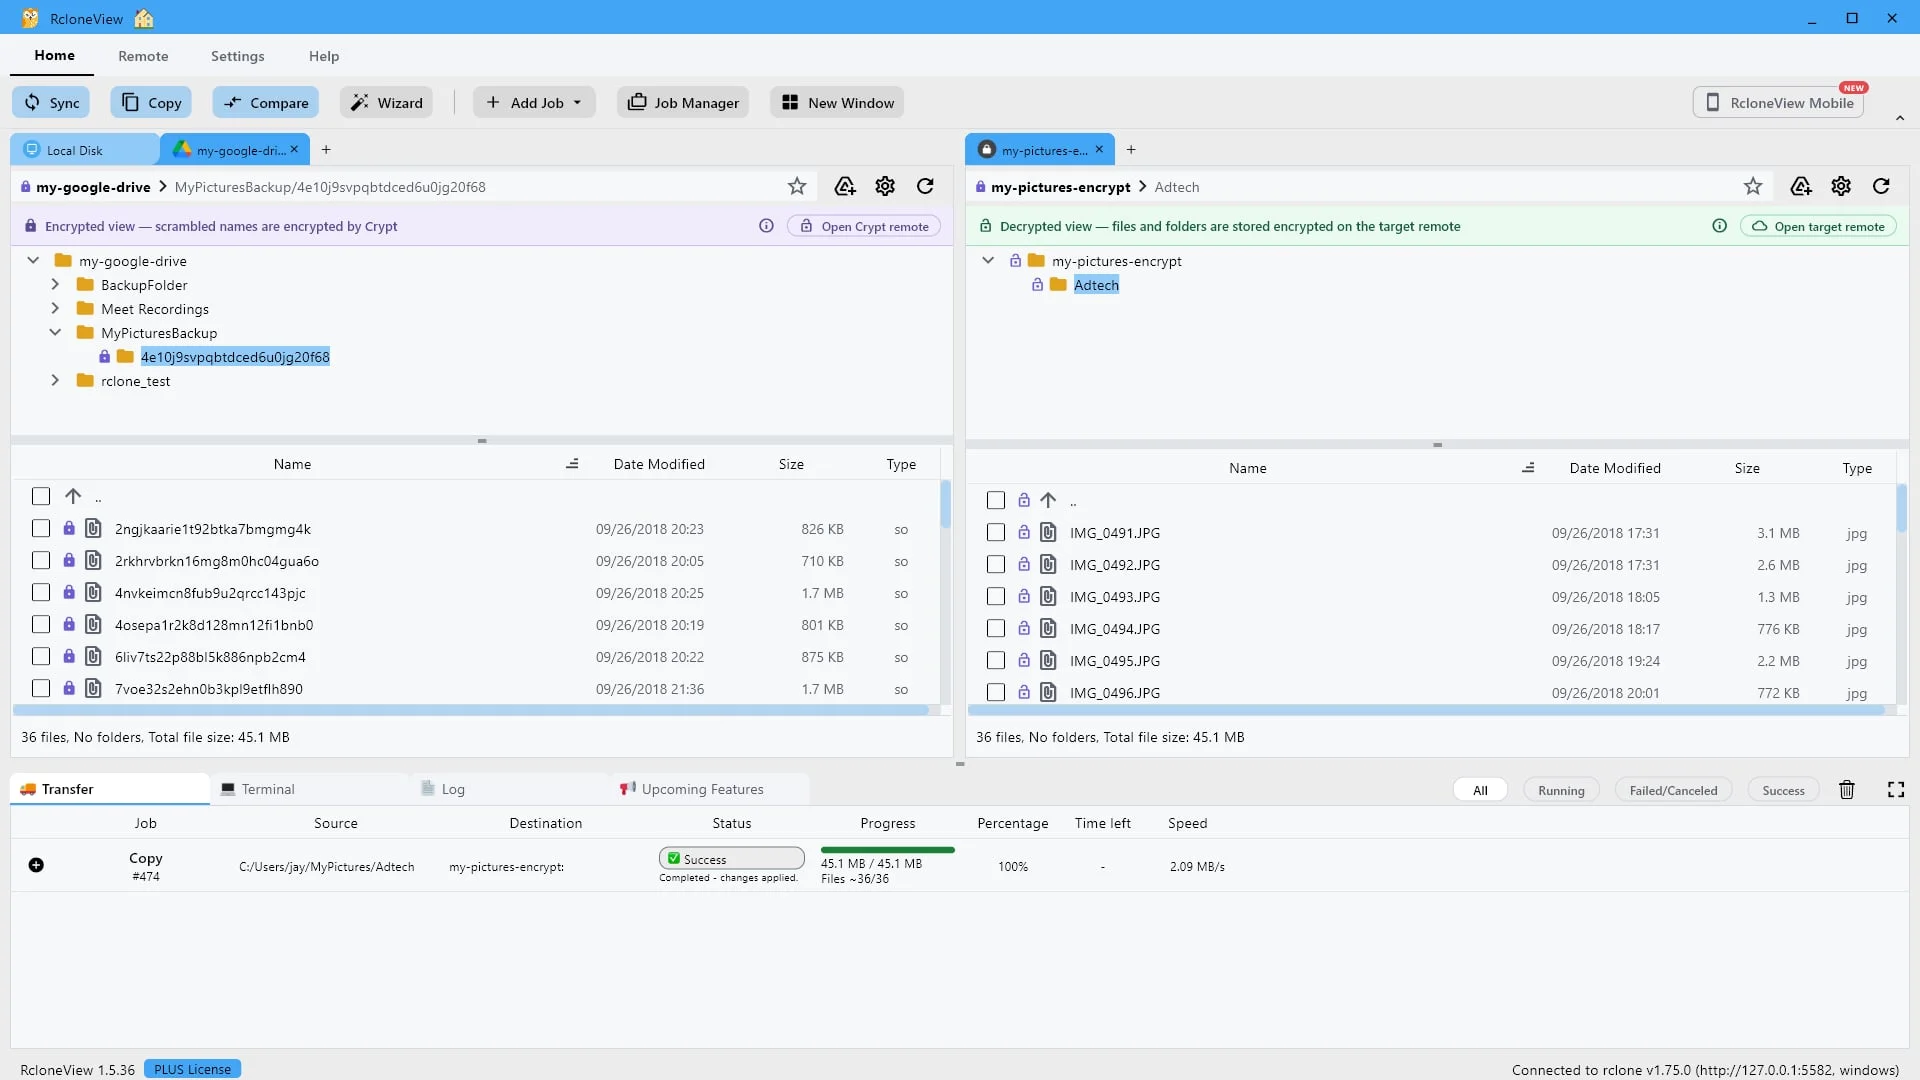
Same folder, two views
encrypted as stored, decrypted as you see it.
And there it is, both sides at once. On the left, the target remote exactly as Google Drive stores it, with scrambled names. On the right, the same folder through the crypt remote, with your real photos. One folder, two views, and only your password connects them. That is RcloneView Crypt. Secure your cloud in minutes.
-
Ready to try it yourself?Free for Windows, macOS and Linux.Get RcloneView Free