Backup
Back up any storage to any destination in minutes
Follow a complete backup from start to finish — pick a source, choose a destination, and watch the transfer complete. Any direction works, across 70+ cloud providers and local folders.
- Back up cloud-to-cloud, local-to-cloud or local-to-local
- Track progress live and review detailed job logs
- Save the job and re-run it with one click
The demo player couldn’t load. Use “Open in new tab” instead.
Watch next
See all demos →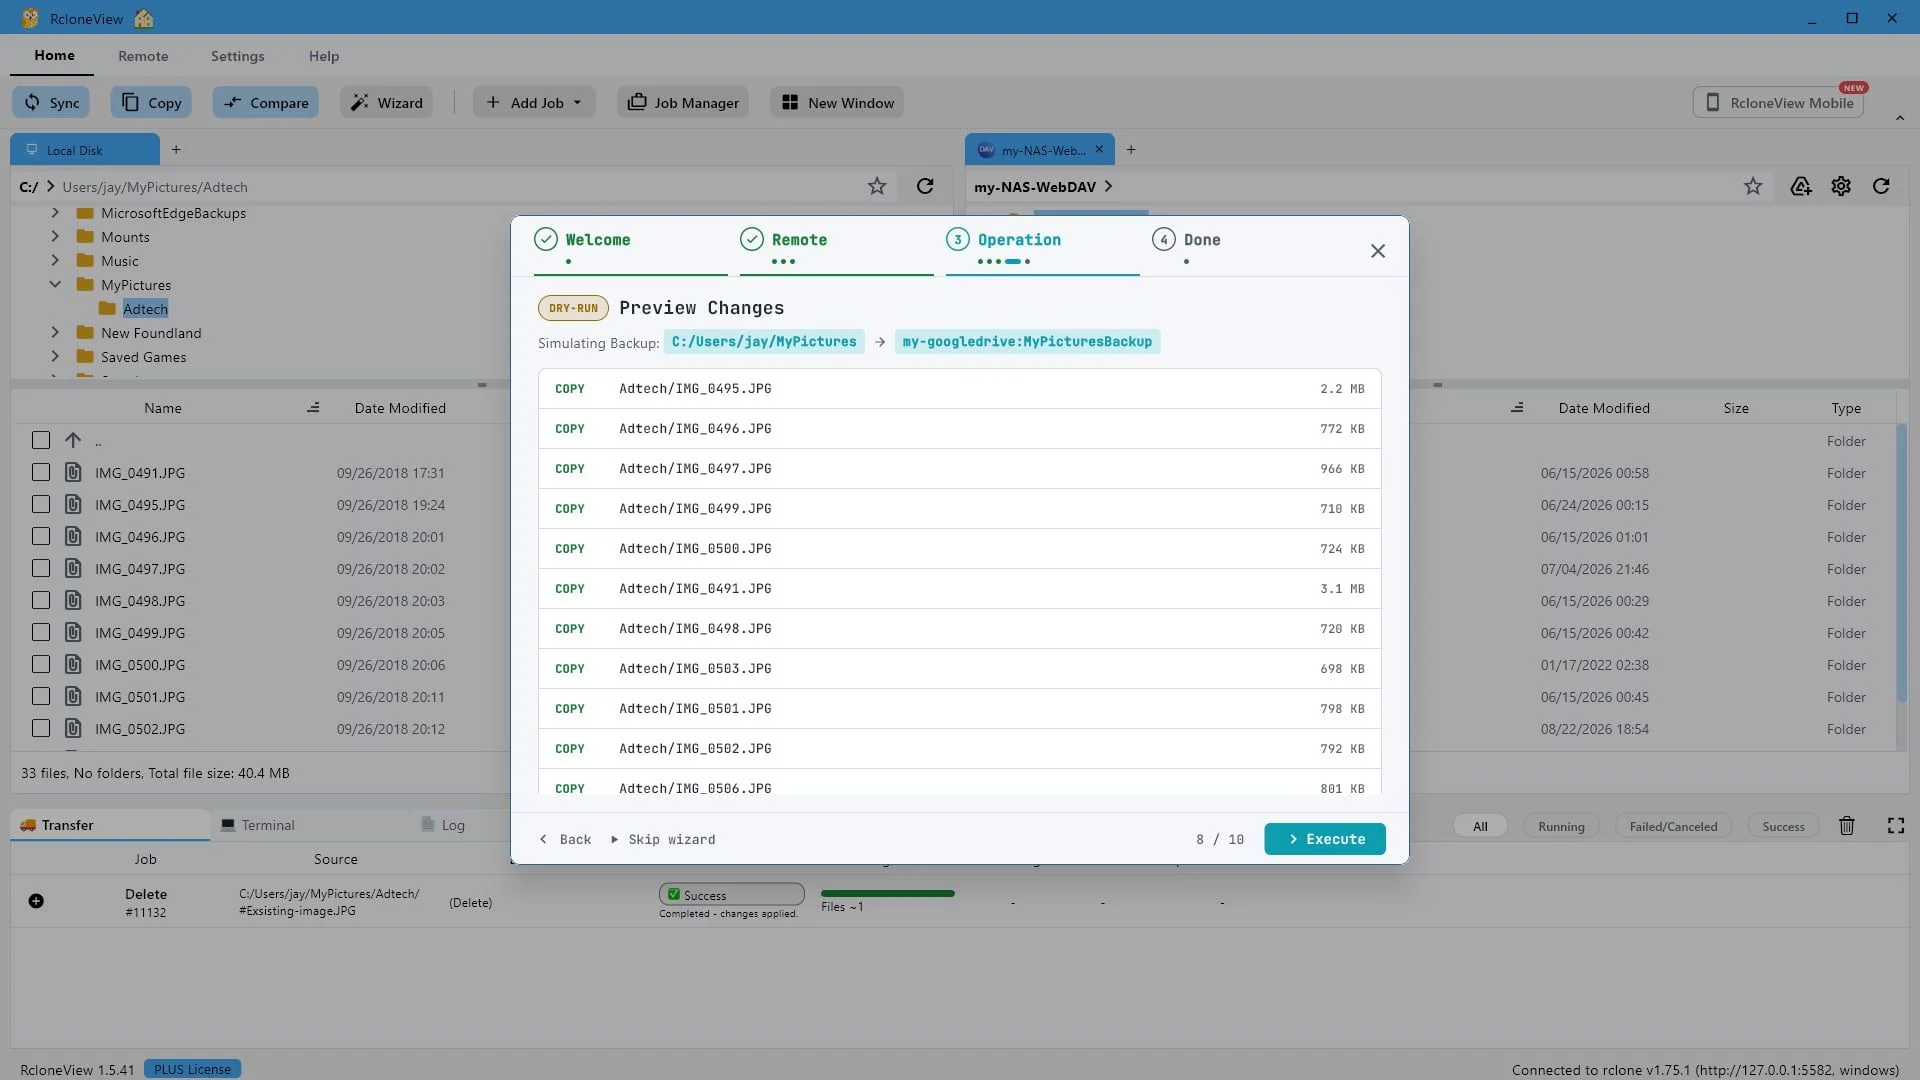
Step-by-step guide
How to back up files to cloud storage
The same 27 steps as the interactive demo, with screenshots — skim it, or jump into the demo at any step.
-
1Try this step ↗
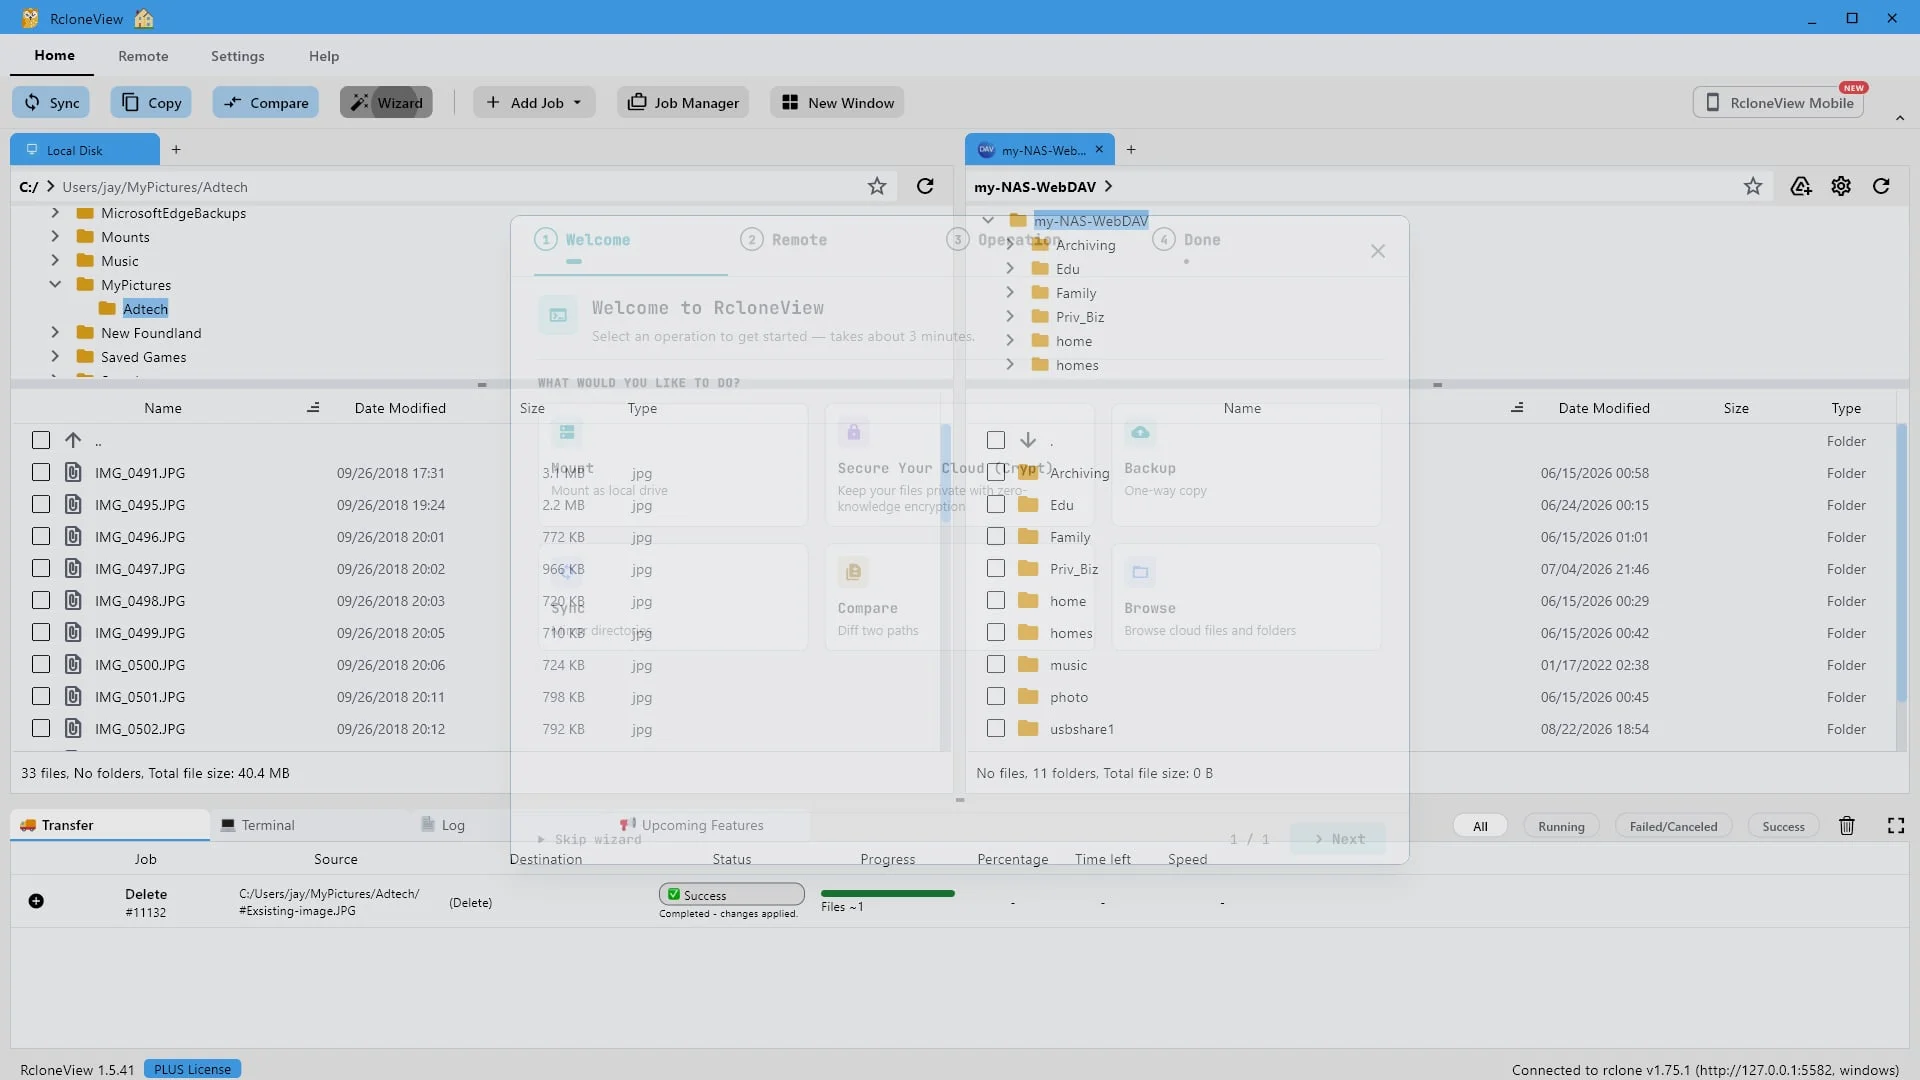
Open the Wizard for a guided setup.
We begin on the RcloneView home screen. Click Wizard to open the guided setup.
-
2Try this step ↗
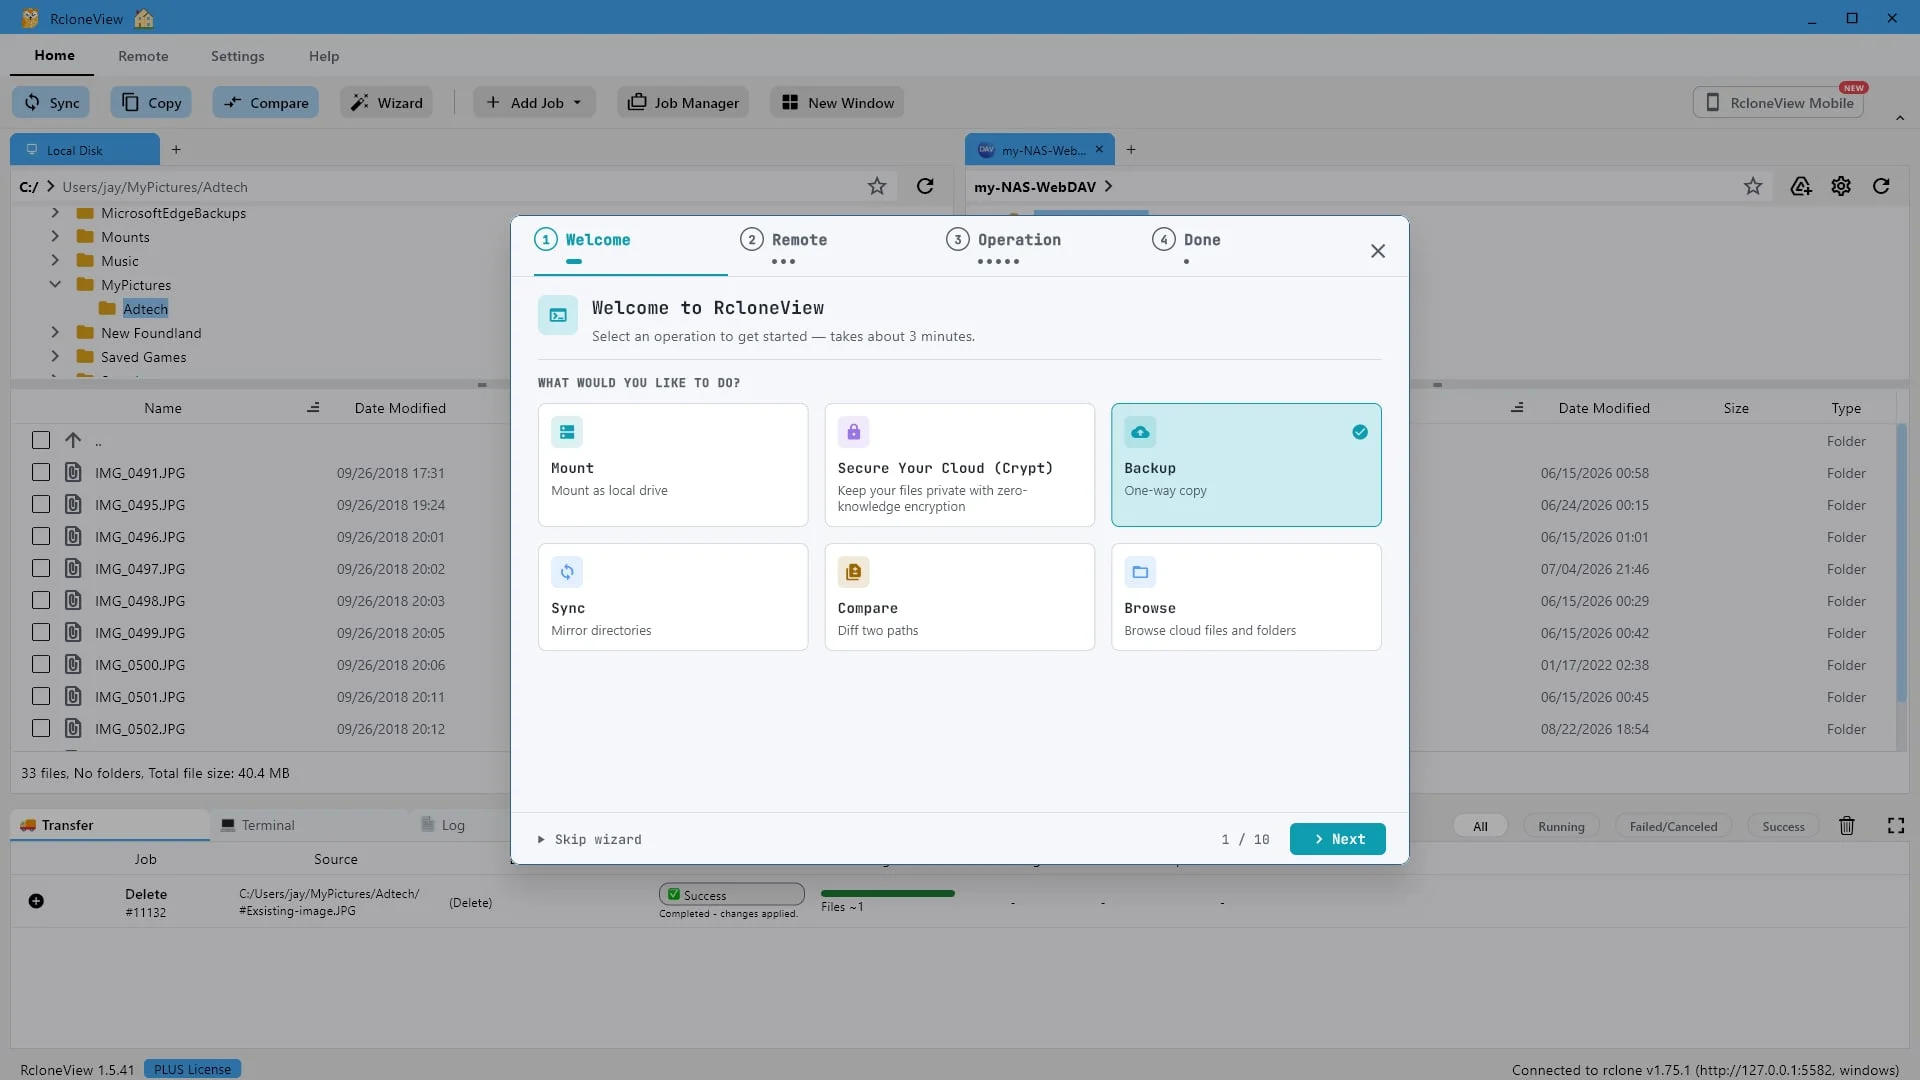
Backup is a one way copy: your originals are never changed.
The wizard can handle several jobs. One way means files travel from source to destination only. Your originals are never touched, and neither is anything already sitting at the destination.
-
3Try this step ↗
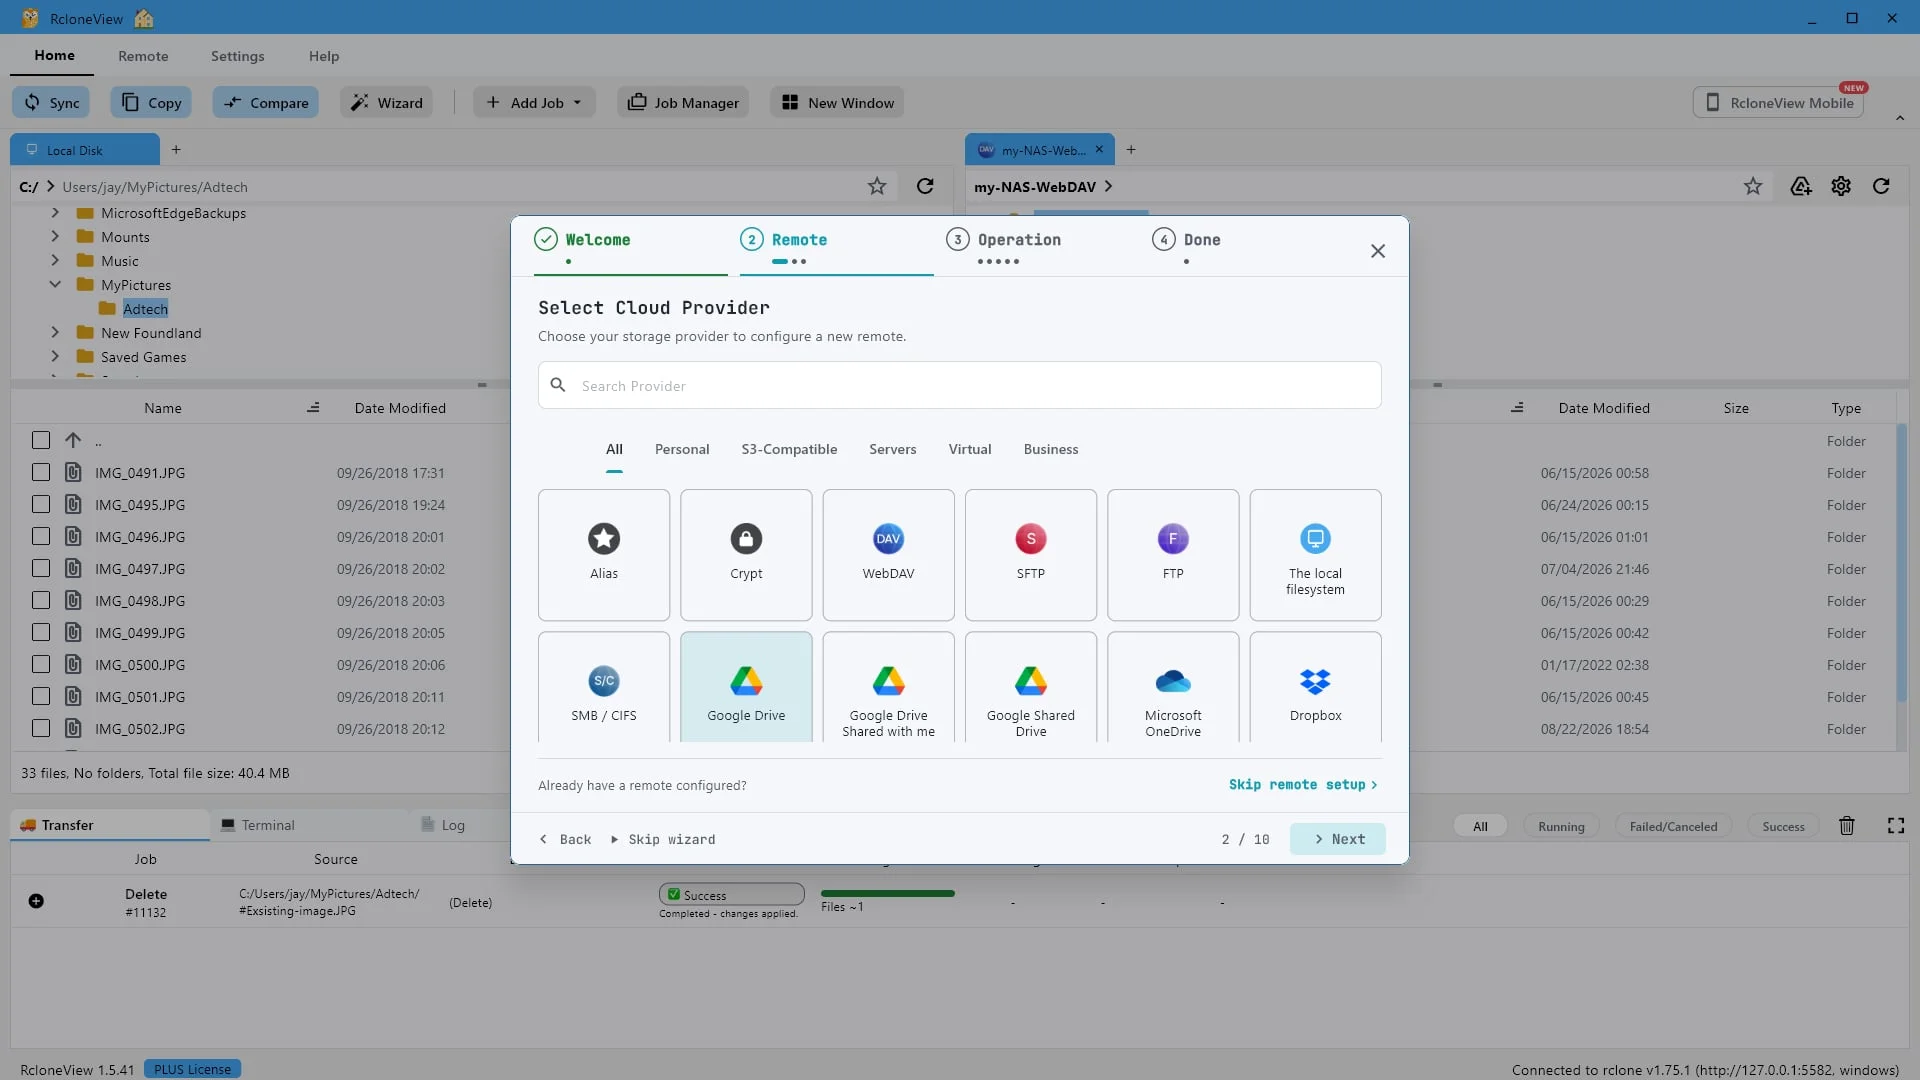
Pick the cloud that will hold the backup. More than eighty providers are supported.
First we add a remote to back up to. RcloneView supports more than eighty backends, and any of them can be a backup destination. For this demo we will use Google Drive.
-
4Try this step ↗
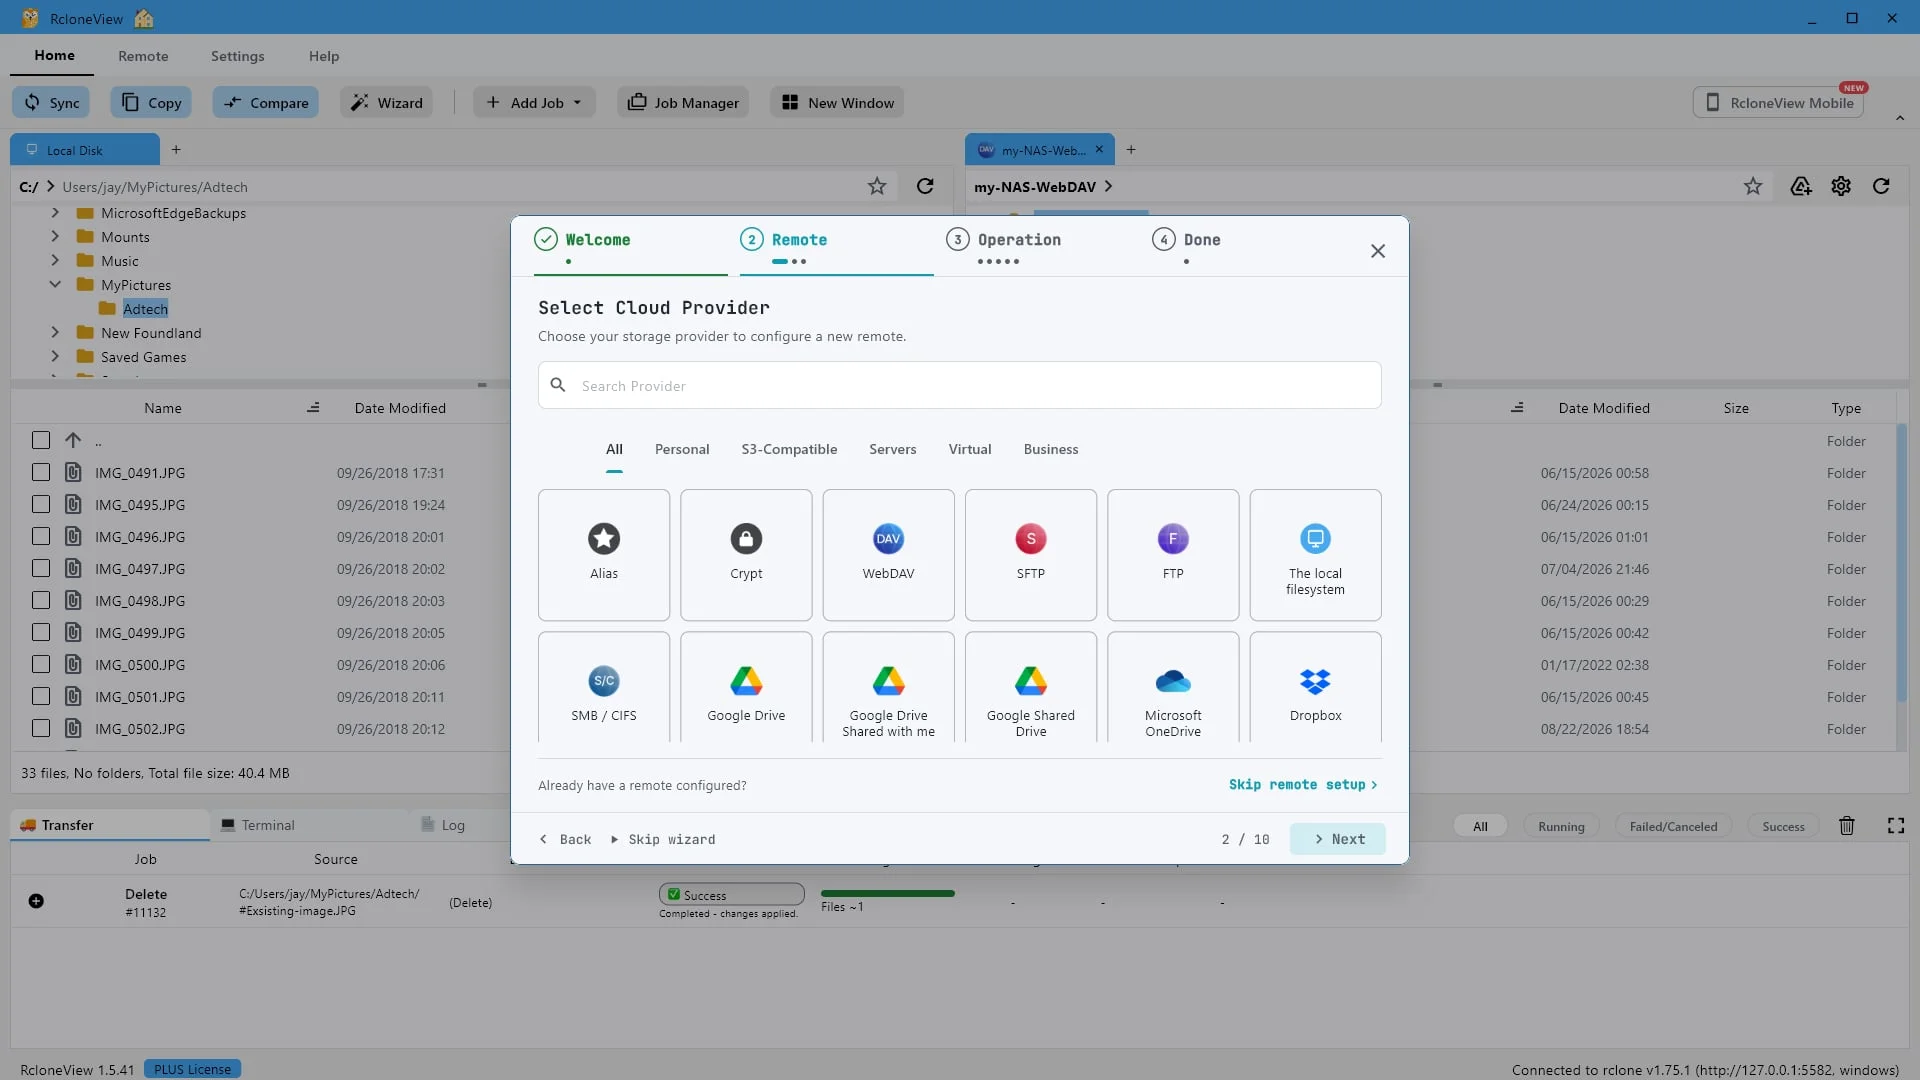
Provider chosen. Next you name the connection and authorize it.
With the provider selected, click Next.
-
5Try this step ↗
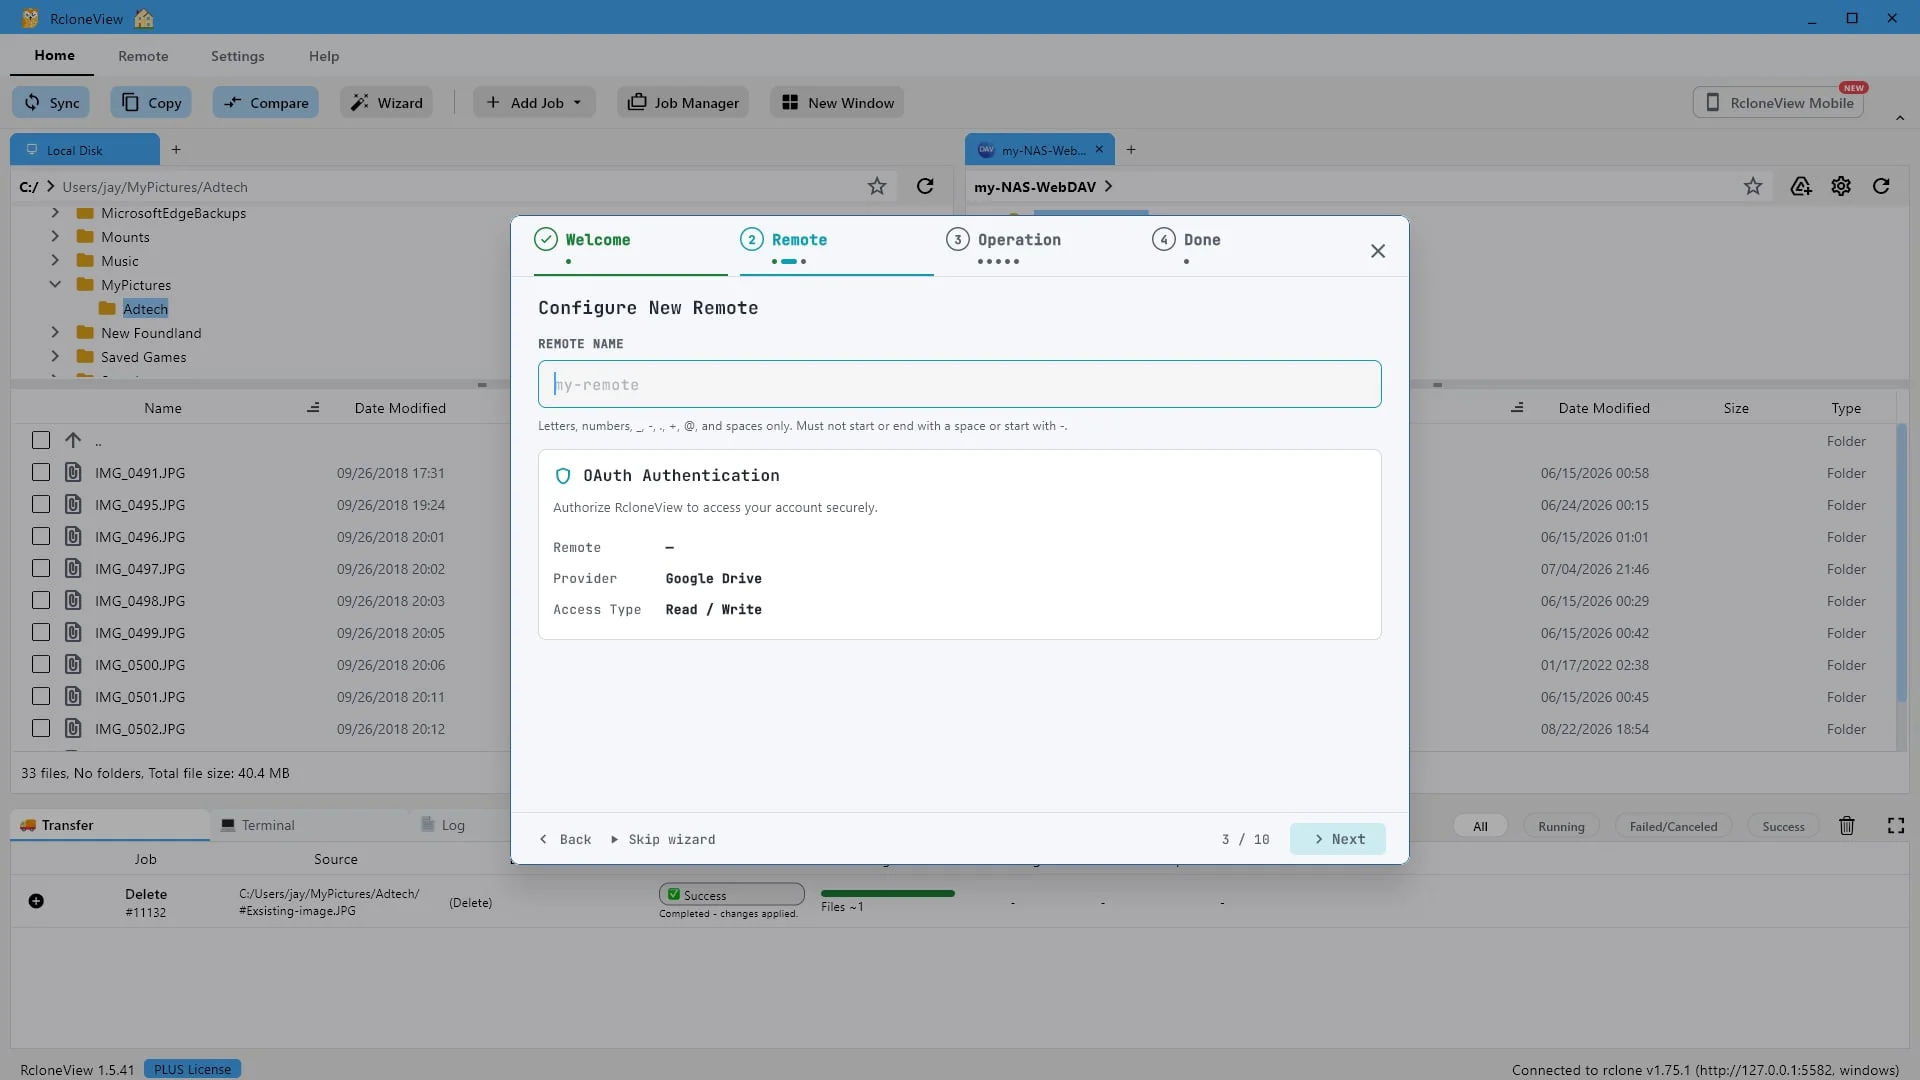
Give this connection a short name you will recognize later.
Give the new remote a short name you will recognize later. This is simply a label for the connection, and you will see it everywhere in RcloneView.
-
6Try this step ↗
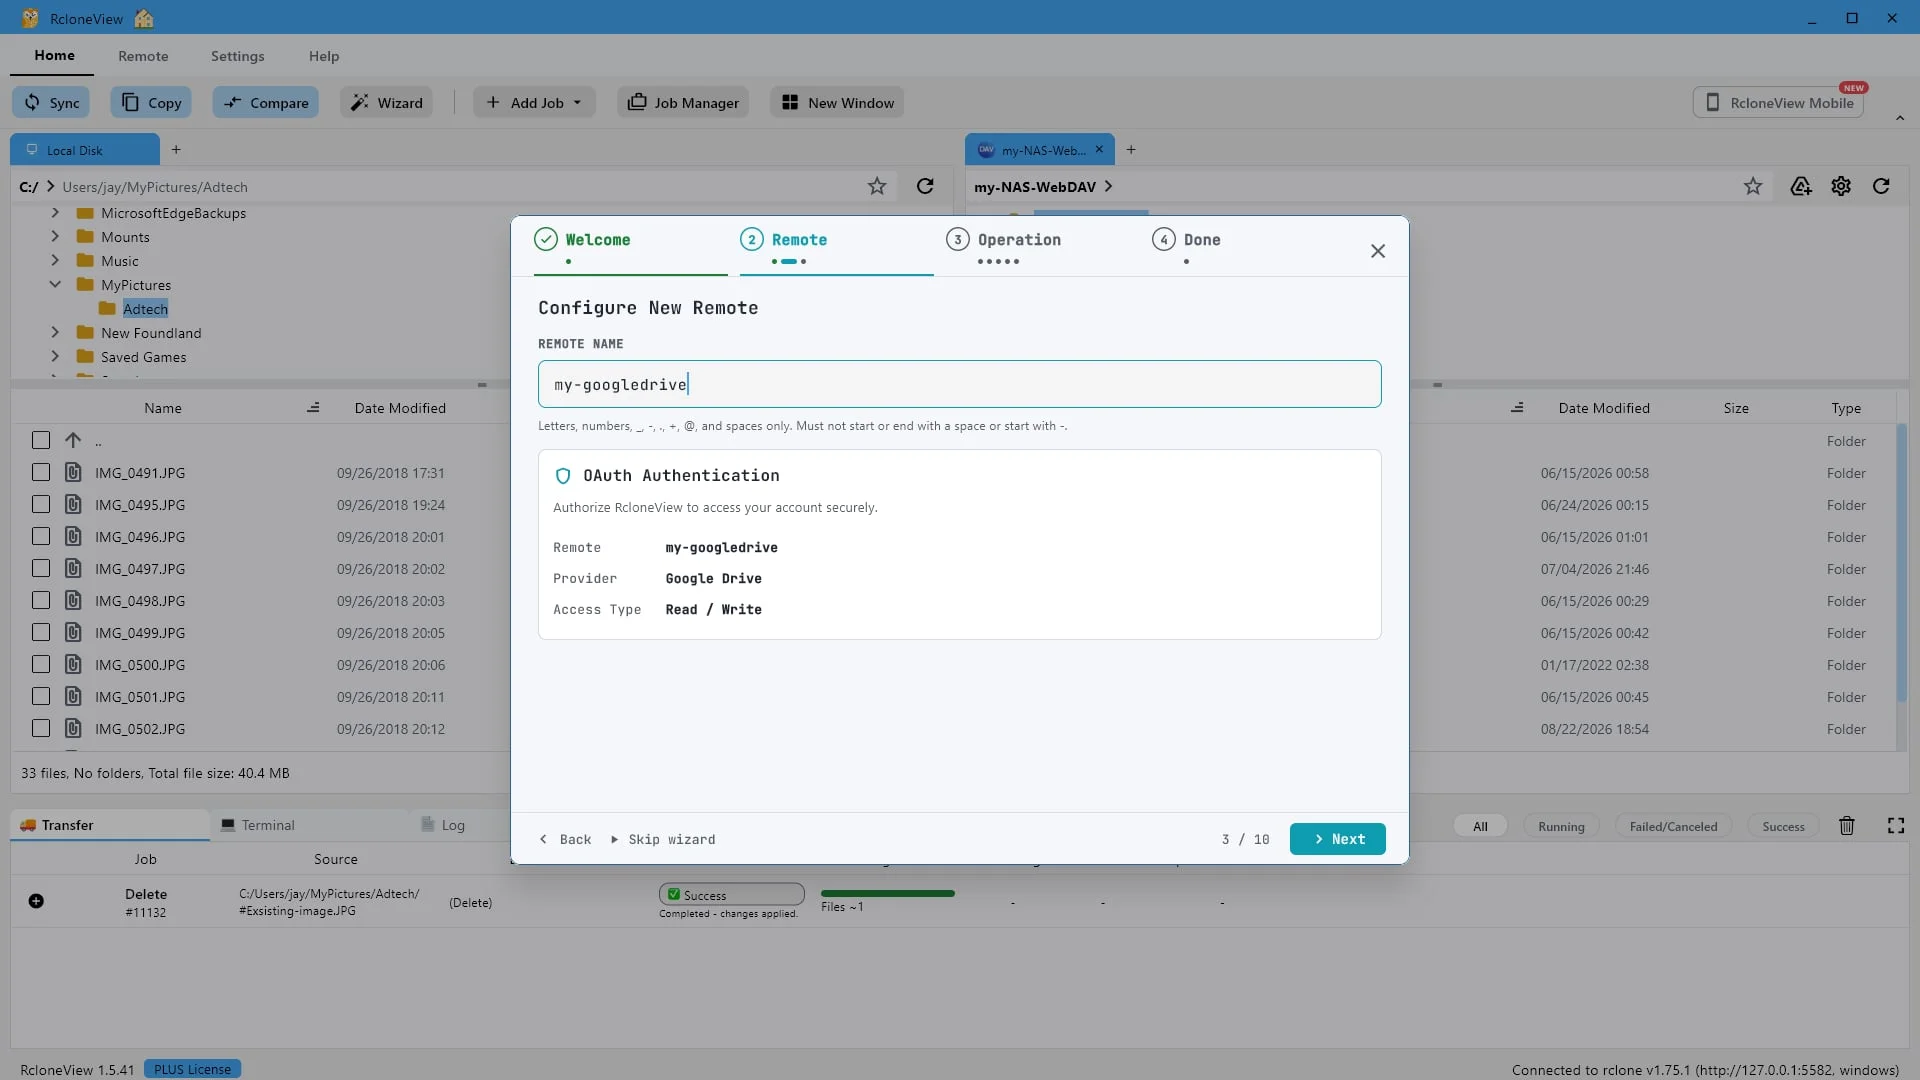
The name you type here is how this cloud appears everywhere in RcloneView.
We will call ours my google drive. Click Next to save it and start the connection test.
-
7Try this step ↗
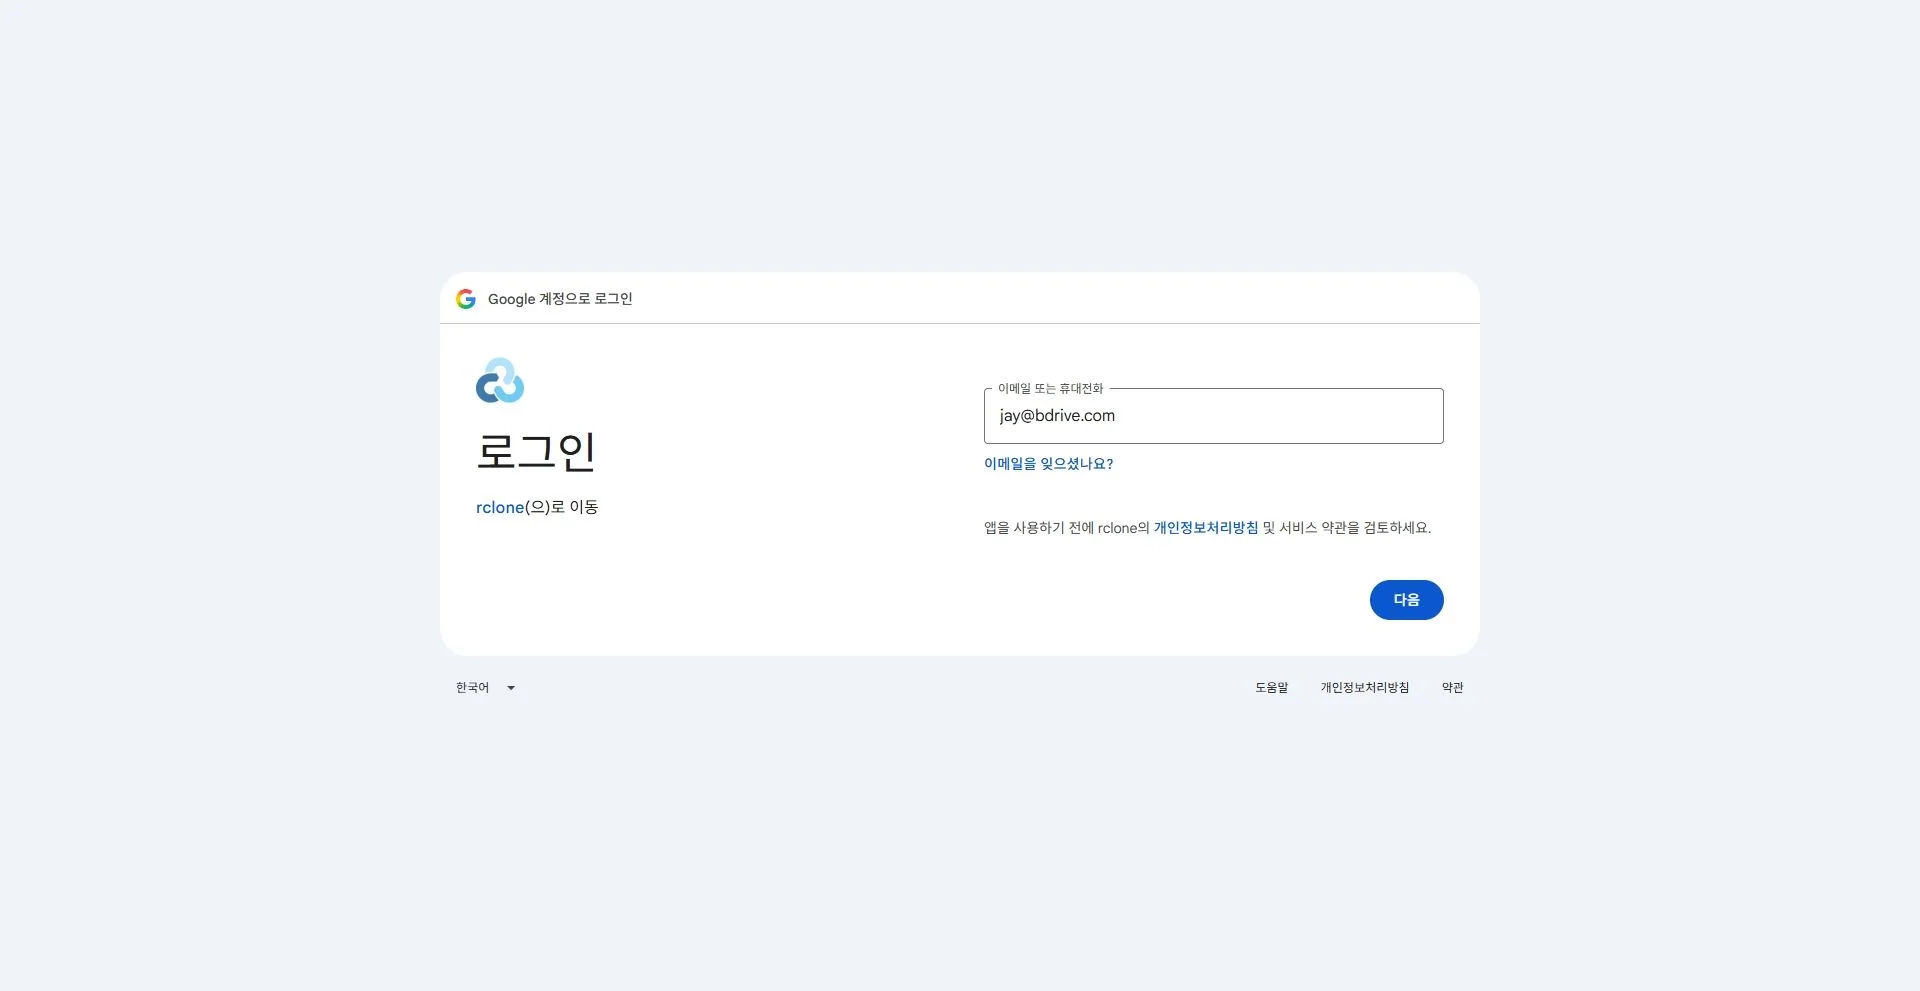
Sign in on Google's own page. RcloneView never sees your password.
Your provider's own sign in page opens. Authorize the connection there. The access token is stored locally on your computer, and RcloneView never sees your password.
-
8Try this step ↗
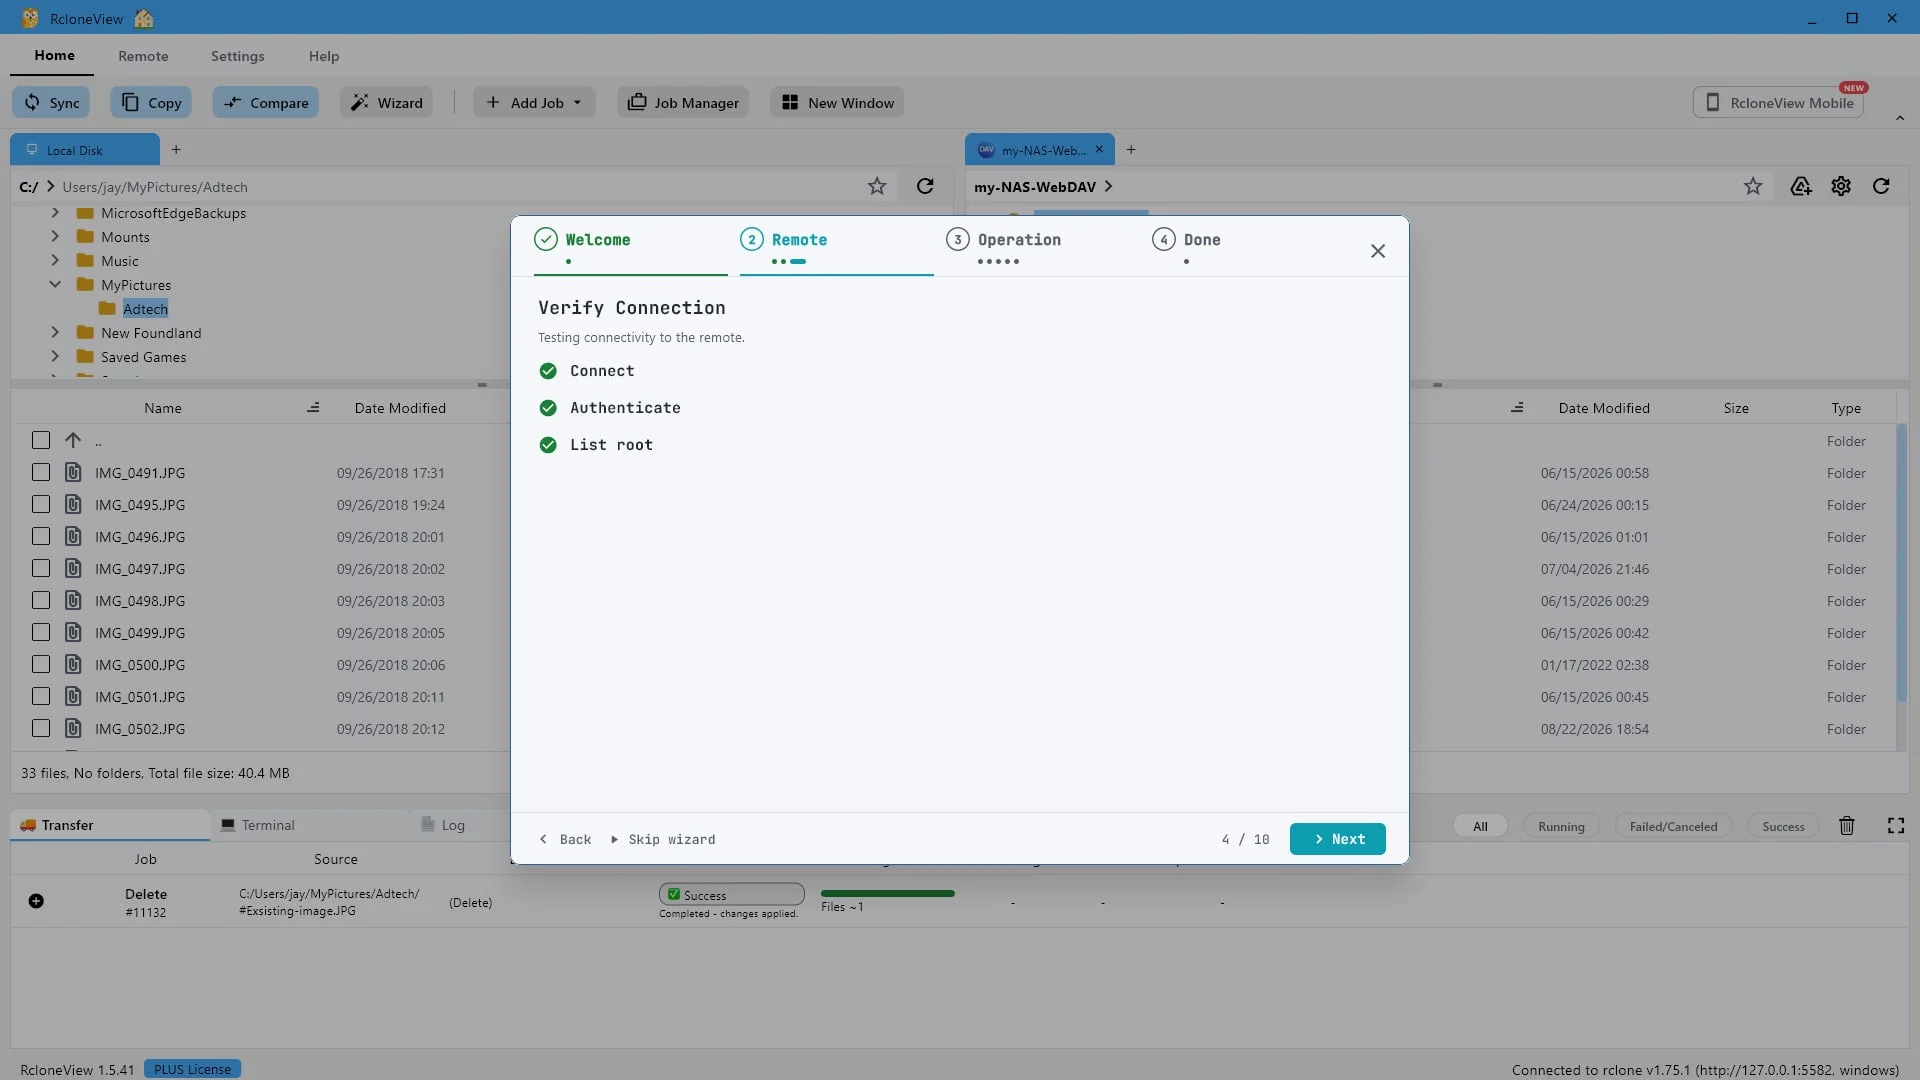
Once that's done, click on the element.
RcloneView verifies the remote right away. Connect, authenticate, and list root all pass, so you know the connection works before you rely on it. Click Next.
-
9Try this step ↗
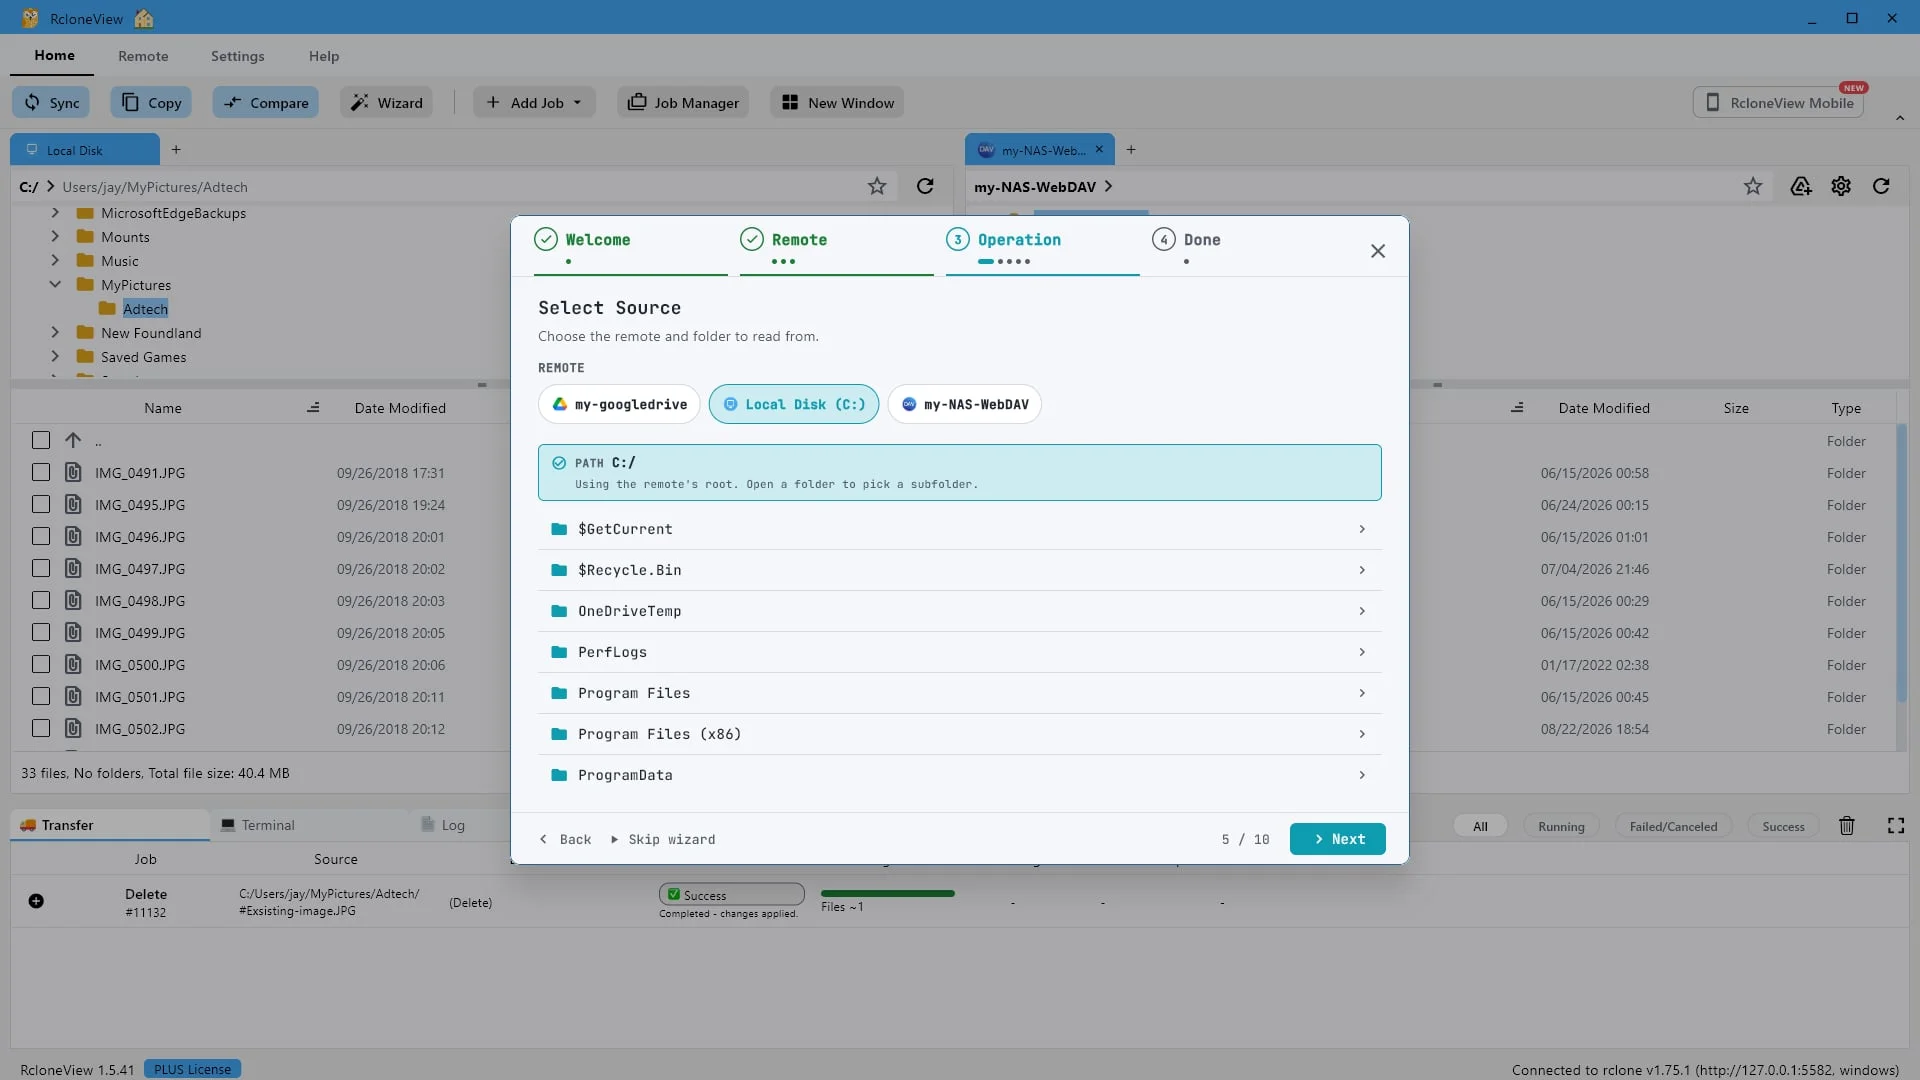
The source is what you back up. Your local disk is a remote here, just like the cloud.
Now tell the wizard what to back up. Notice that your local disk sits in the same row as your cloud remotes. In RcloneView any configured location can be a source, and here we start from the local disk.
-
10Try this step ↗
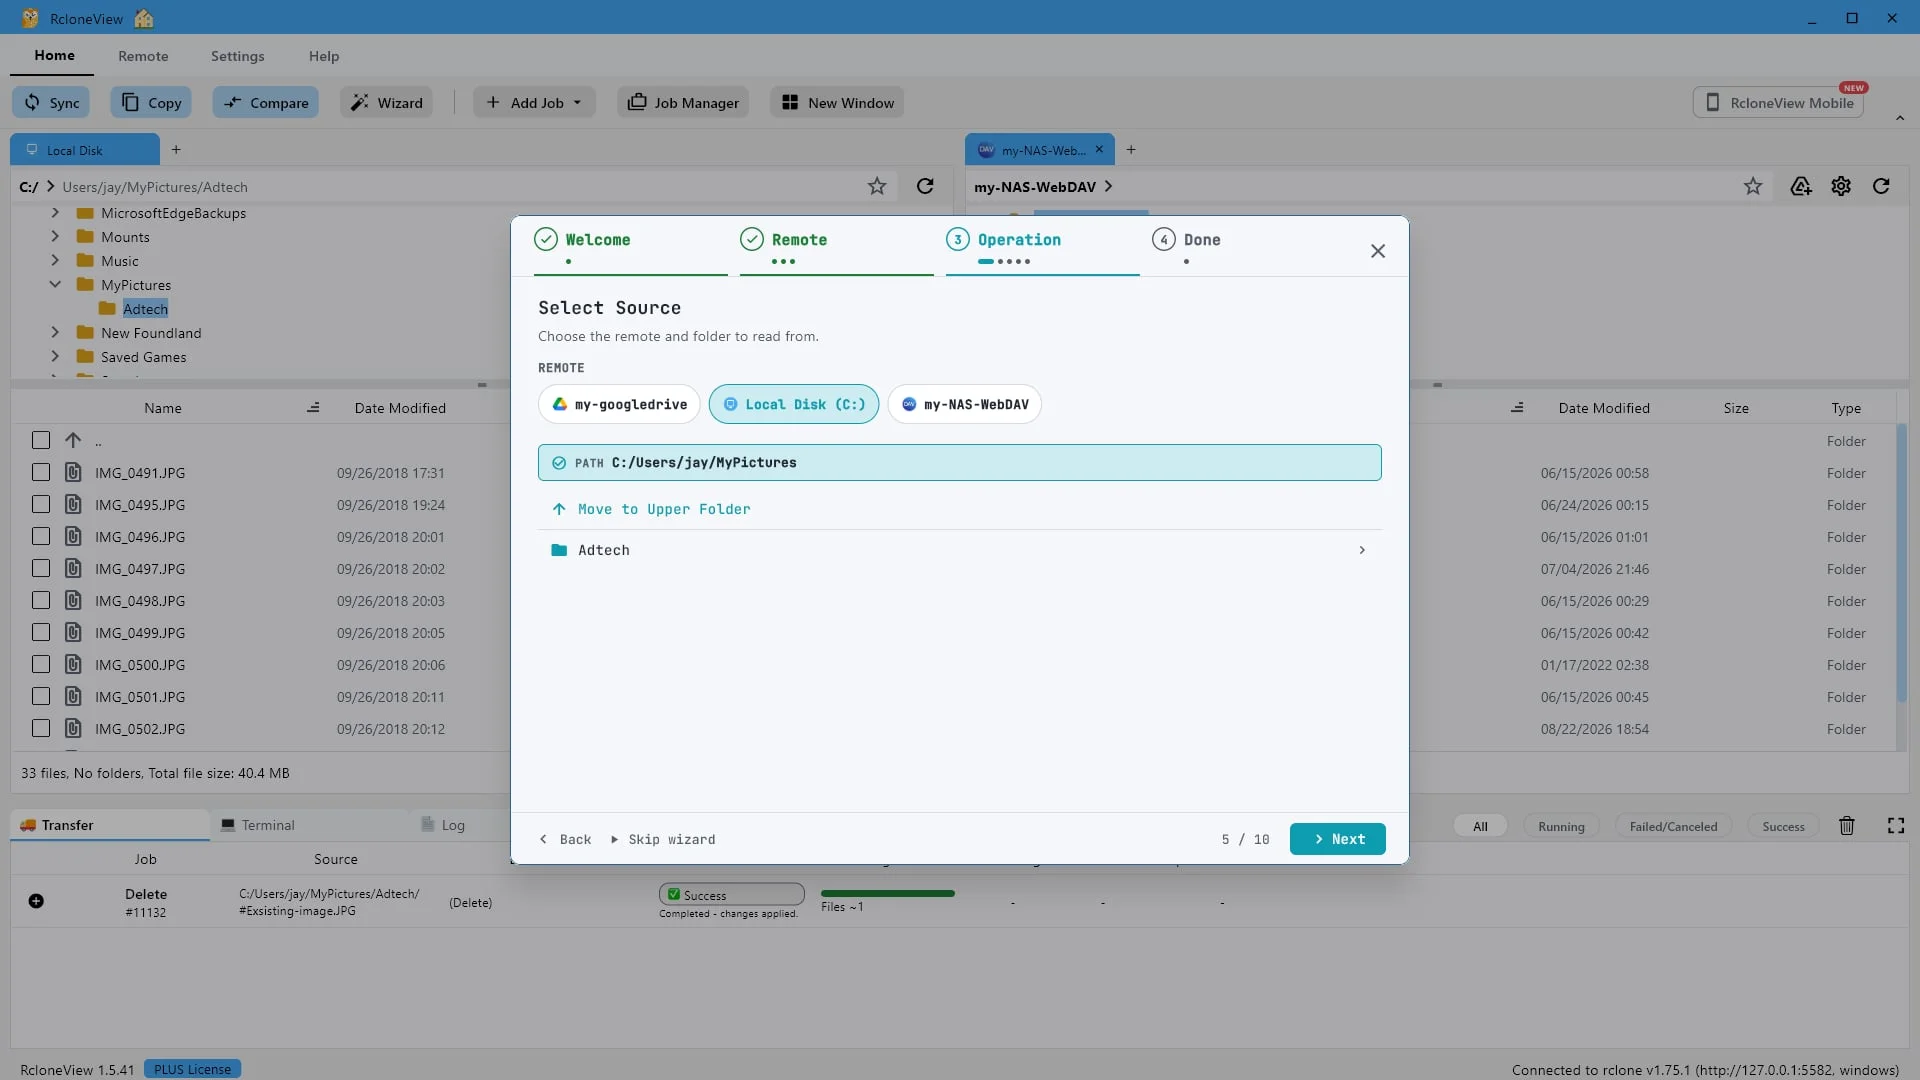
Open a folder to narrow the source down to exactly what you want copied.
We will use My Pictures, which contains the Adtech folder with thirty three photos inside.
-
11Try this step ↗
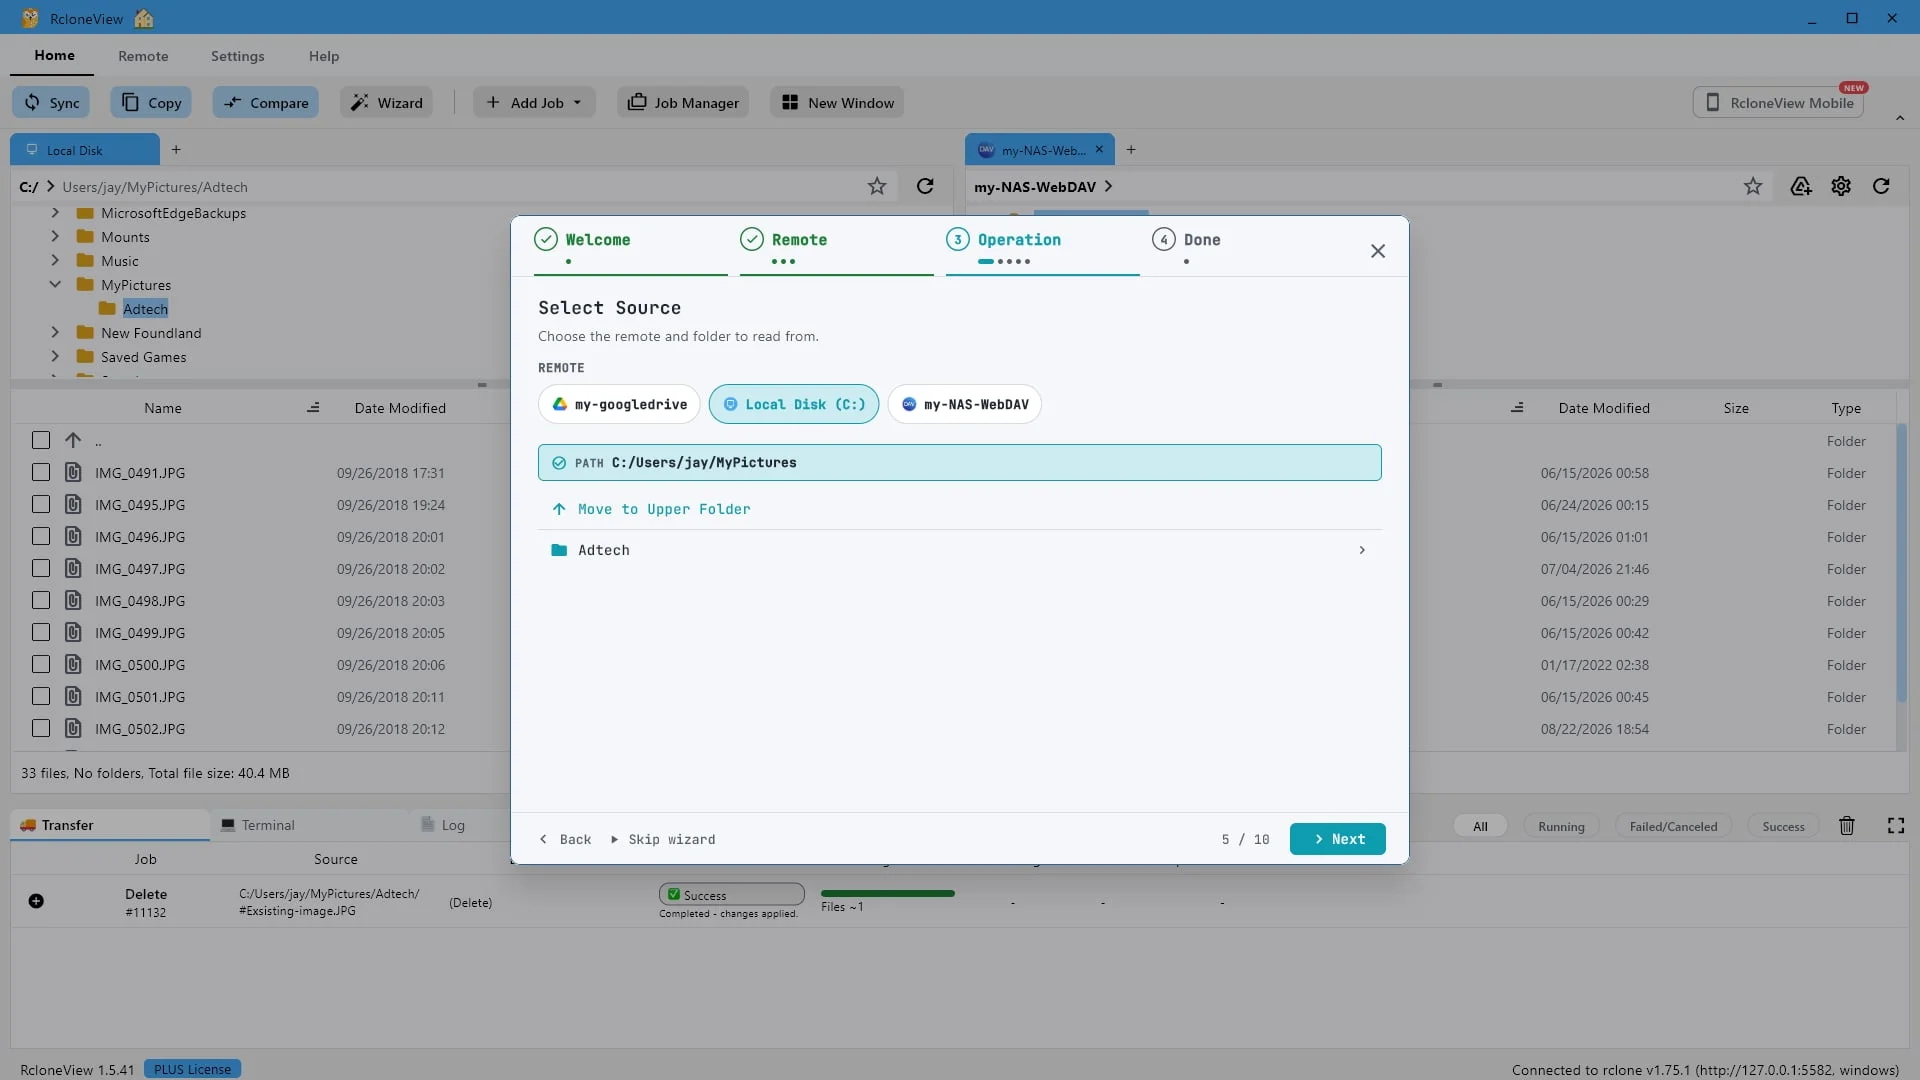
Source is set. Next you choose where the copy lands.
Click Next to choose where the copy will land.
-
12Try this step ↗
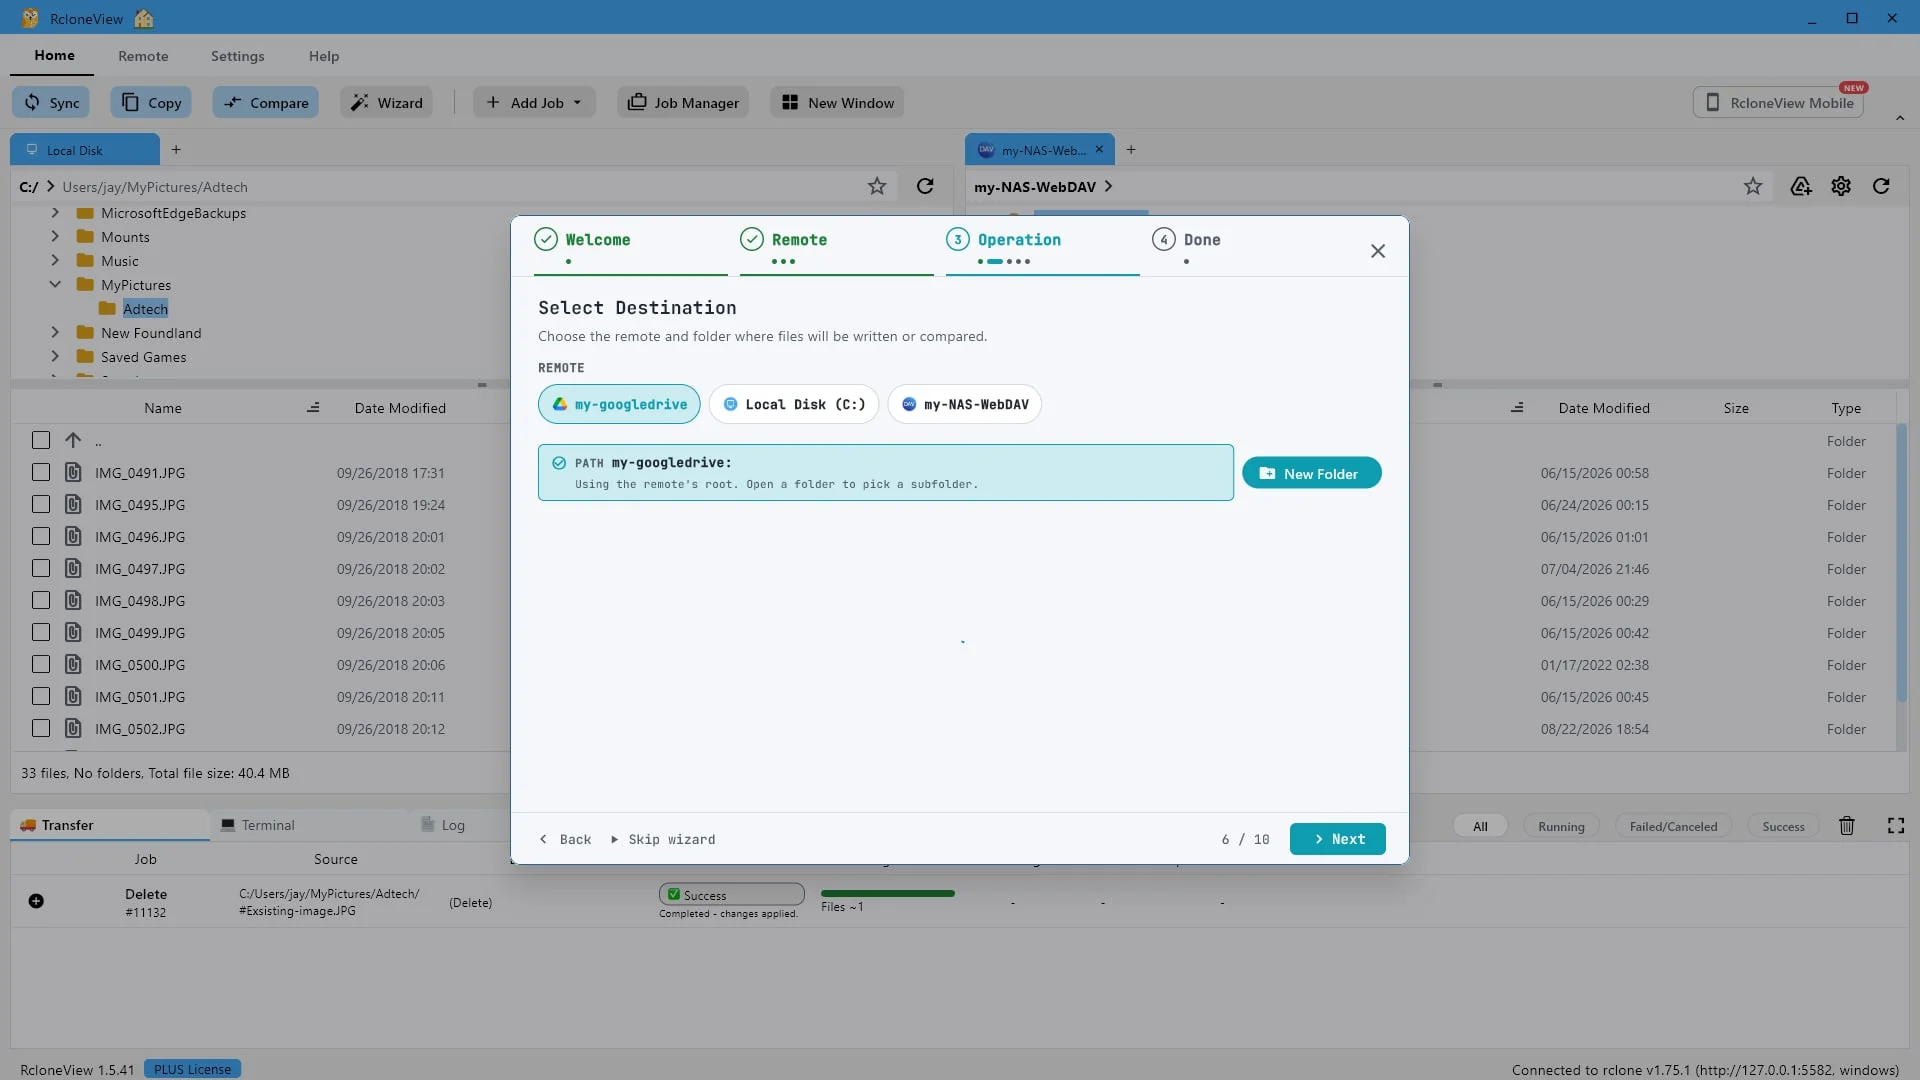
The destination receives the copy. Any remote can go here, including another cloud.
The destination is the side that receives the files. Any remote can go here, including a second cloud account or another folder on the same machine. We will pick my google drive.
-
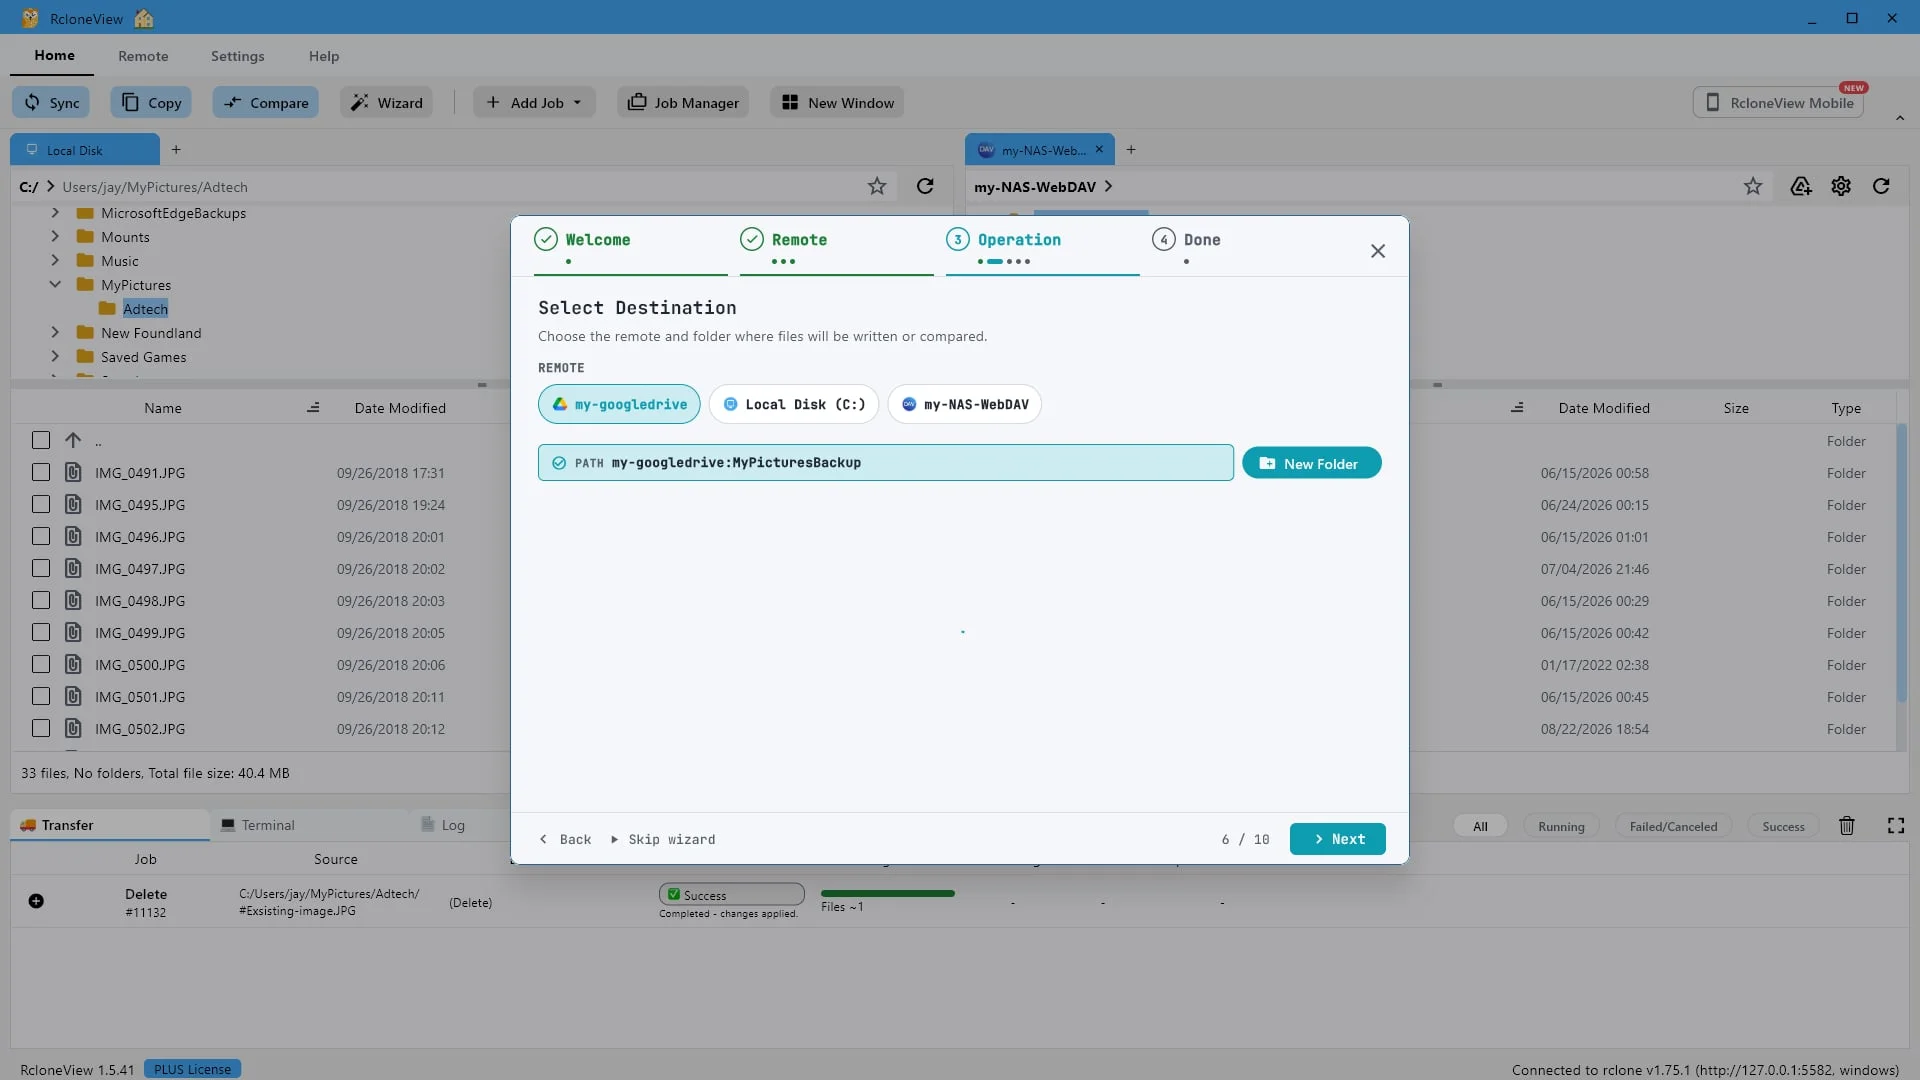
13Try this step ↗
Open or create the folder that will hold the backup.
Ours is called My Pictures Backup. Keep in mind that this folder is not empty, because that will matter in a moment.
-
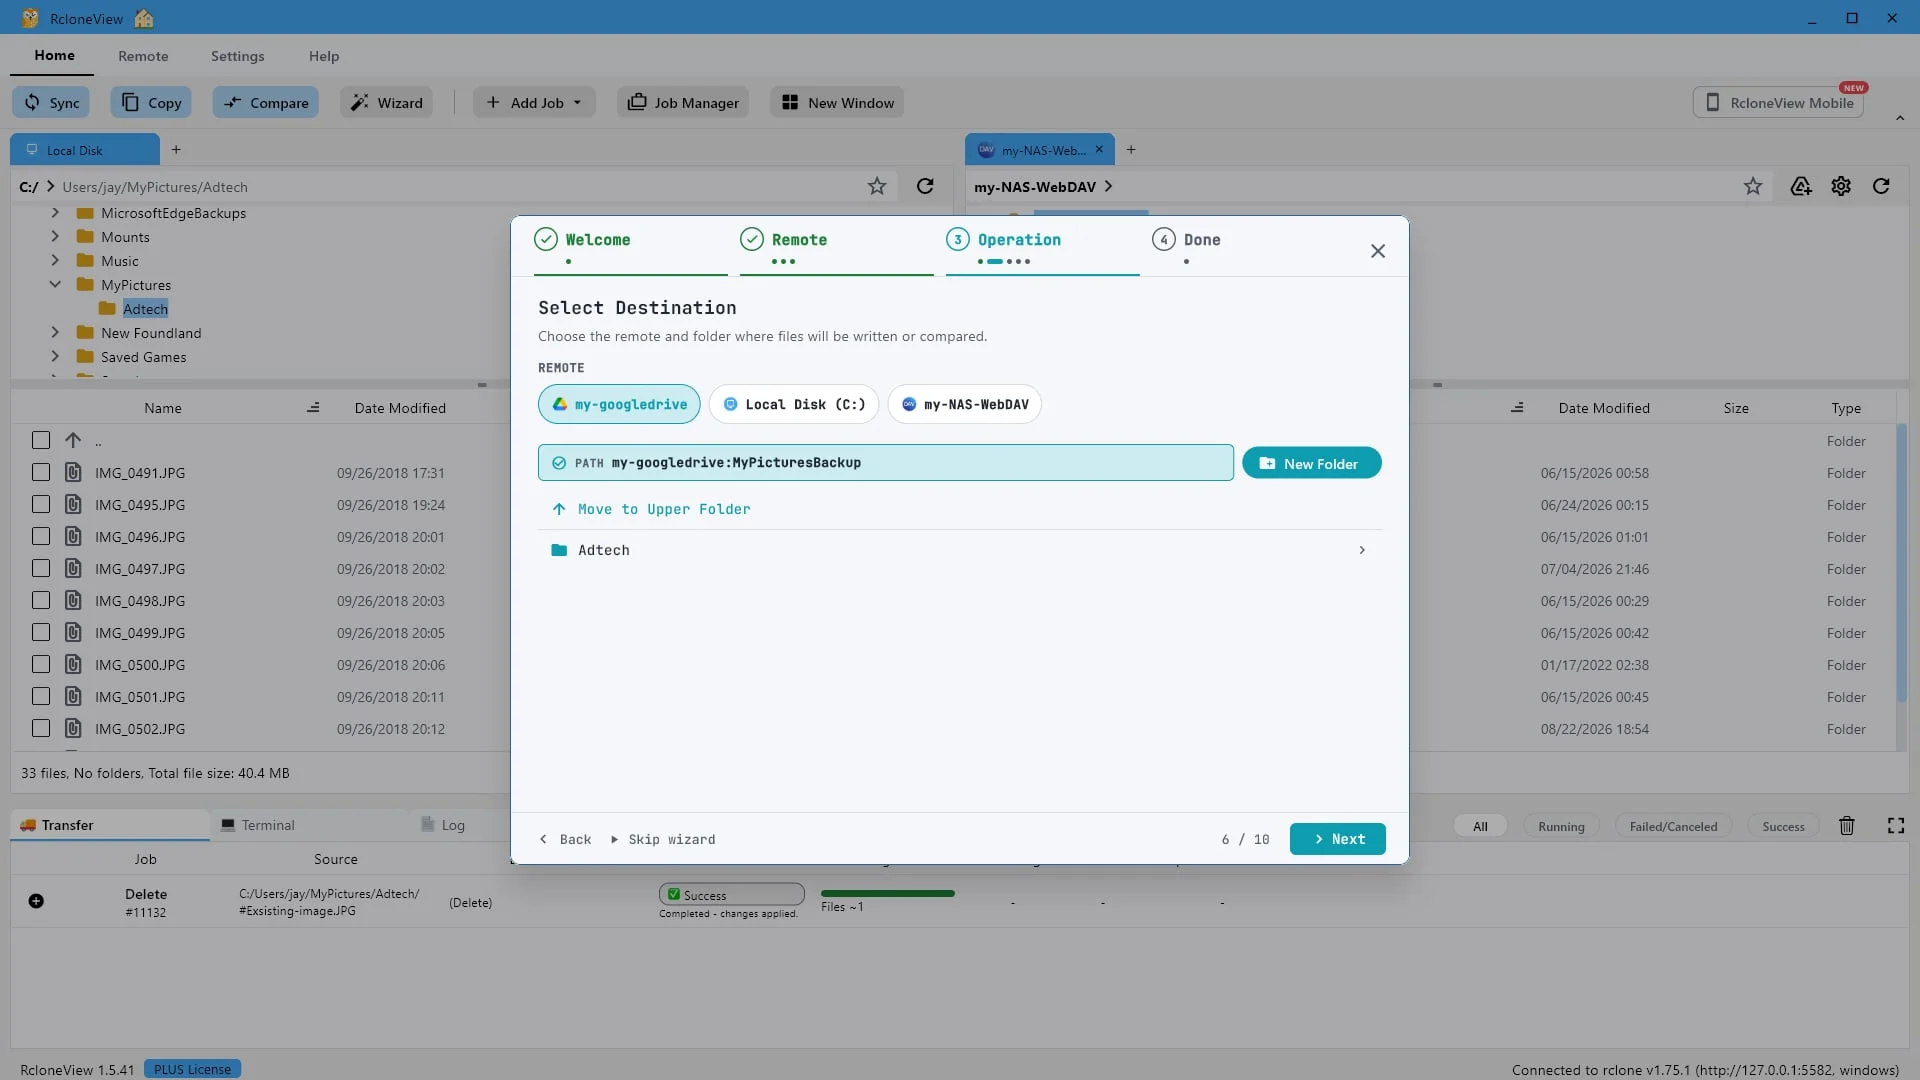
14Try this step ↗
Both sides are set: My Pictures on your disk, My Pictures Backup in the cloud.
My Pictures on the local disk is the source, and My Pictures Backup in Google Drive is the destination. Click Next.
-
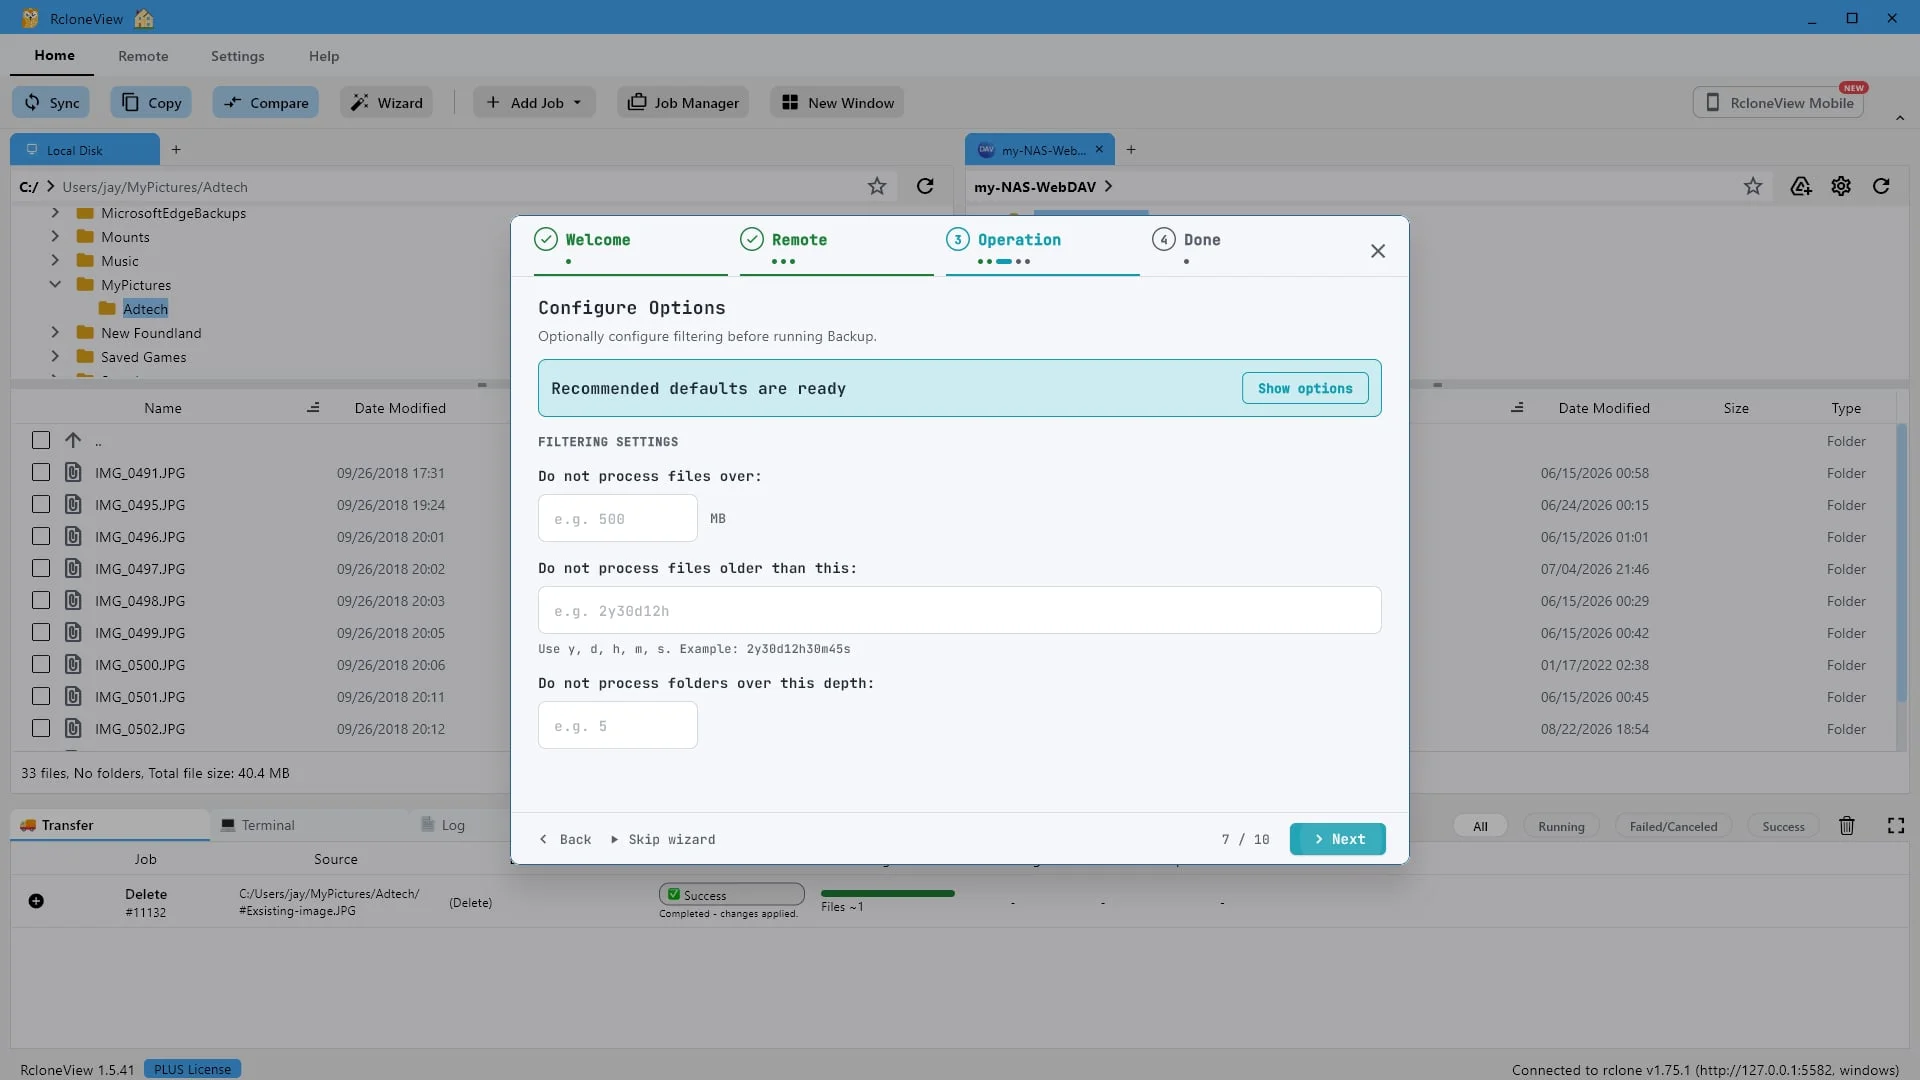
15Try this step ↗
The defaults suit most backups. Just click "Next"
Filters let you skip files that are too large, too old, or too deep in the folder tree. The recommended defaults are already in place, so most people can simply click Next.
-
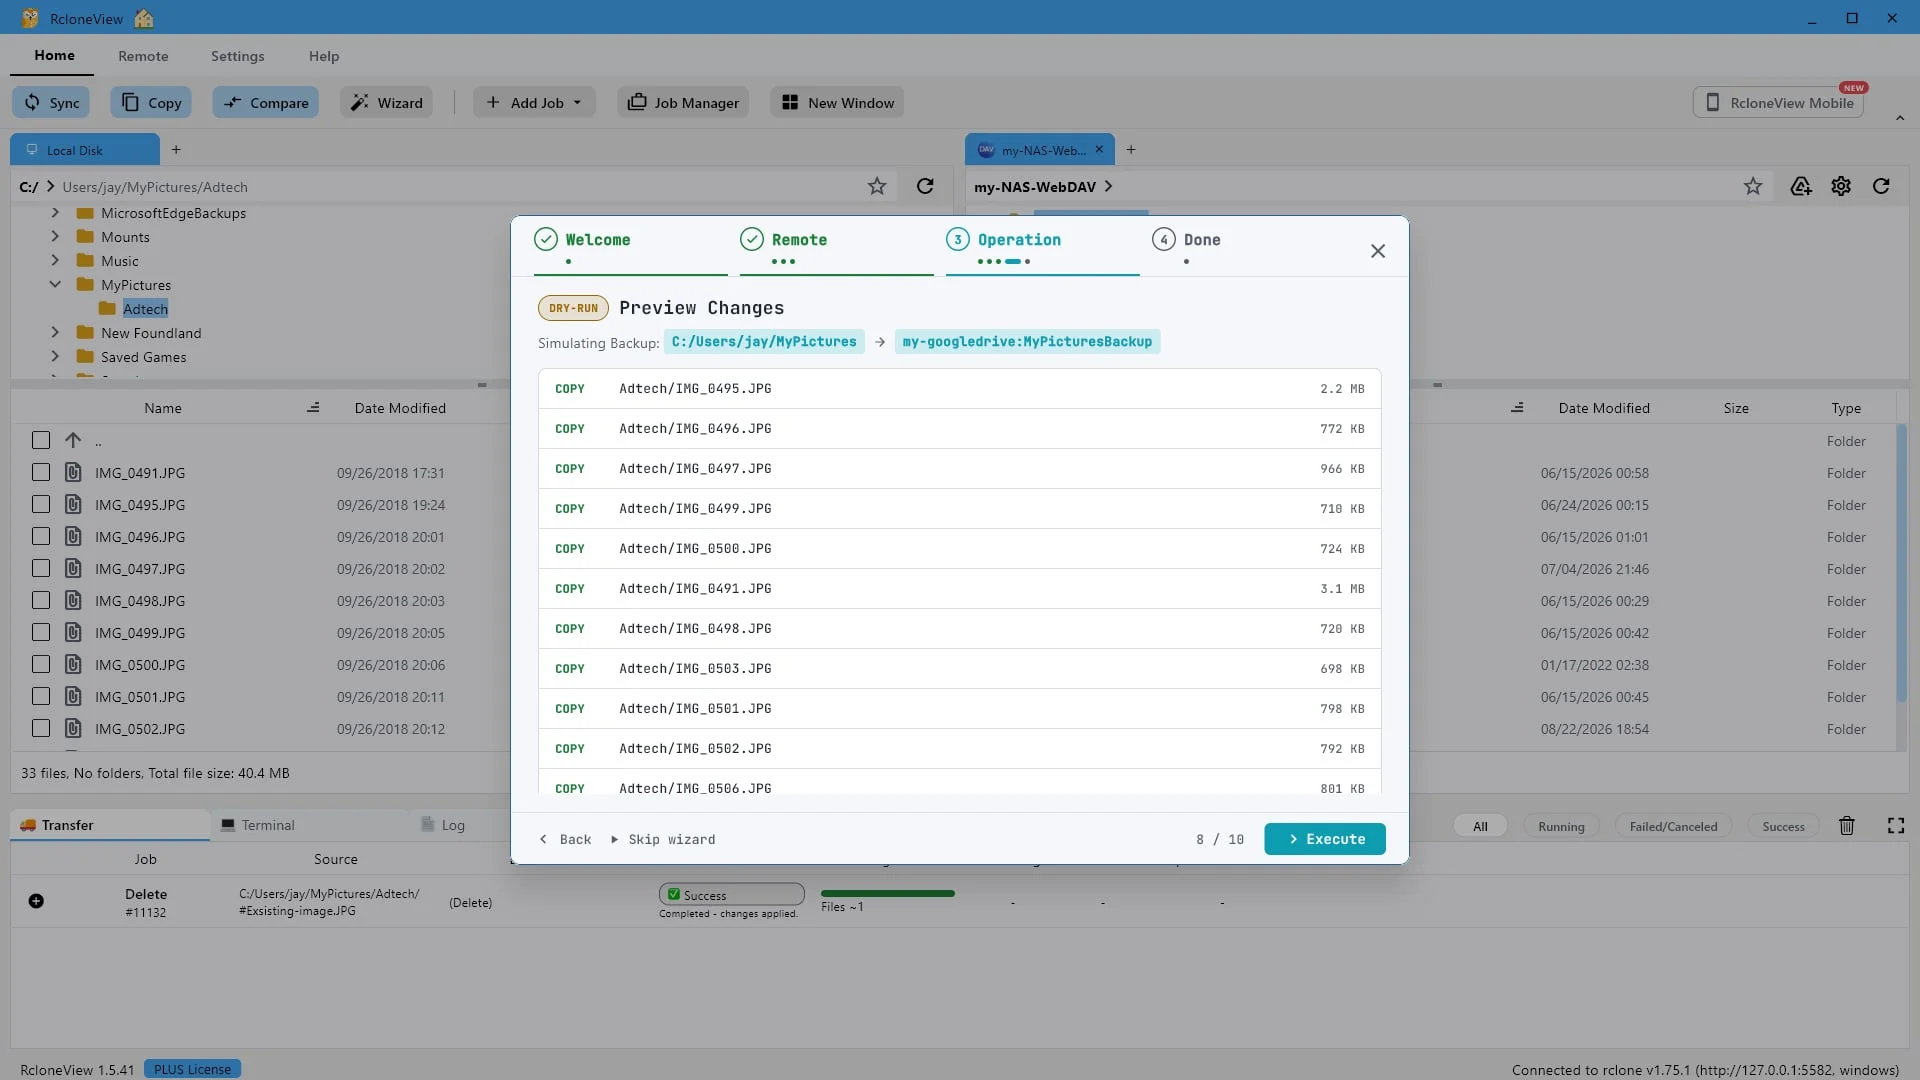
16Try this step ↗
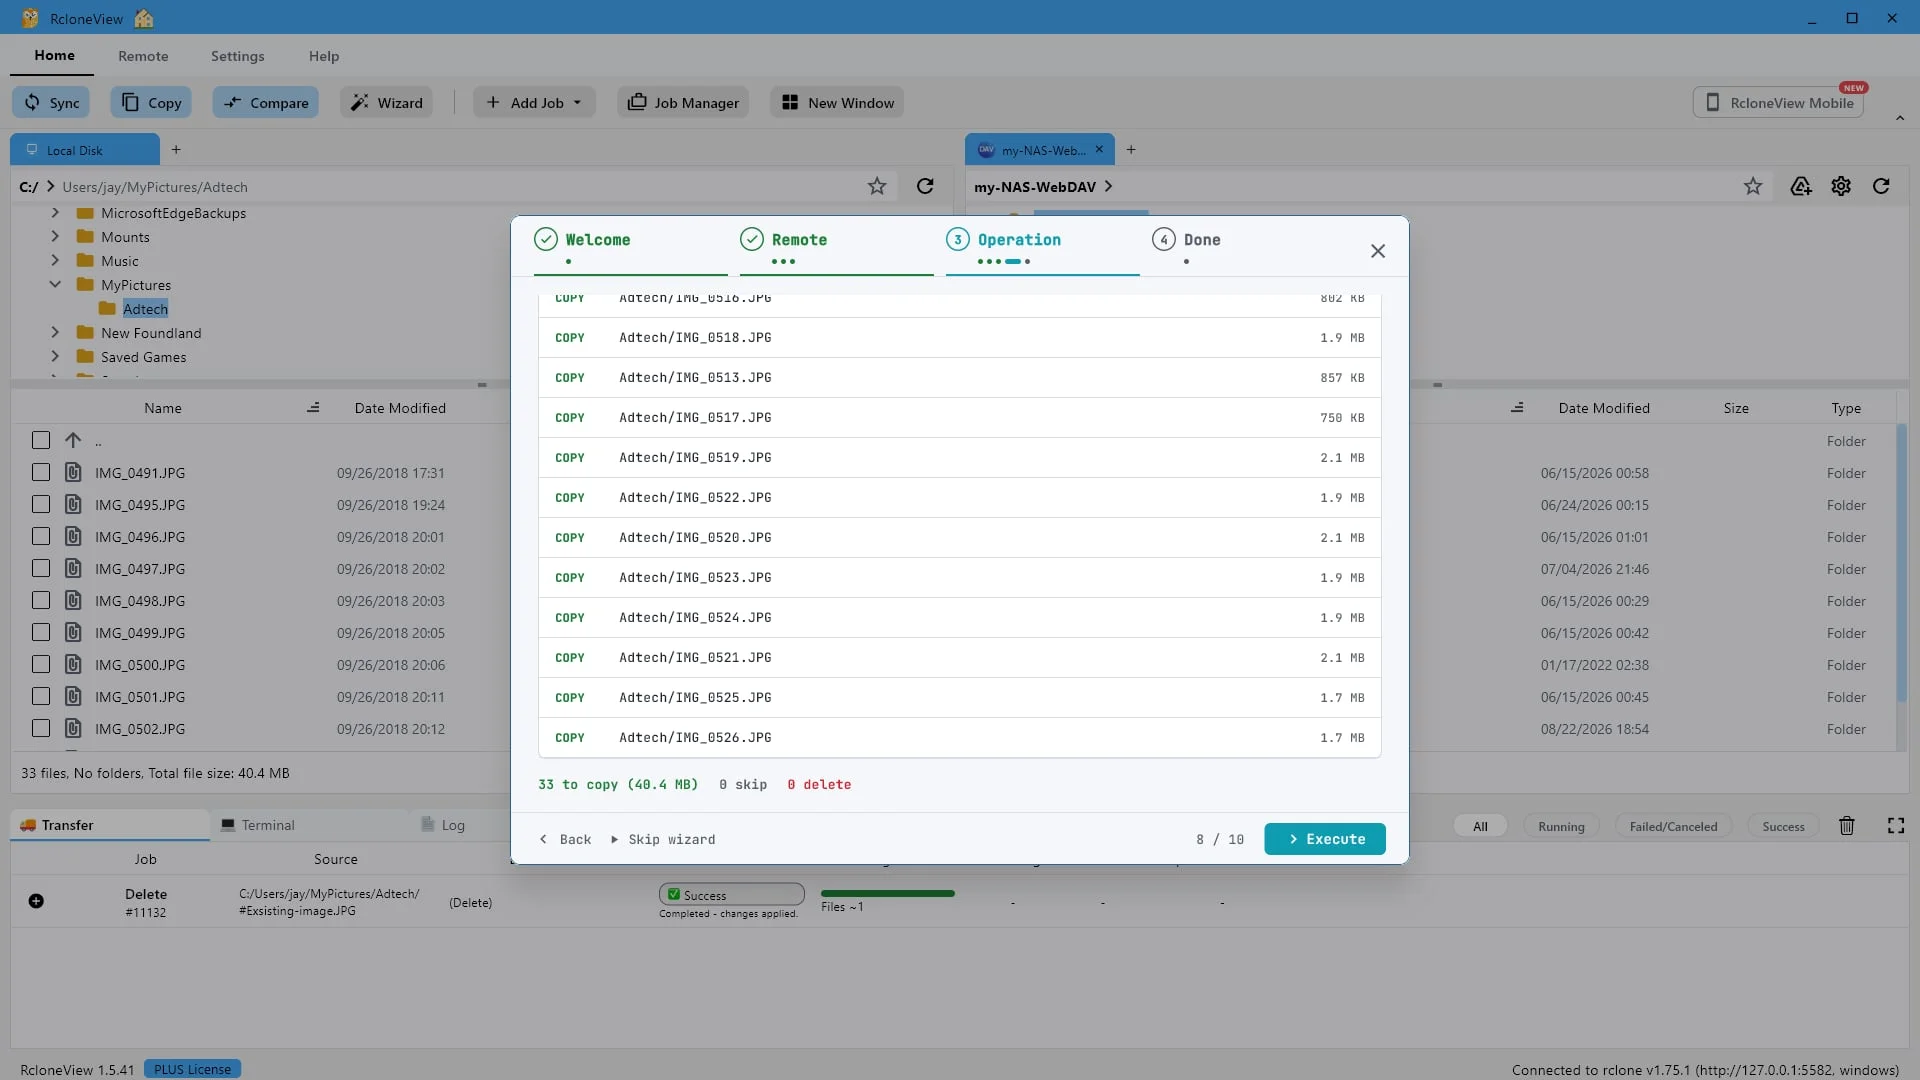
A dry run lists every file it would copy, before anything moves.
Before anything is written, RcloneView does a dry run. Every file it intends to copy is listed here by name and size. Nothing has left your computer yet.
-
17Try this step ↗
33 to copy, 0 to delete. A one way copy never removes anything at the destination. Click "Execute"
Read the summary line. Thirty three files to copy, nothing skipped, and zero to delete. That zero is the difference between a backup and a sync. A sync makes the destination match the source and removes whatever is extra. A copy only adds and updates.
-
18Try this step ↗
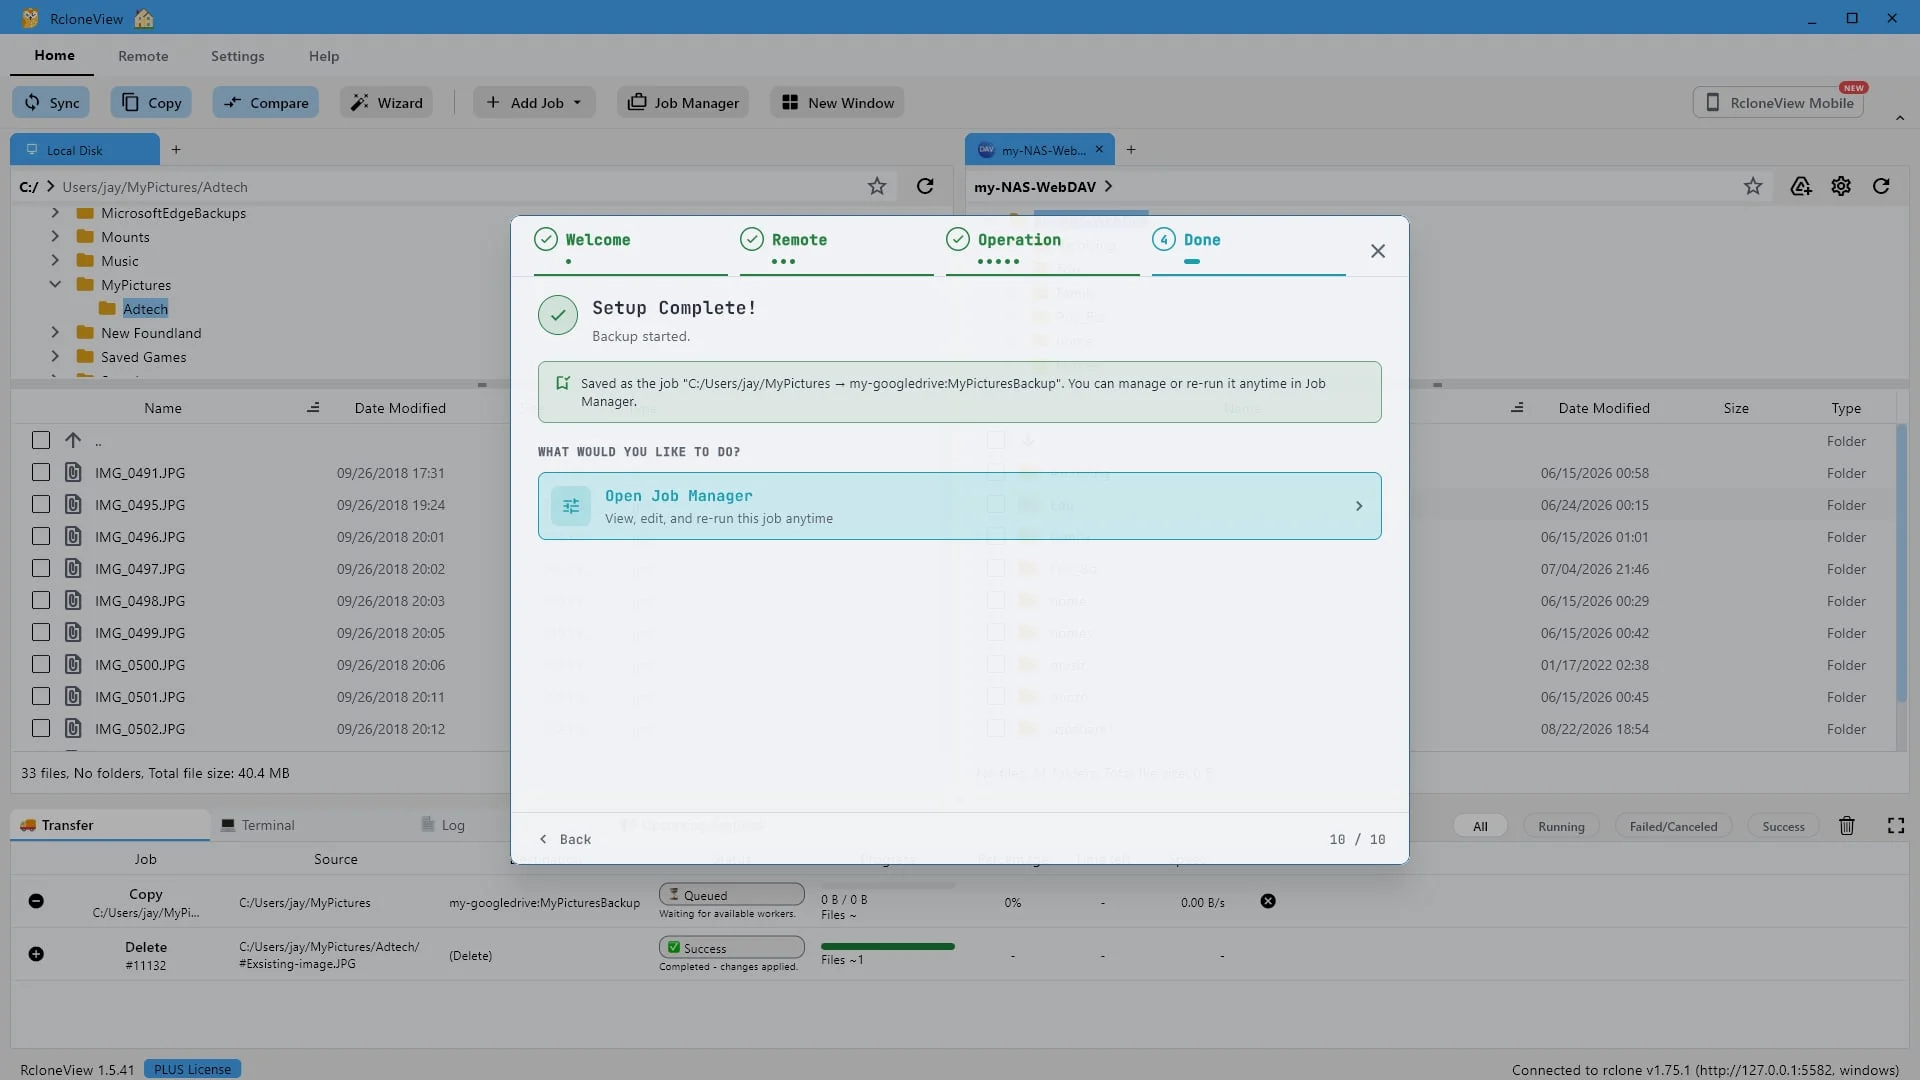
The backup started, and the wizard saved it as a reusable job.
The backup is running, and notice what else happened. Everything you just answered was saved as a job. You never have to walk through the wizard again for this pair of folders. Open Job Manager to see it.
-
19Try this step ↗
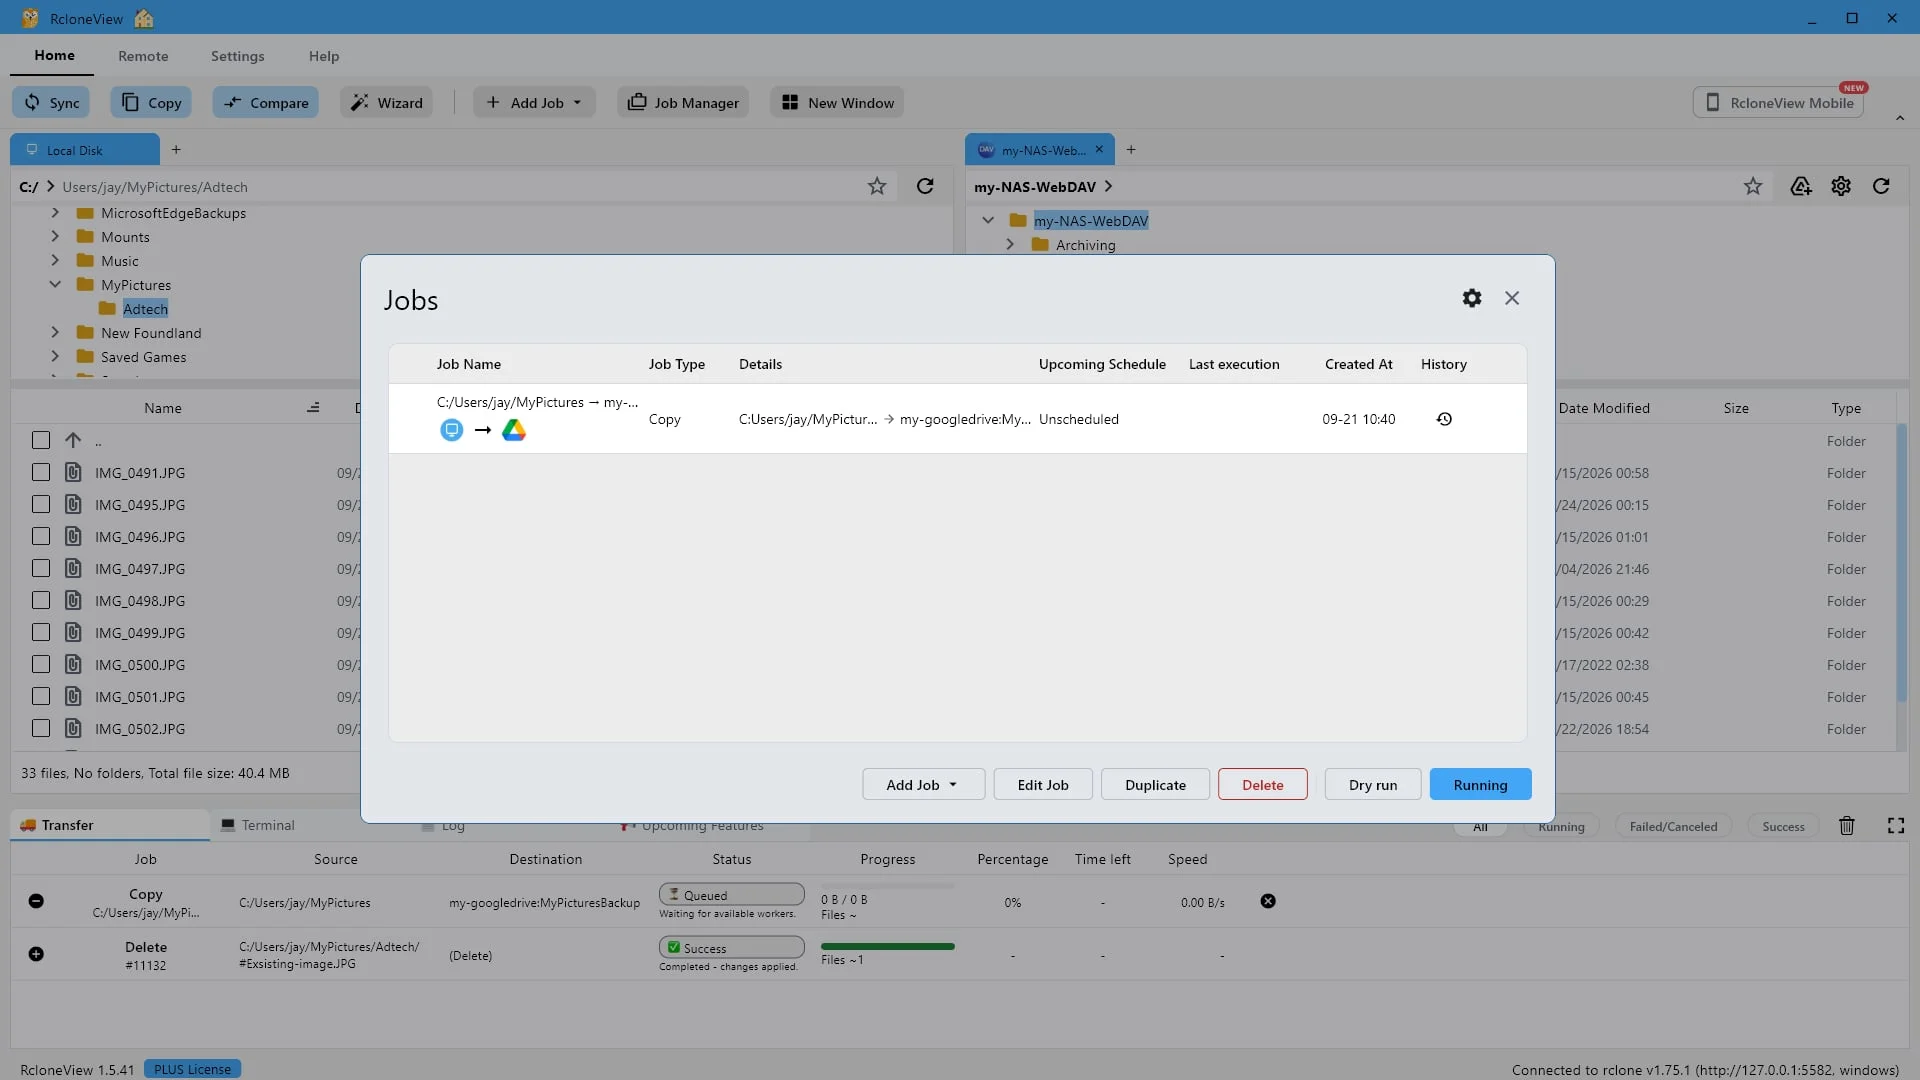
Your wizard answers are now one saved job: source, destination and options together.
Here is that job. Source, destination, job type and options are all stored in a Job. It is unscheduled for now, so it runs when you tell it to, and you can give it a schedule later.
-
20Try this step ↗
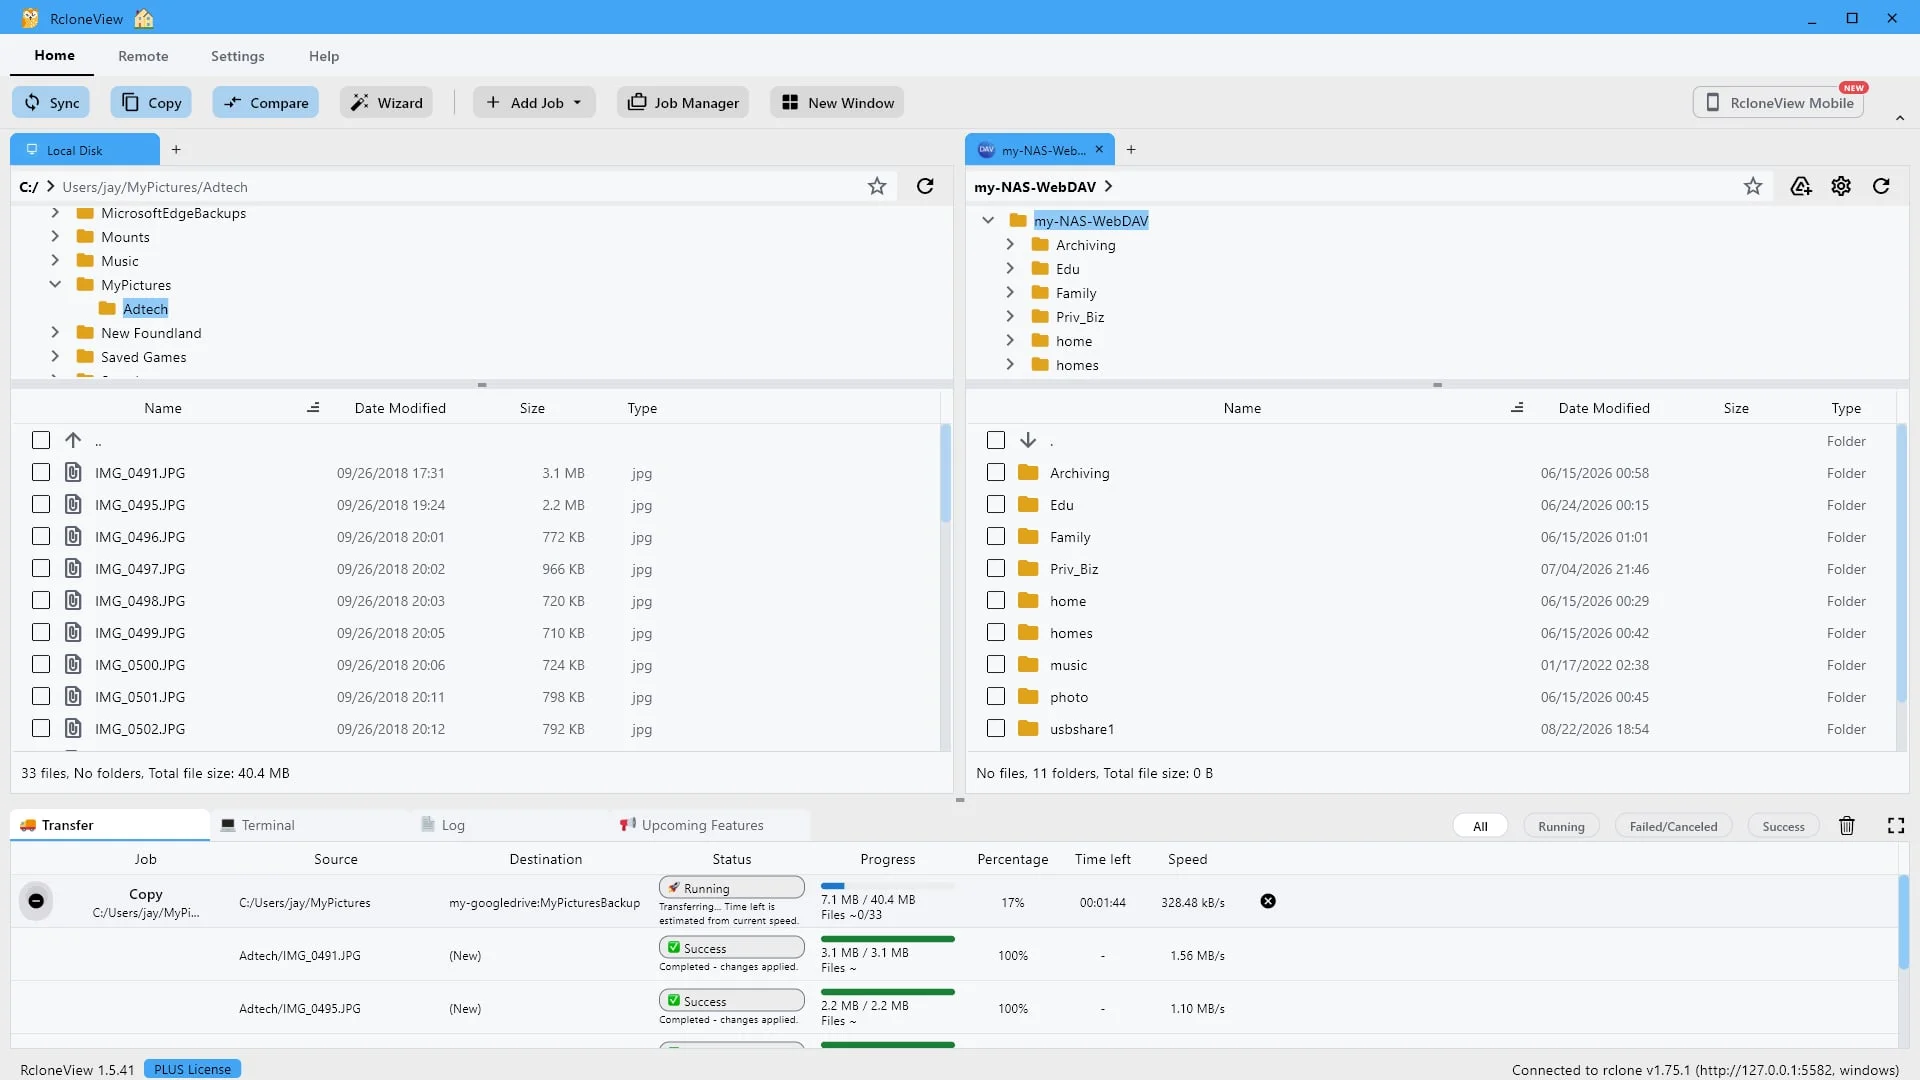
Watch the transfer live: progress, speed and time left, file by file.
While the job runs, the transfer panel shows progress, speed and time remaining, file by file. Seventeen percent through, and the first photos are already marked success.
-
21Try this step ↗
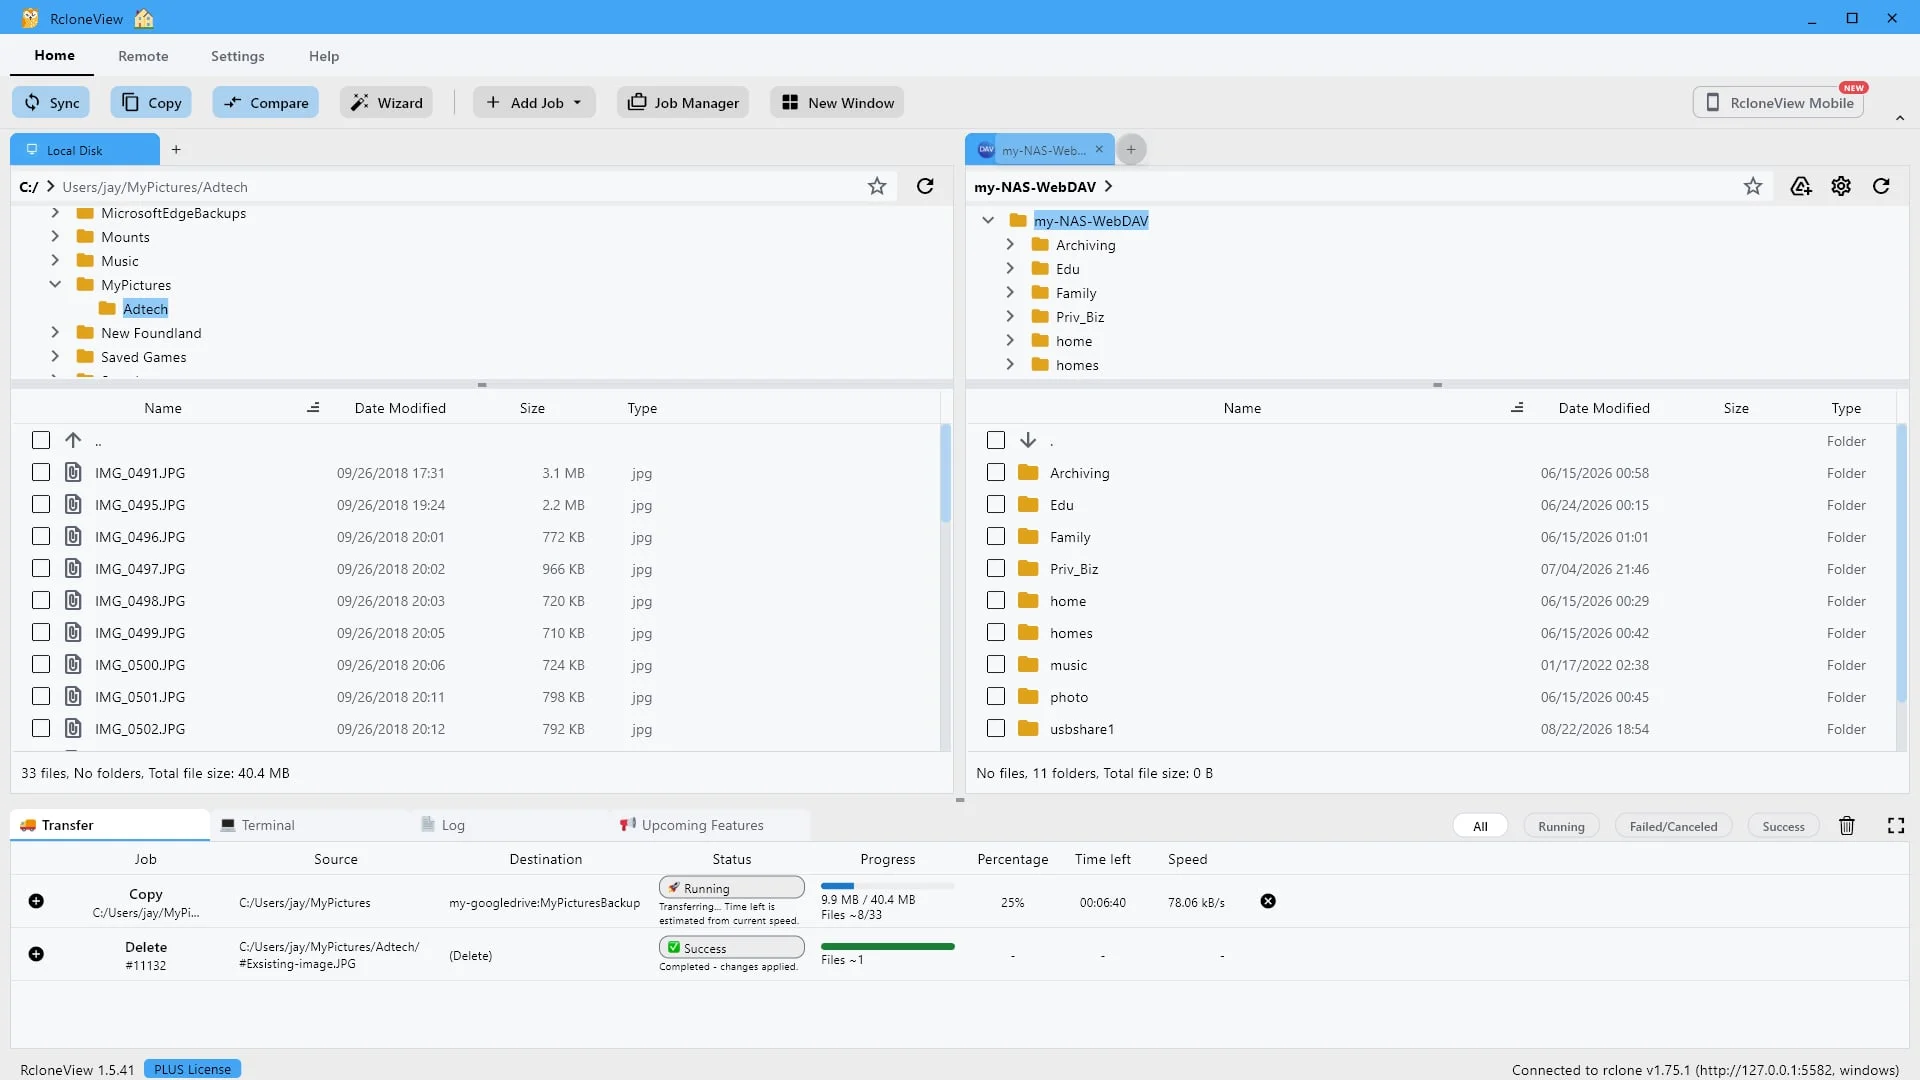
Open the destination in its own tab to check the result yourself.
Open a new tab so we can look at the destination directly.
-
22Try this step ↗
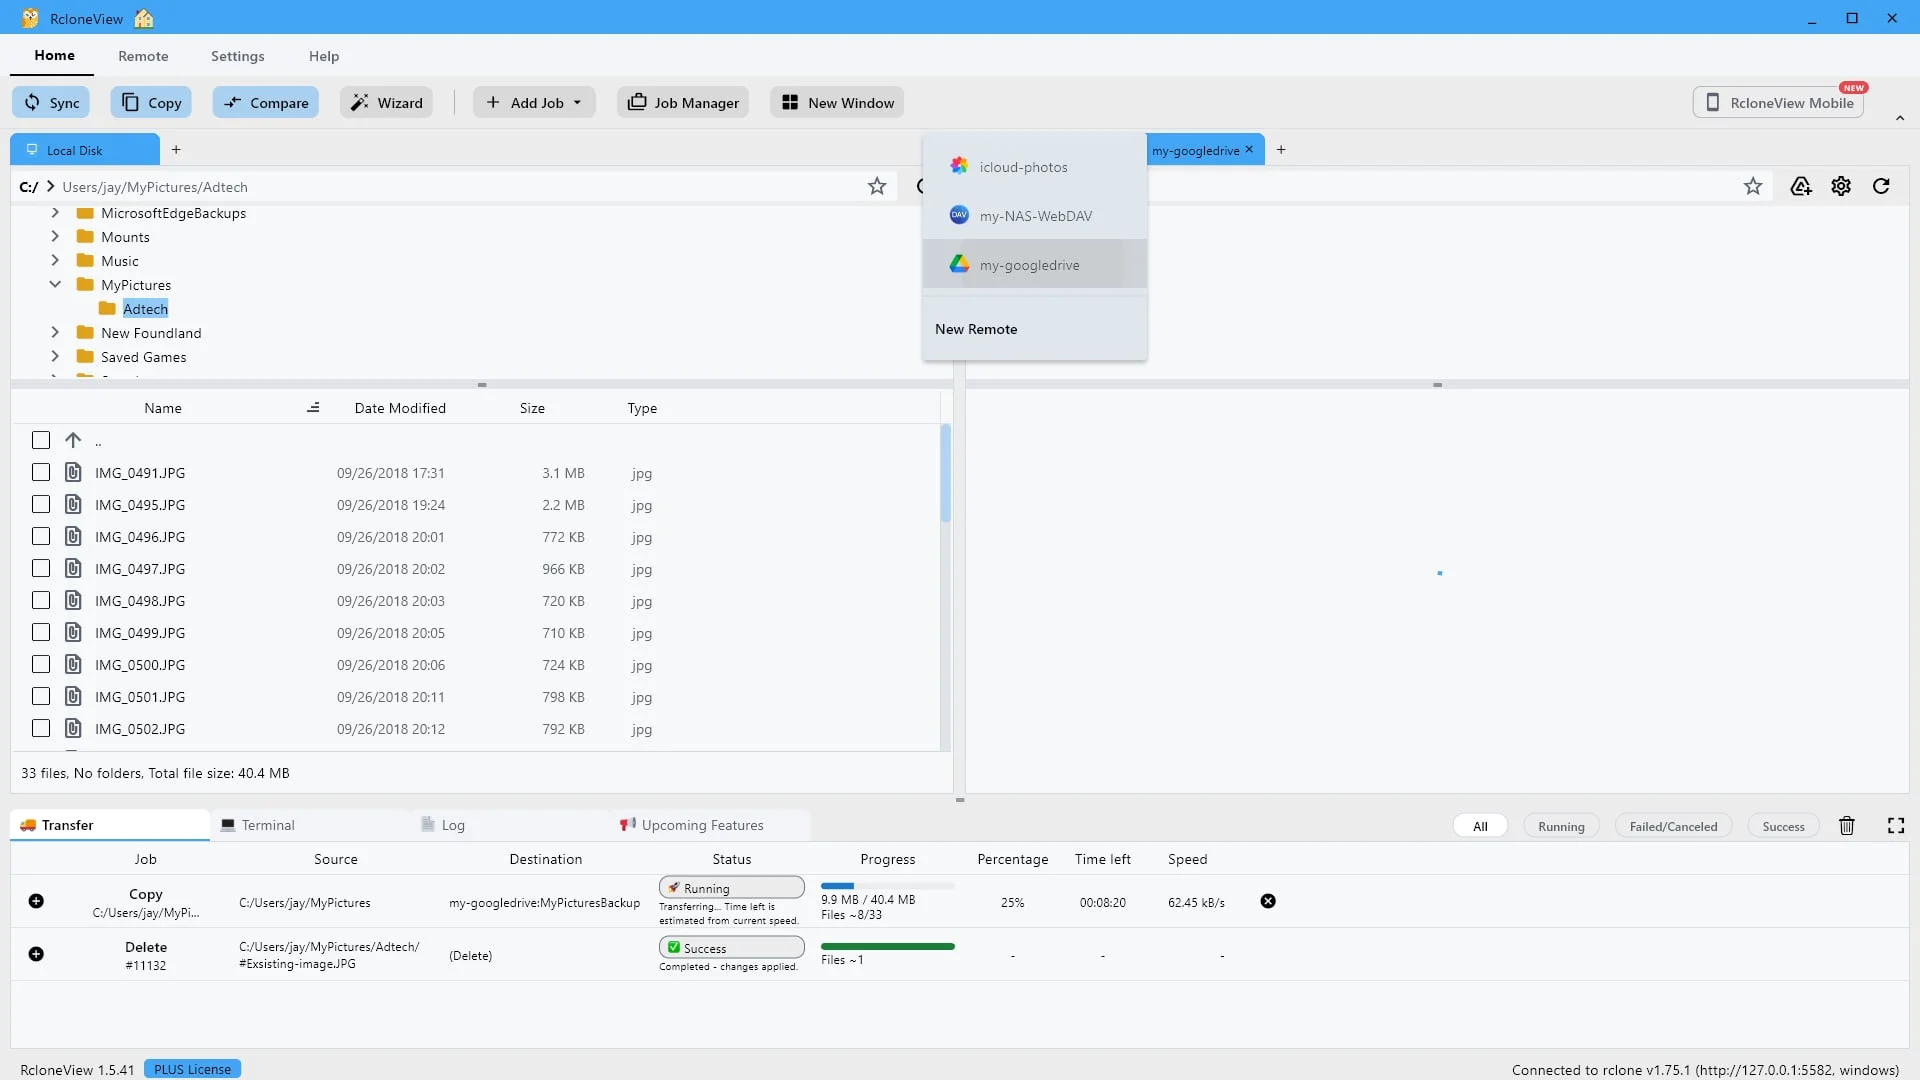
Choose the remote you just backed up to.
Choose my google drive, the remote we just backed up to.
-
23Try this step ↗
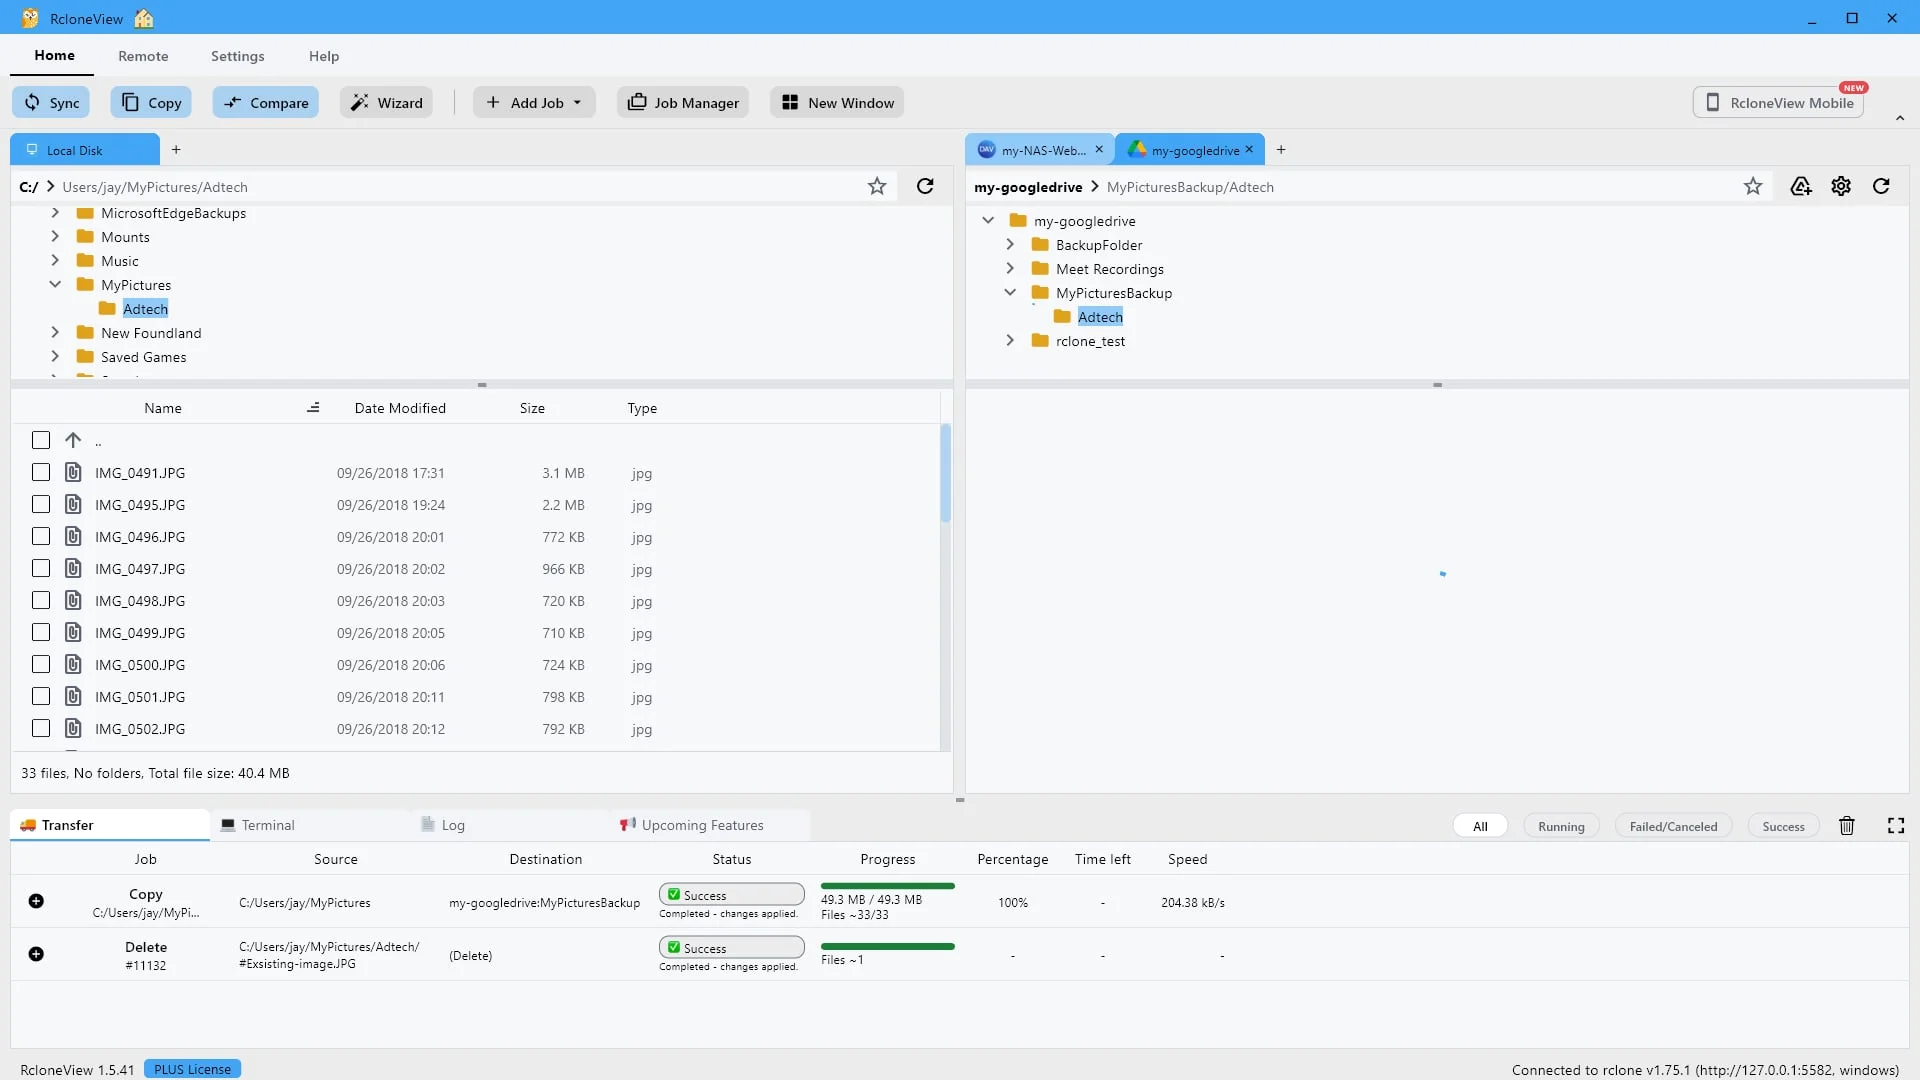
The Adtech folder was created by the copy, mirroring your local structure.
Open My Pictures Backup. Open it.
-
24Try this step ↗
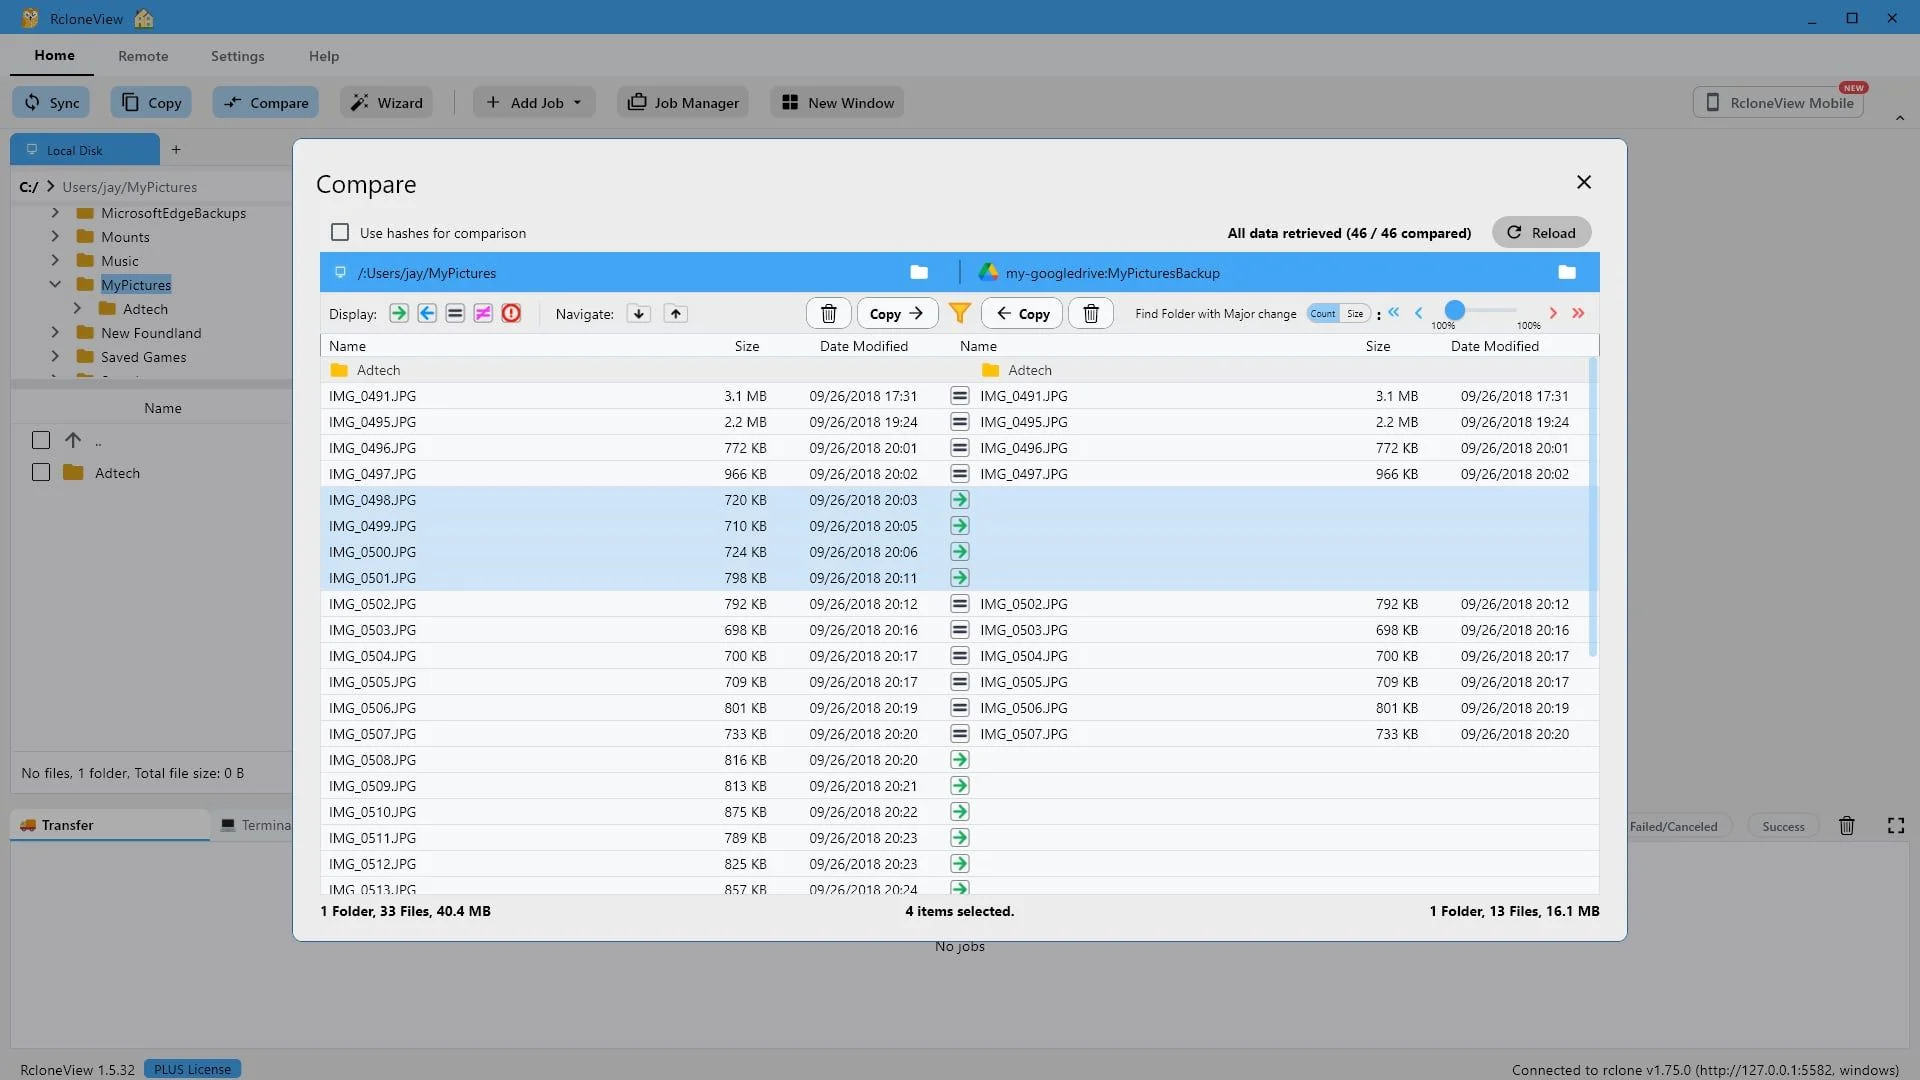
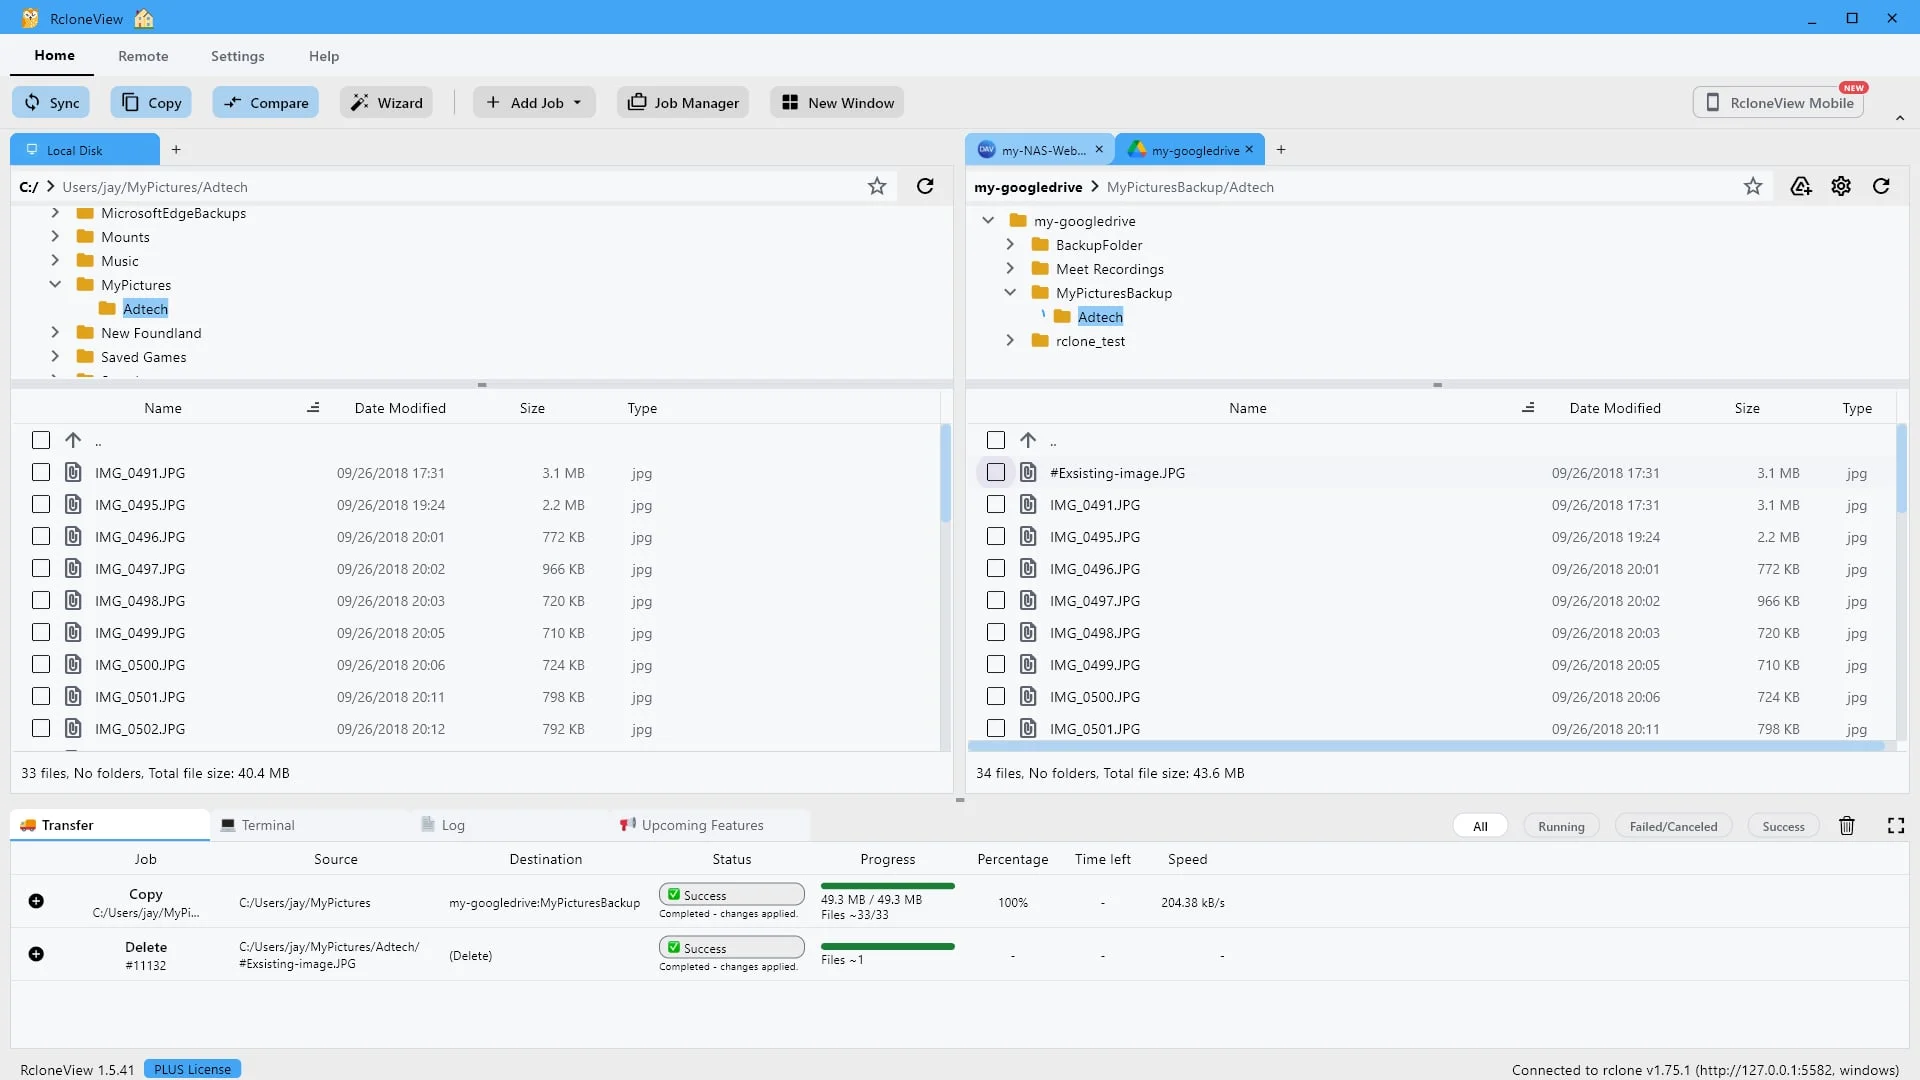
33 files on the left, 34 on the right. The extra file was already there and survived the backup.
Now compare the two panes. The local folder holds thirty three photos. The backup holds thirty four. The extra one was already in the destination before we started, and the backup left it exactly where it was. A sync would have deleted it. That is what a one way copy protects you from.
-
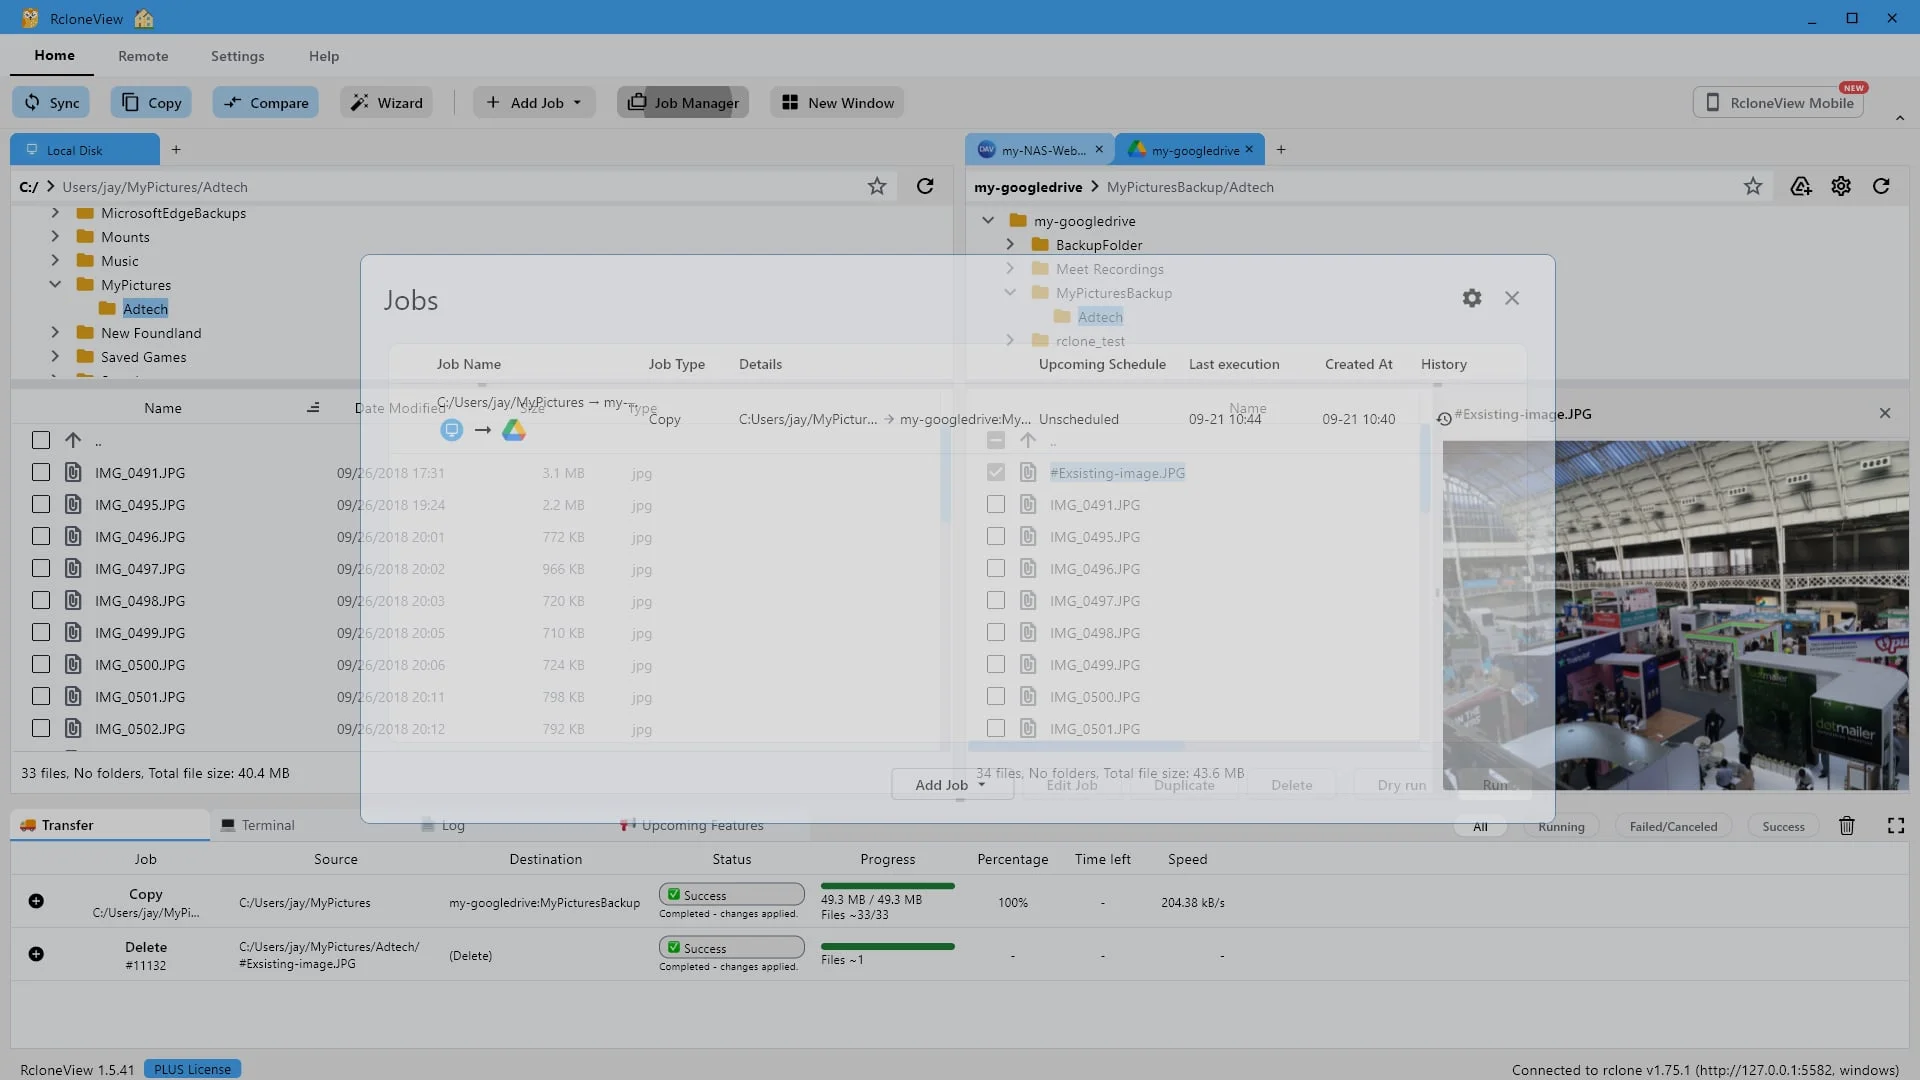
25Try this step ↗
Come back to the saved job to see what it is worth.
The files are safe. Now let's go back to that saved job and see what it is worth. Open Job Manager.
-
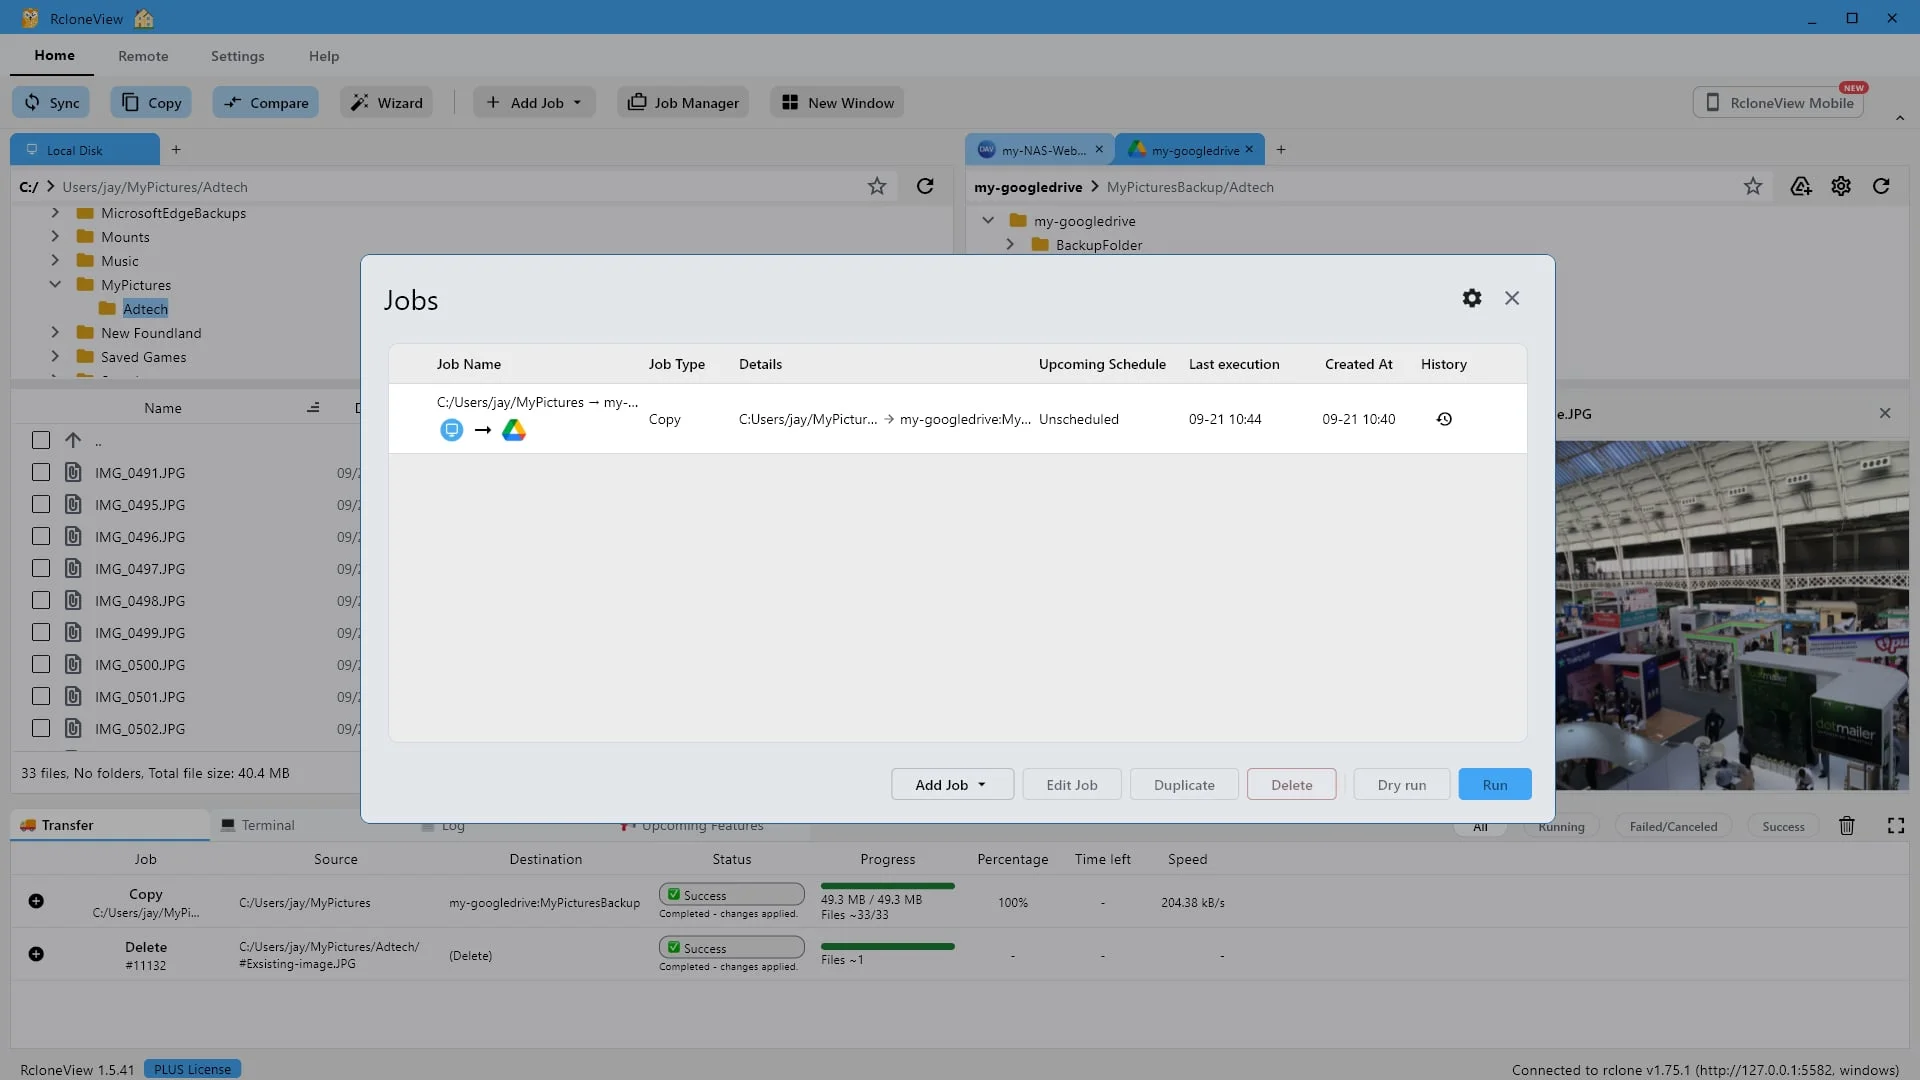
26Try this step ↗
The same job, now with a last execution time recorded.
The job is still here, and it now shows when it last ran. Select it to work with it.
-
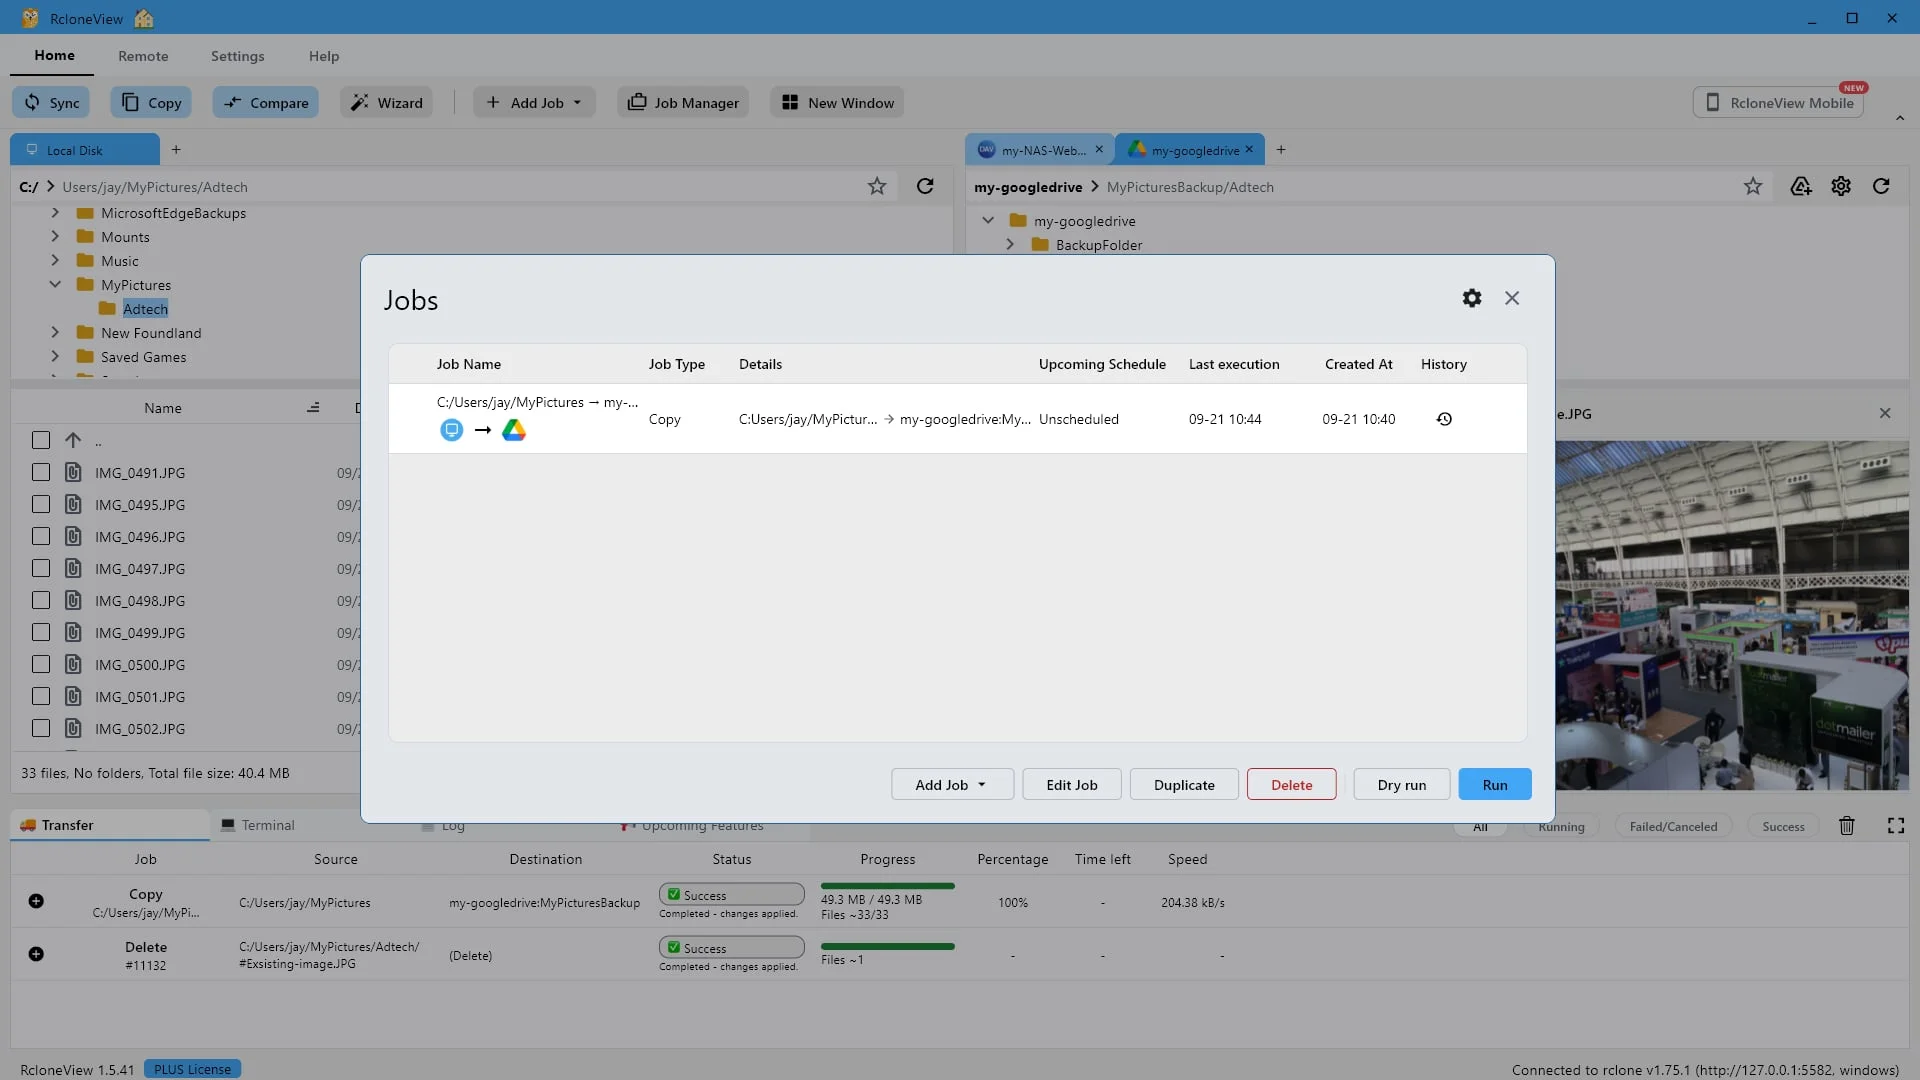
27Try this step ↗
Run repeats the whole backup with one click. Dry run previews it first.
This is the payoff. One click on Run repeats the entire backup, and because it is a copy, only new and changed files move. Dry run previews it first, and Edit Job lets you change the paths or add a schedule.
-
Ready to try it yourself?Free for Windows, macOS and Linux.Get RcloneView Free