Compare
Compare any two clouds or local folders in 3 minutes
Put two locations side by side and spot what’s new, missing or changed — then copy or clean up right from the comparison view.
- Compare cloud-to-cloud, cloud-to-local or local-to-local
- Highlight new, modified and missing files at a glance
- Copy or delete selected files directly from the results
The demo player couldn’t load. Use “Open in new tab” instead.
Watch next
See all demos →
Step-by-step guide
How to compare two clouds or folders
The same 20 steps as the interactive demo, with screenshots — skim it, or jump into the demo at any step.
-
1Try this step ↗
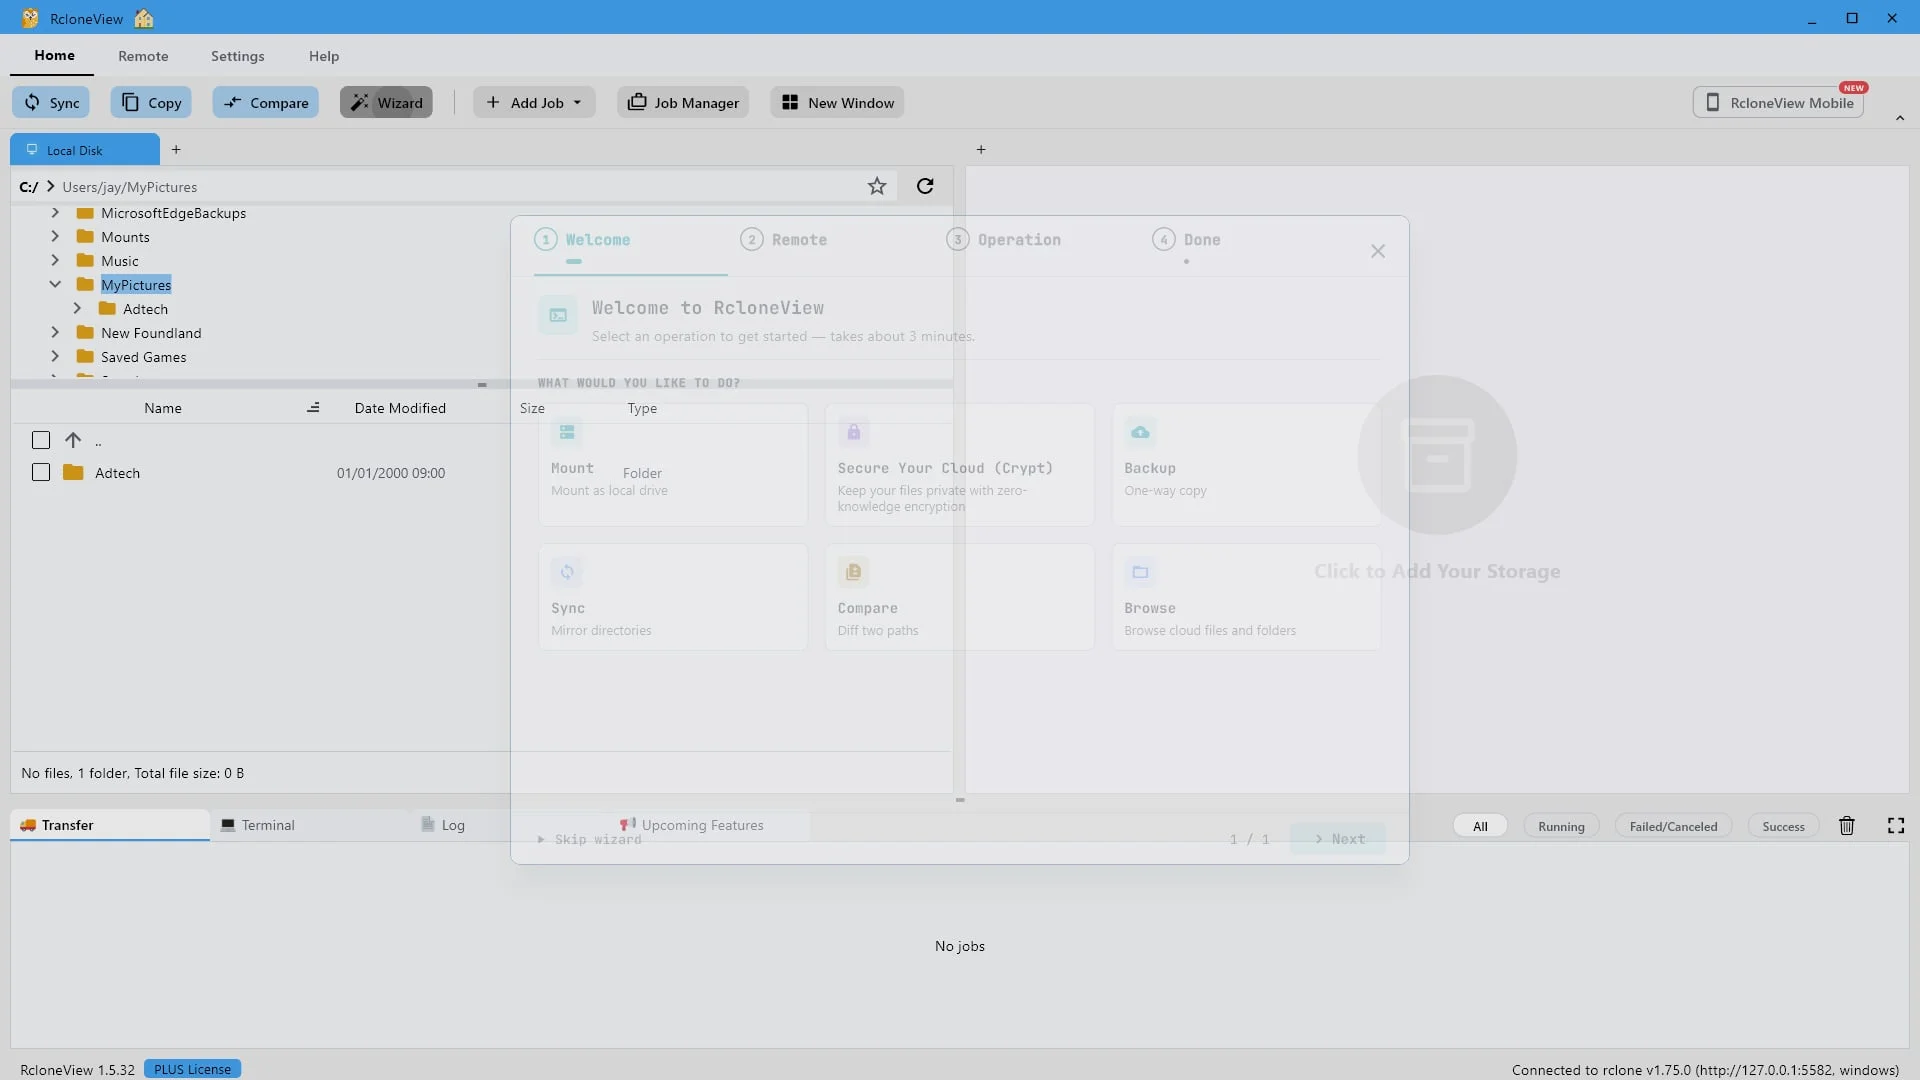
Start here. Click "Wizard" to open the guided setup.
We begin on the RcloneView home screen.
-
2Try this step ↗
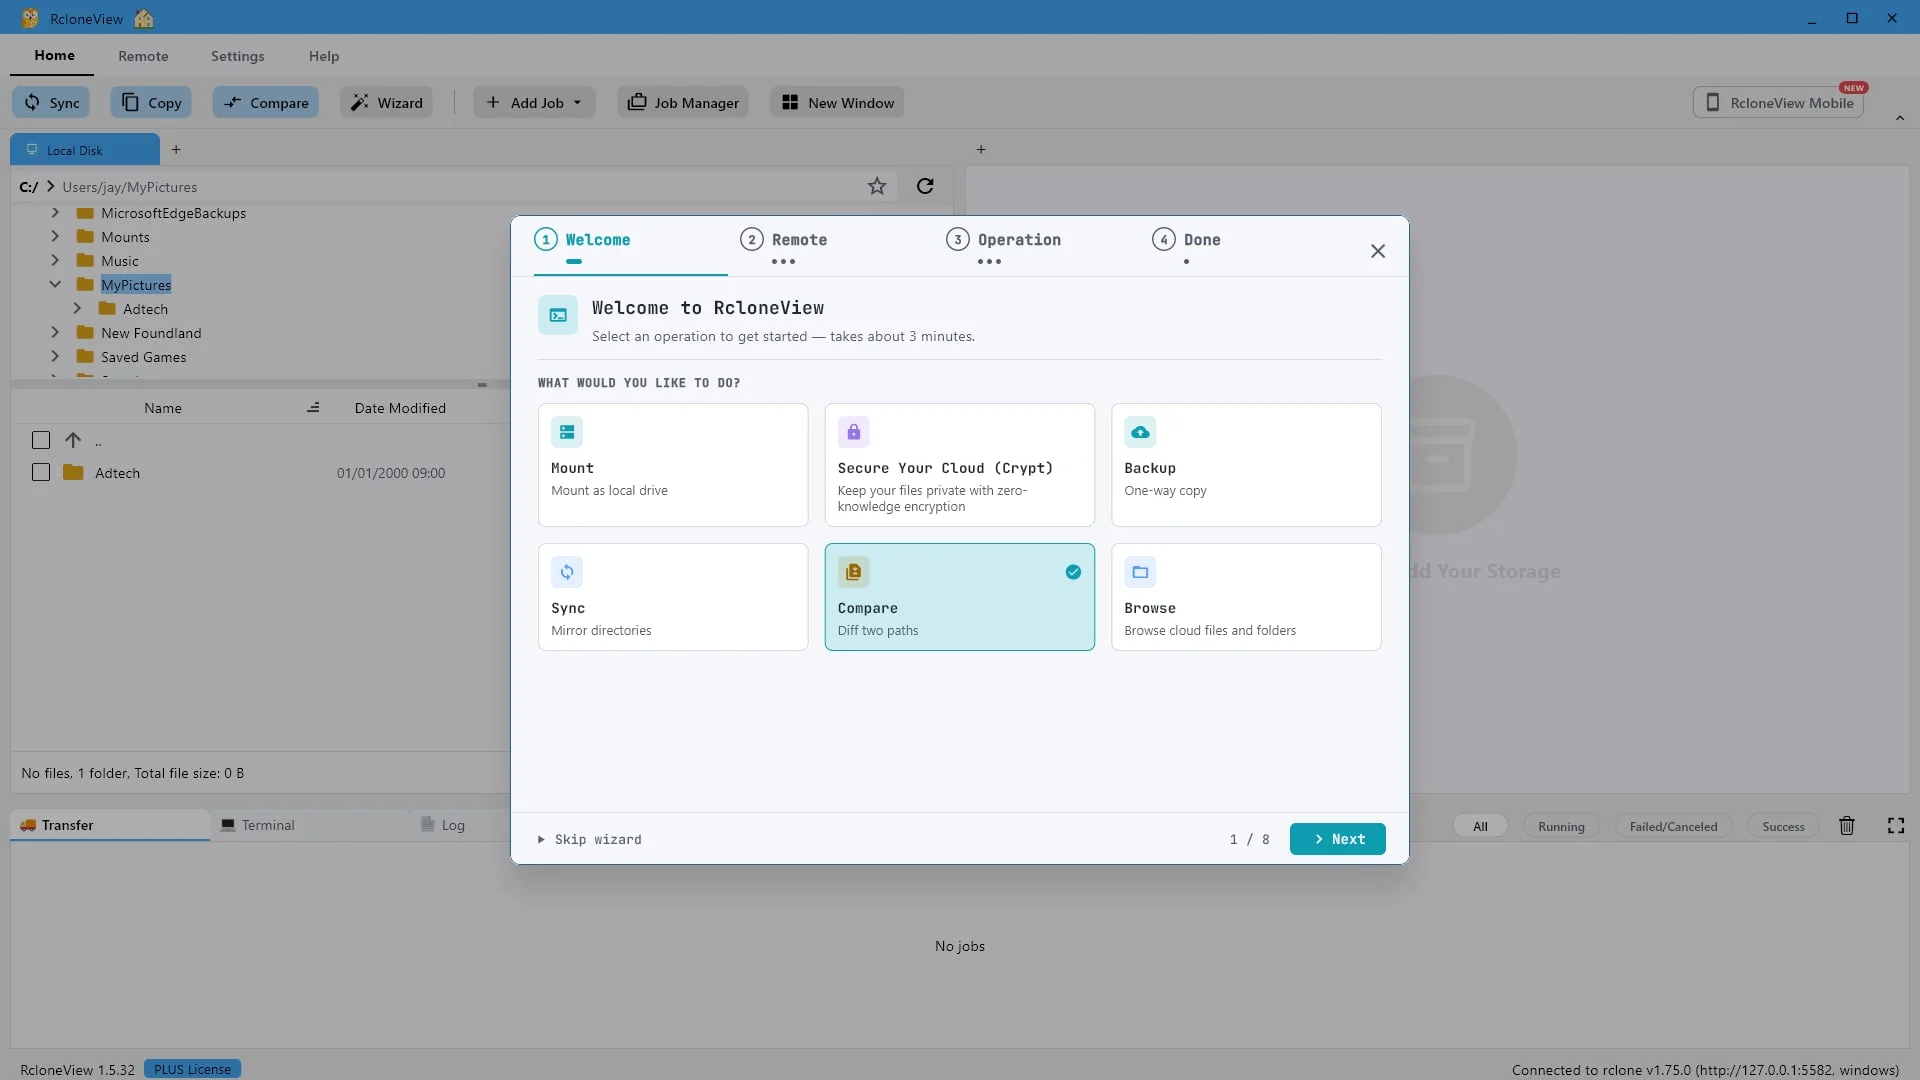
Choose "Compare - Diff two paths" to see what's different between any two folders.
The wizard can handle several steps. Choose Compare, diff two paths, to line up any two folders and see exactly where they disagree.
-
3Try this step ↗
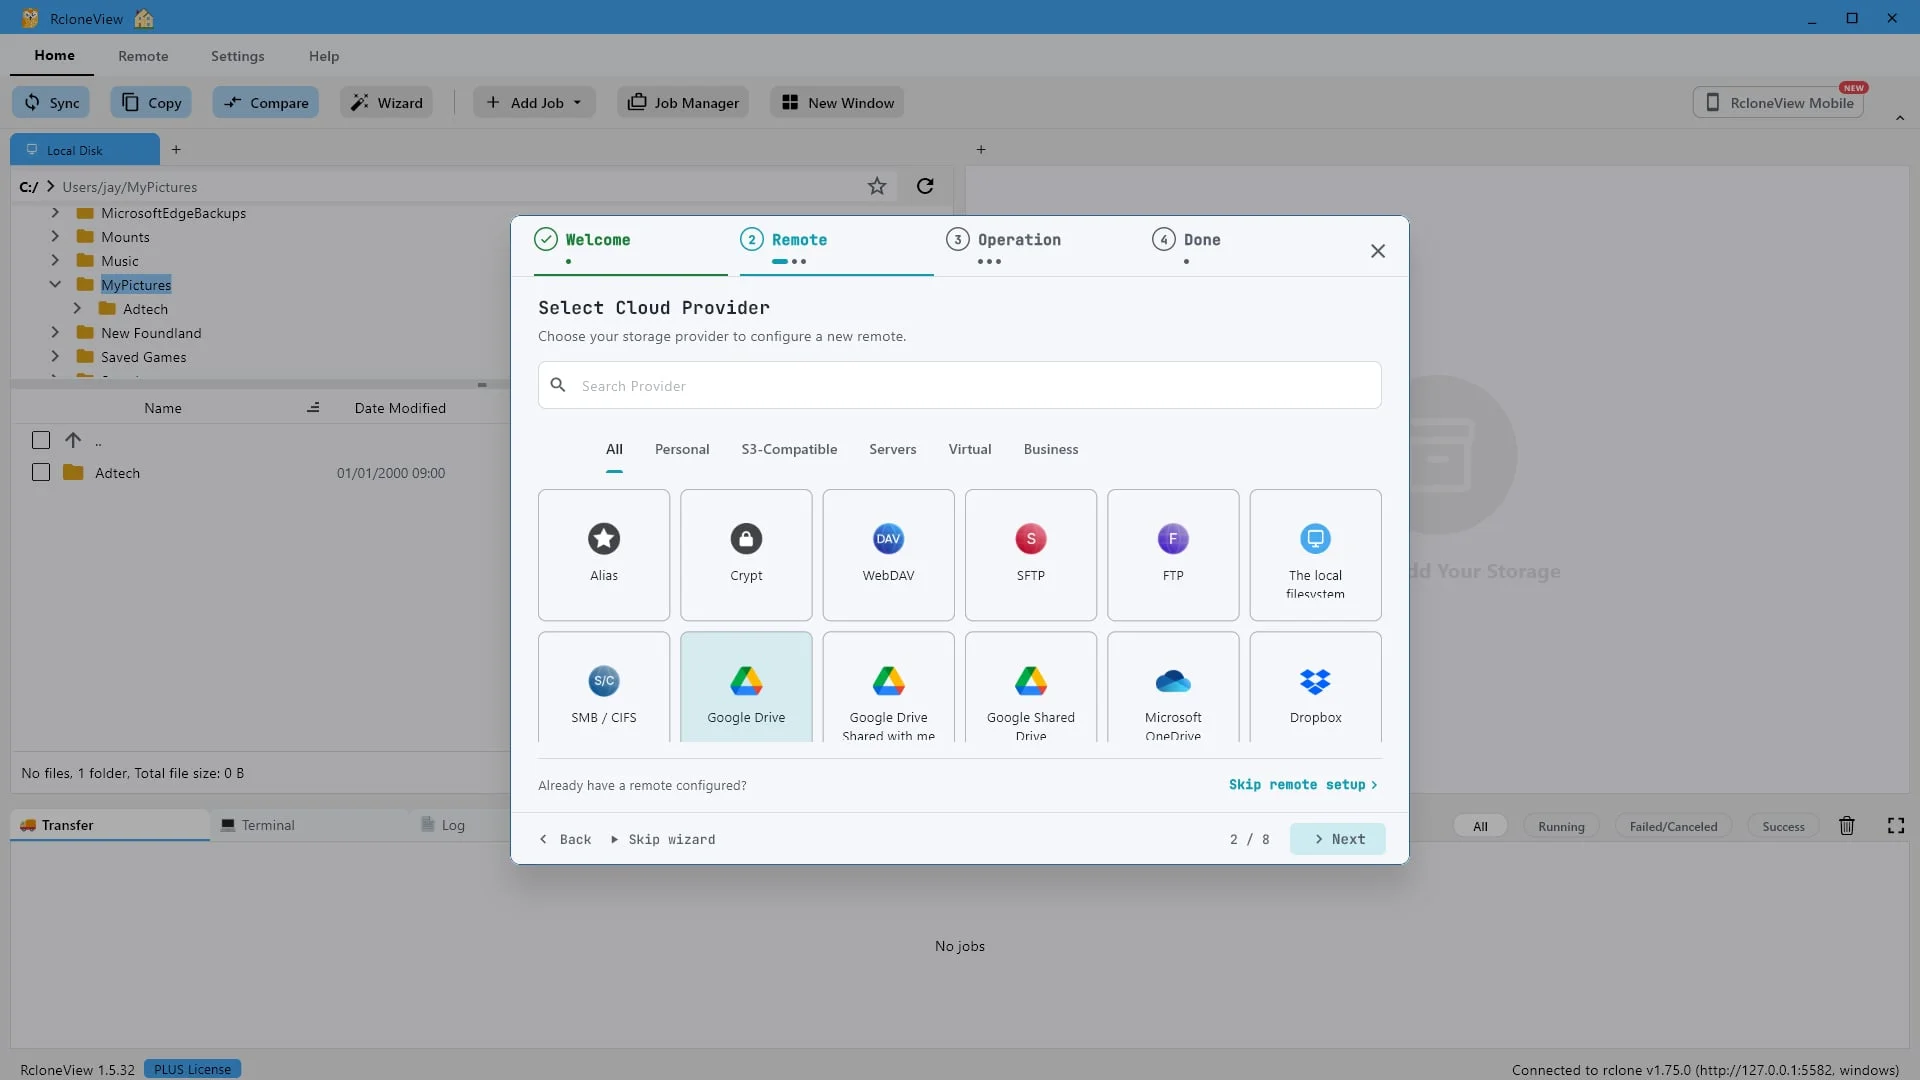
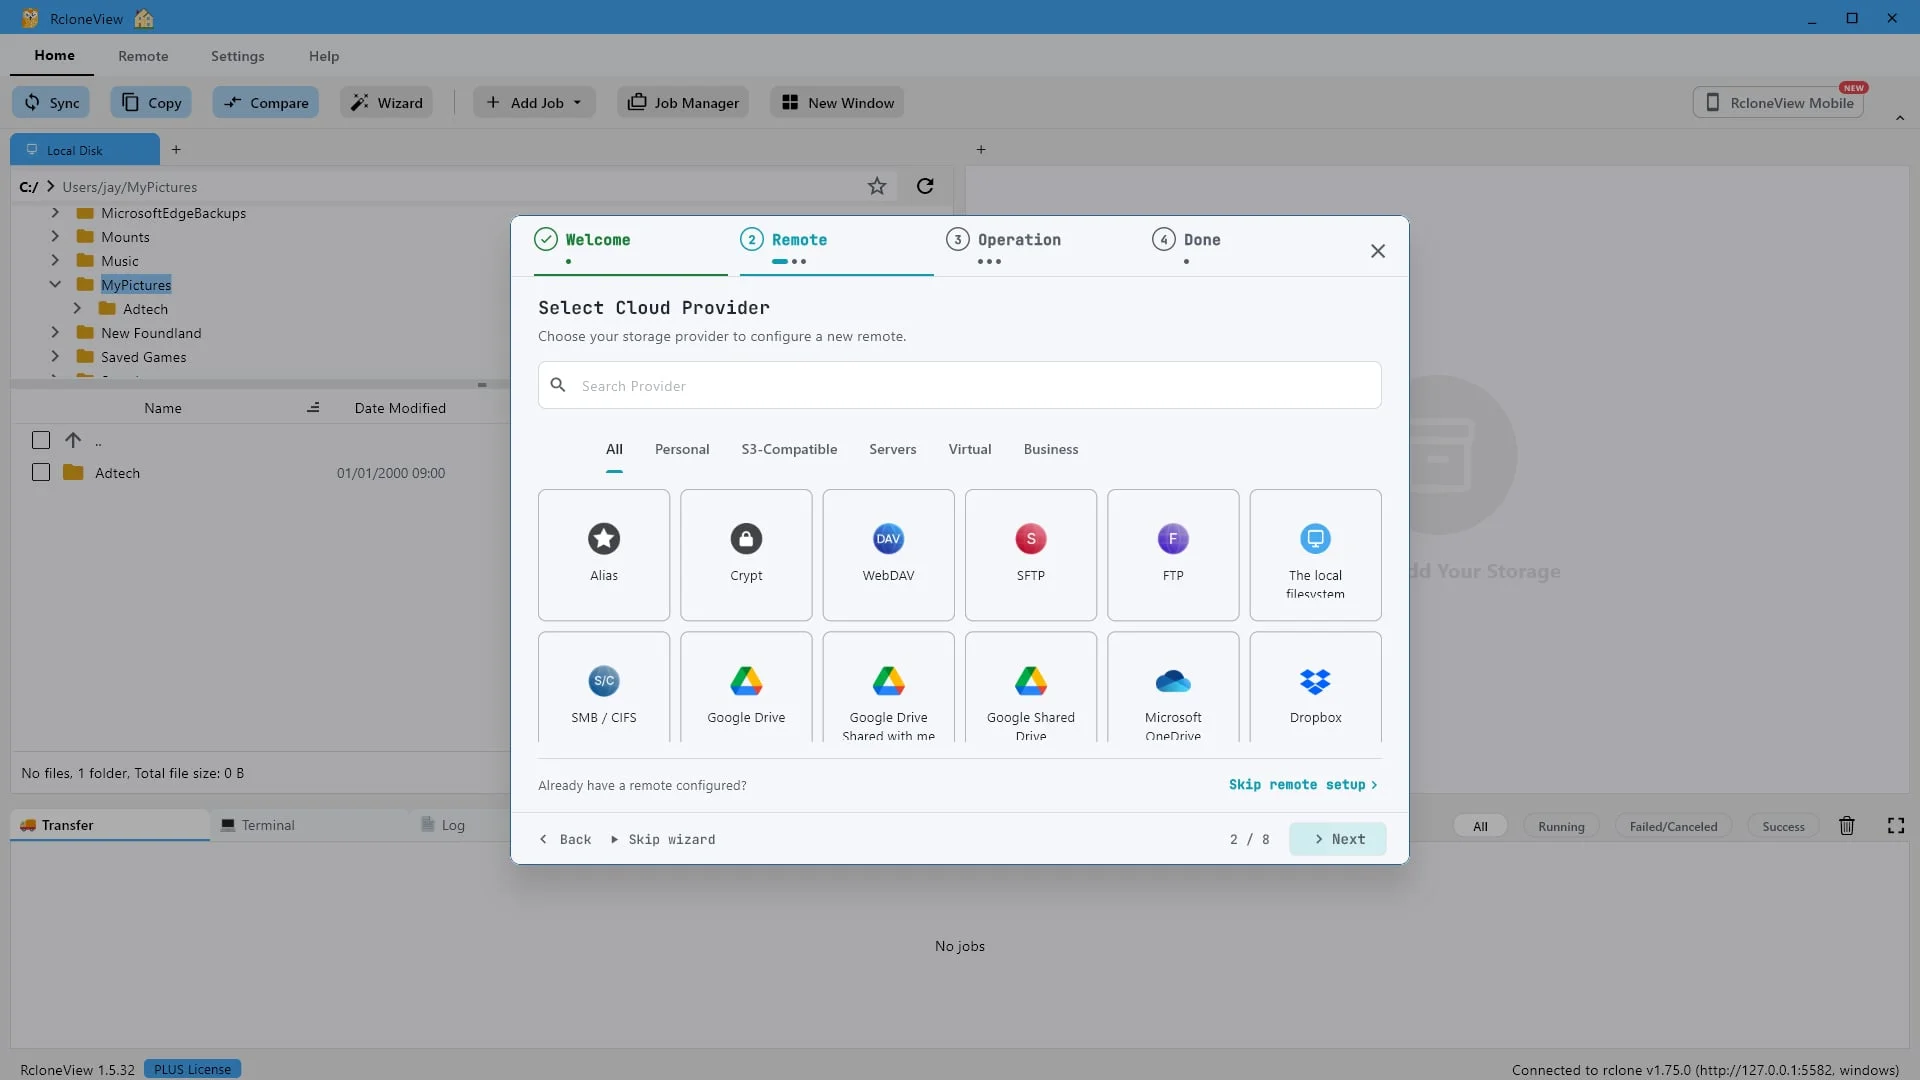
Add whichever storage you want to work with. This demo uses Google Drive.
First we add a remote to work with. RcloneView supports more than eighty backends, and any of them can sit on either side of a comparison. For this demo we will add Google Drive.
-
-
5Try this step ↗
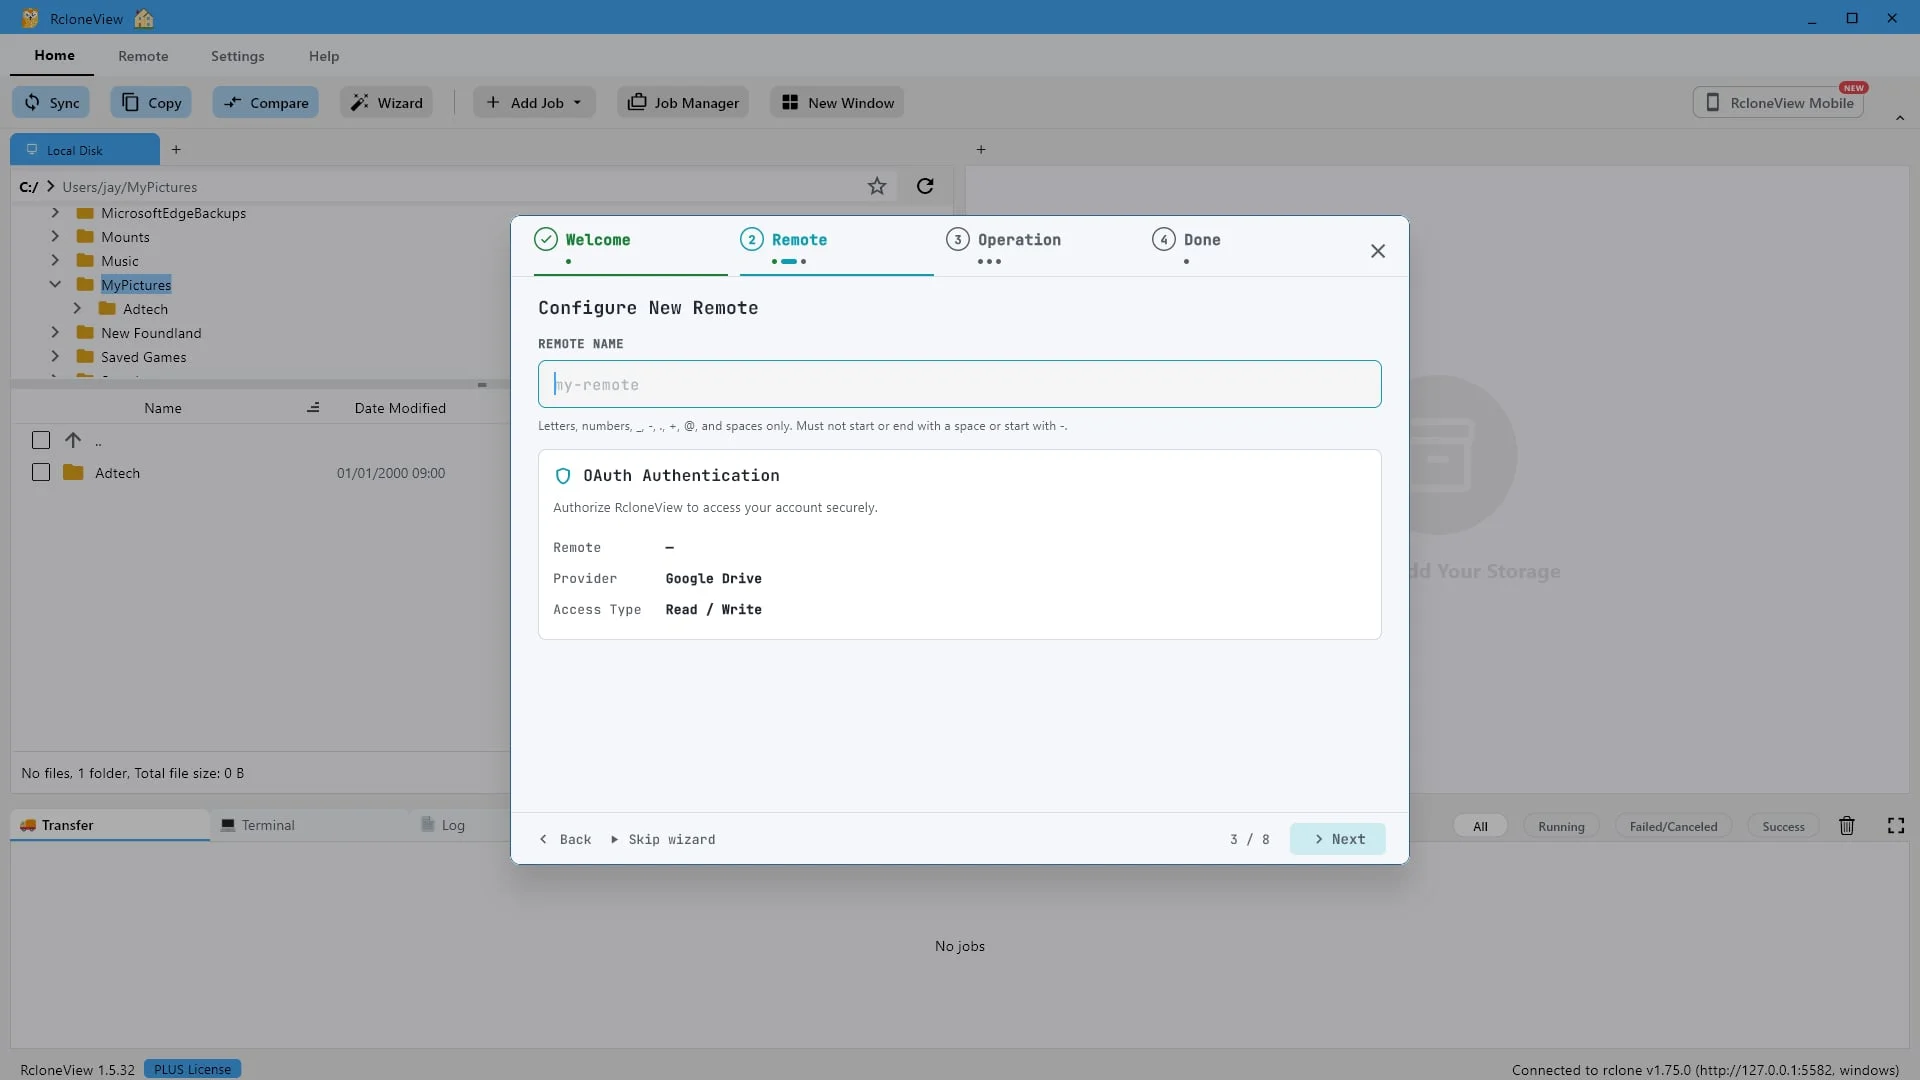
Give this connection a name you'll recognize later.
Give the new remote a short name you will recognize later. This is simply a label for the connection.
-
6Try this step ↗
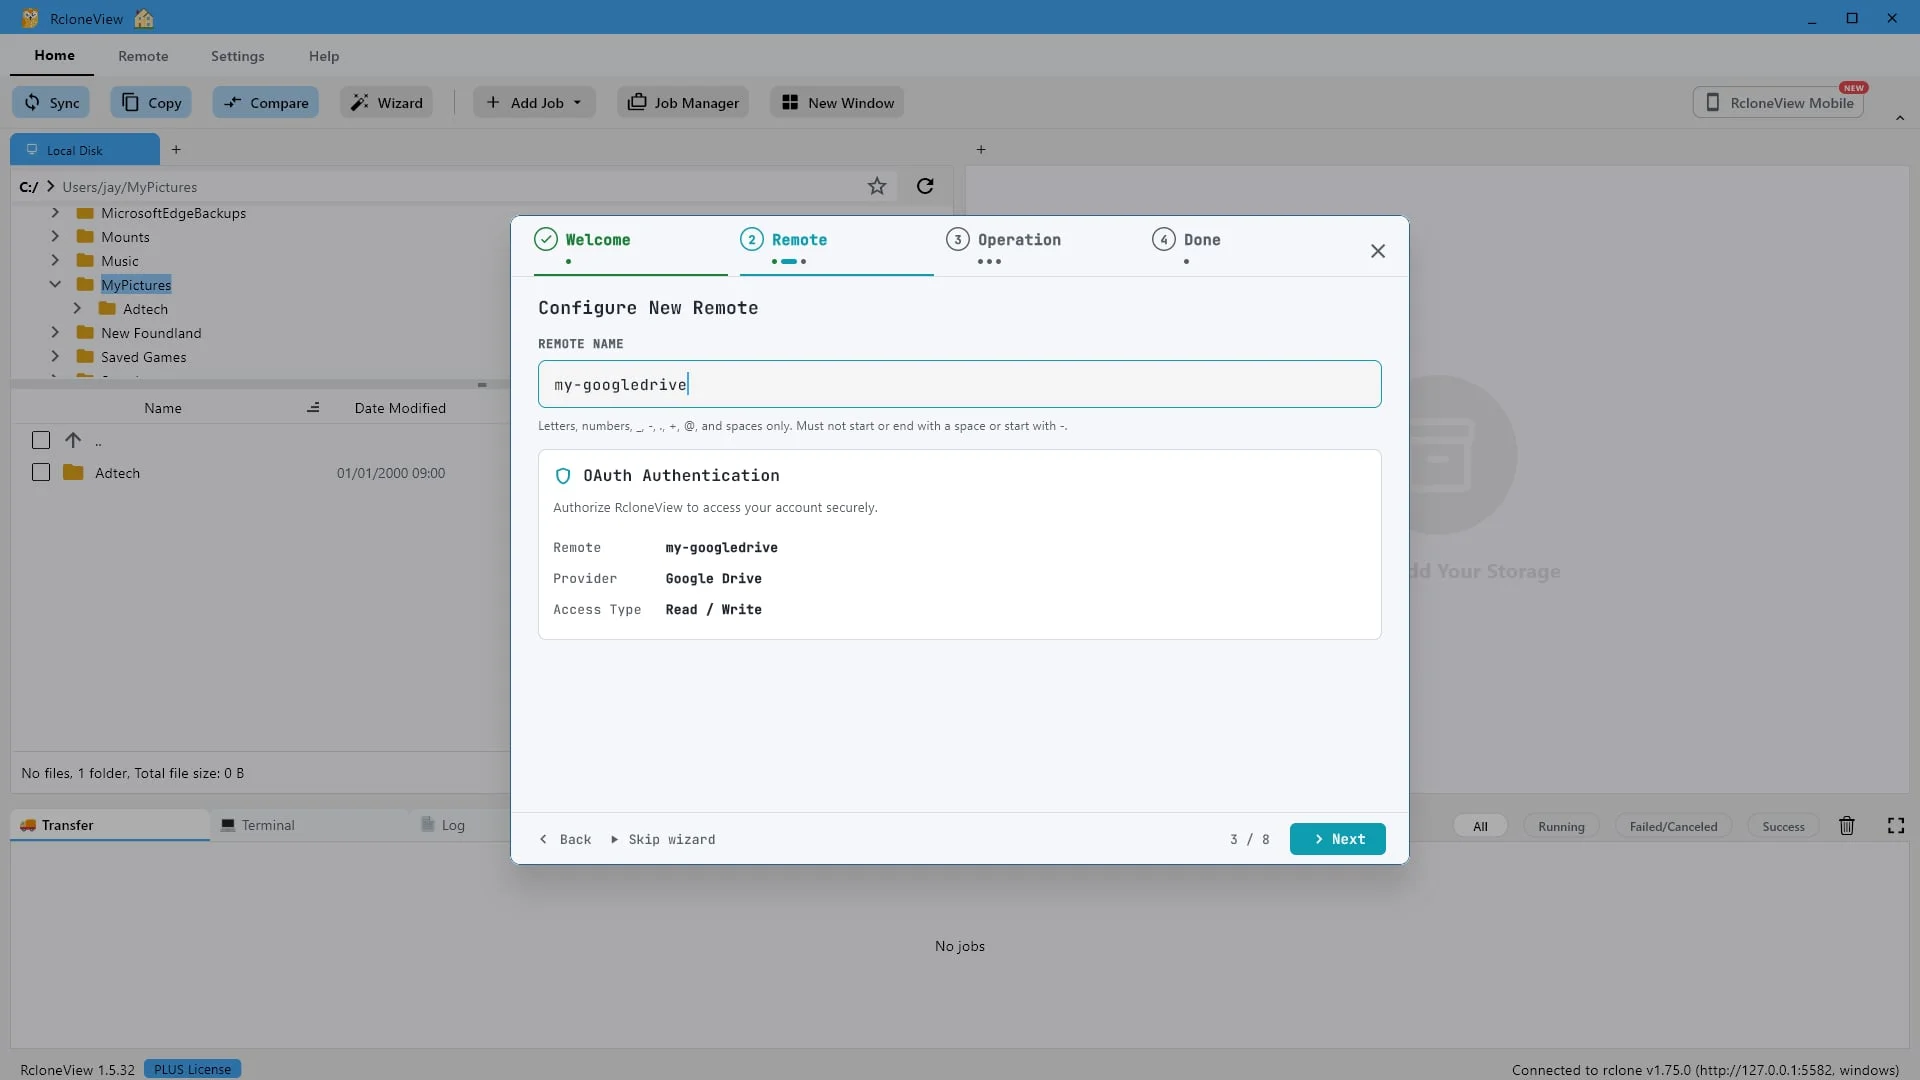
We'll call this one "my-googledrive". Then click "Next".
We will call ours my google drive. Click Next to save it and start the connection test.
-
7Try this step ↗
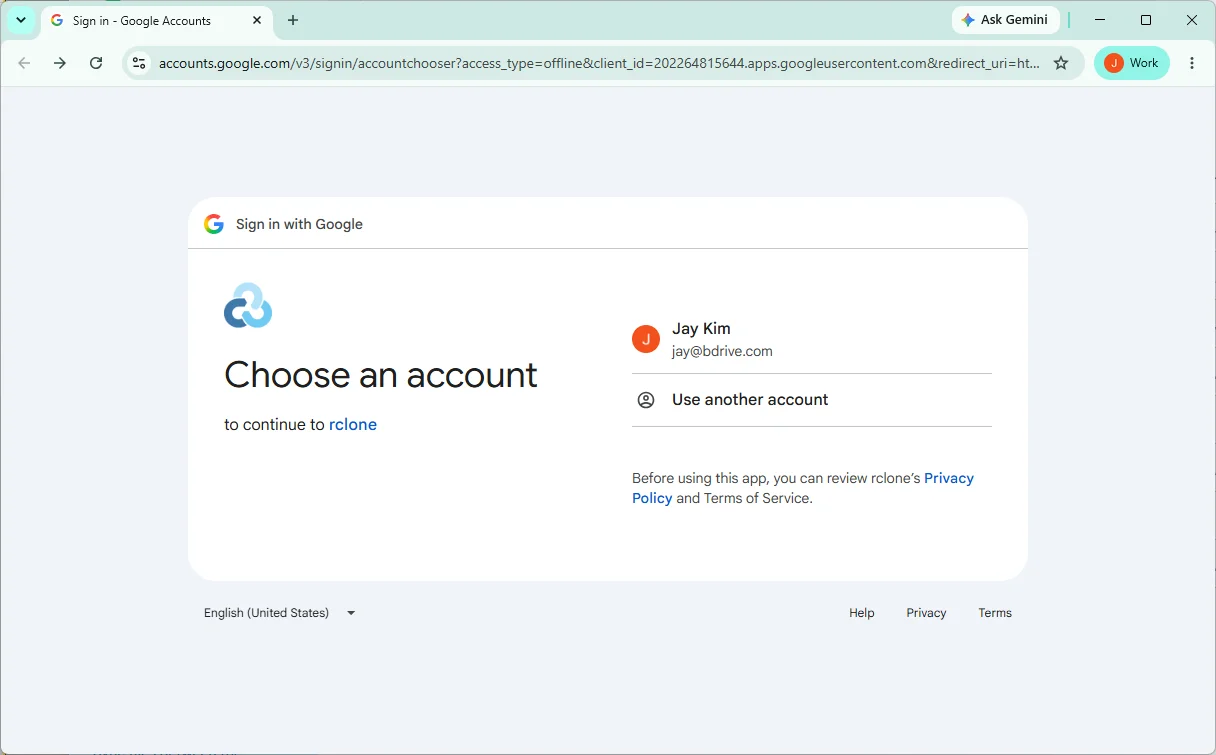
Sign in and authorize. RcloneView never sees your password.
Authorize the connection on the provider's own page. The access token is stored locally on your computer, and RcloneView never sees your password.
-
8Try this step ↗
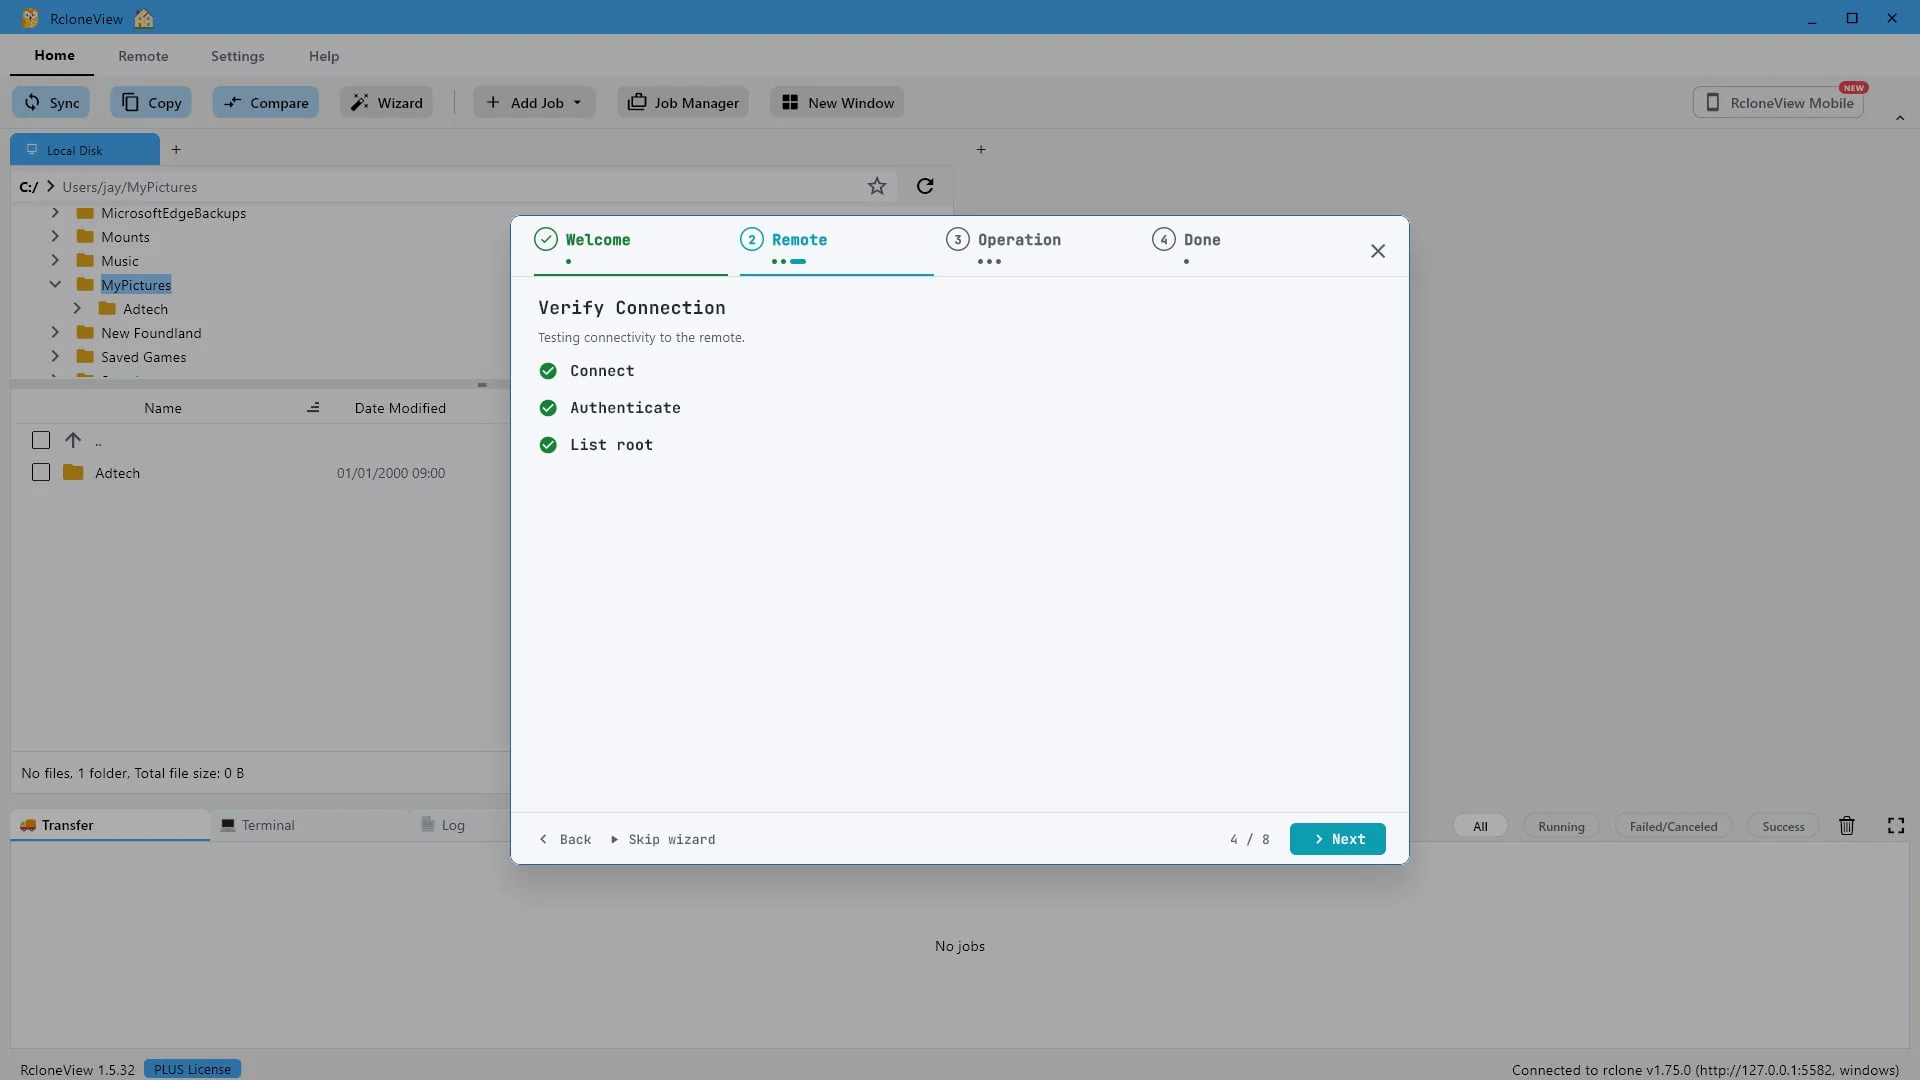
Connect, authenticate and list root all passed. Click "Next".
Connect, authenticate, and list root all pass, so you know the remote works before you rely on it.
-
9Try this step ↗
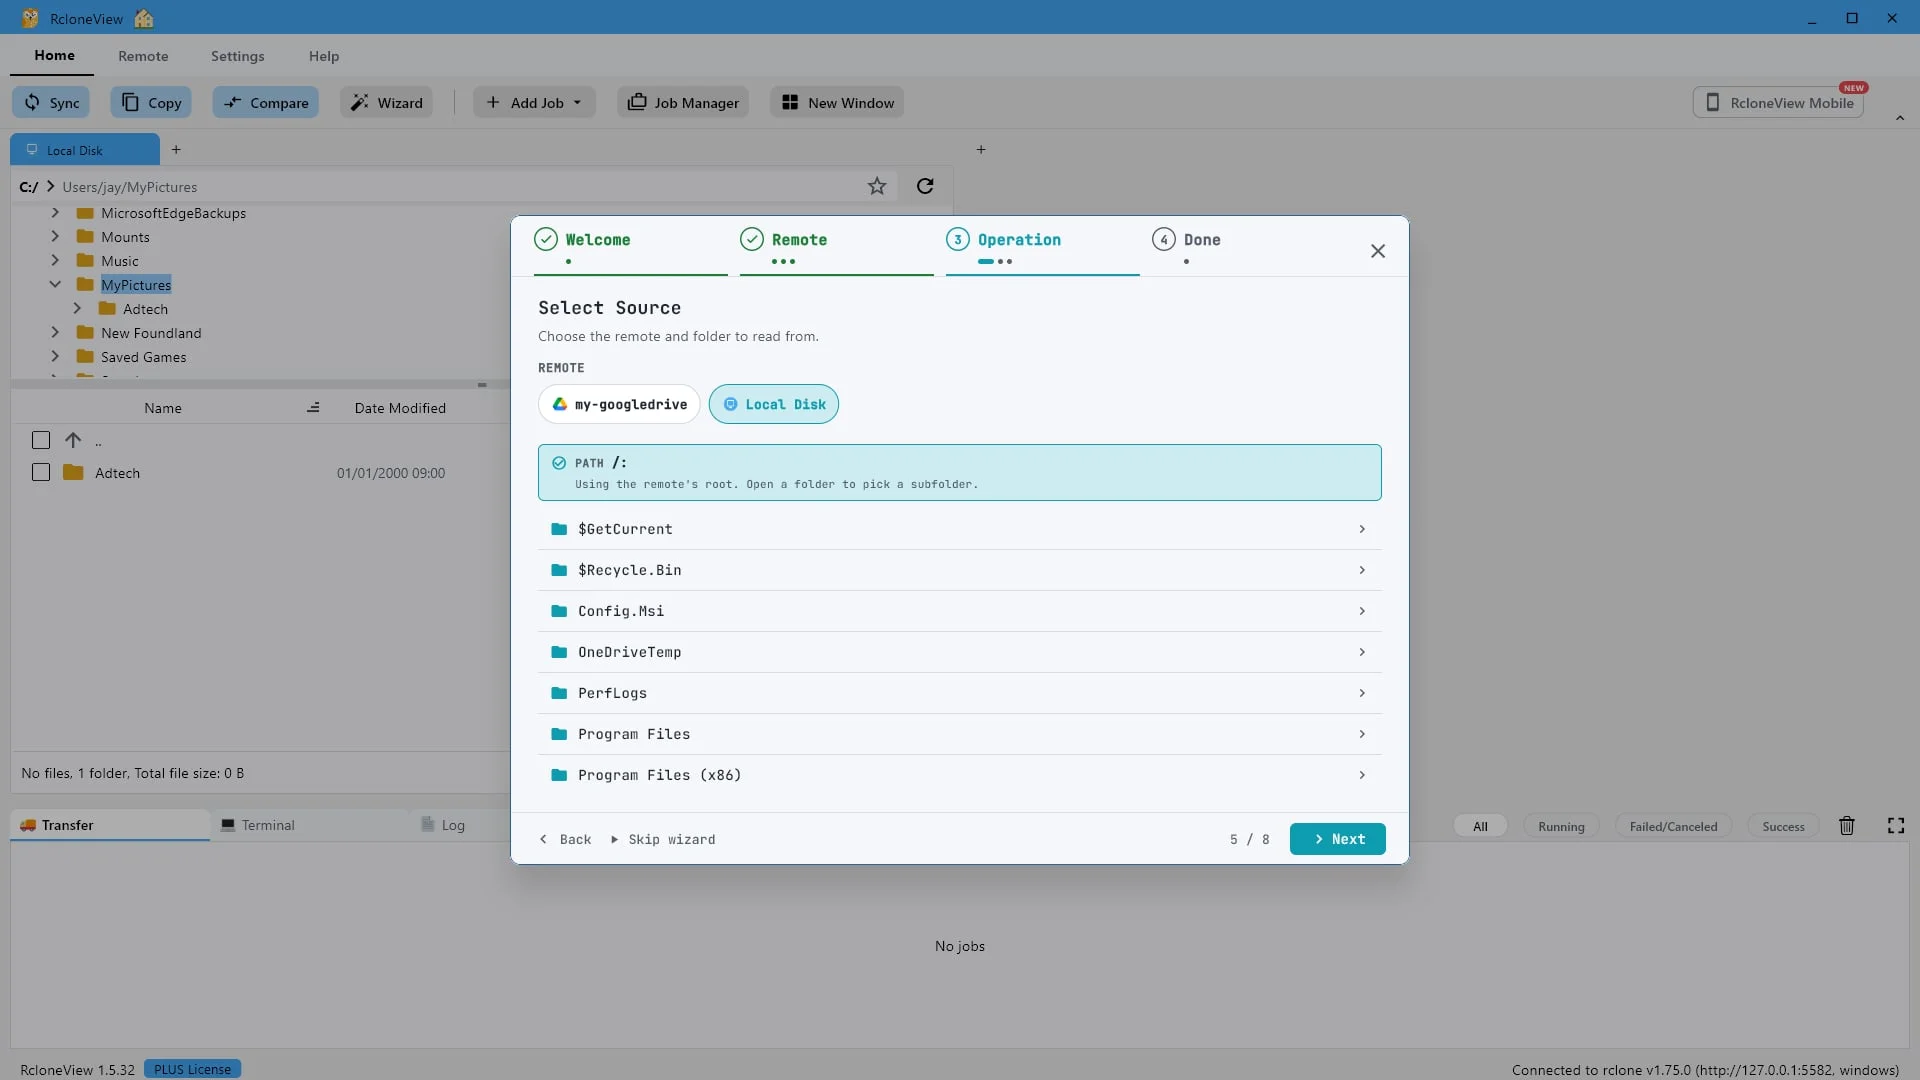
Pick the side you're comparing from - any remote can go here. This demo starts from Local Disk.
Now tell the wizard what to compare. The source is simply the side you are comparing from, and any remote you have configured can go here. In this demo we will start from the local disk.
-
10Try this step ↗
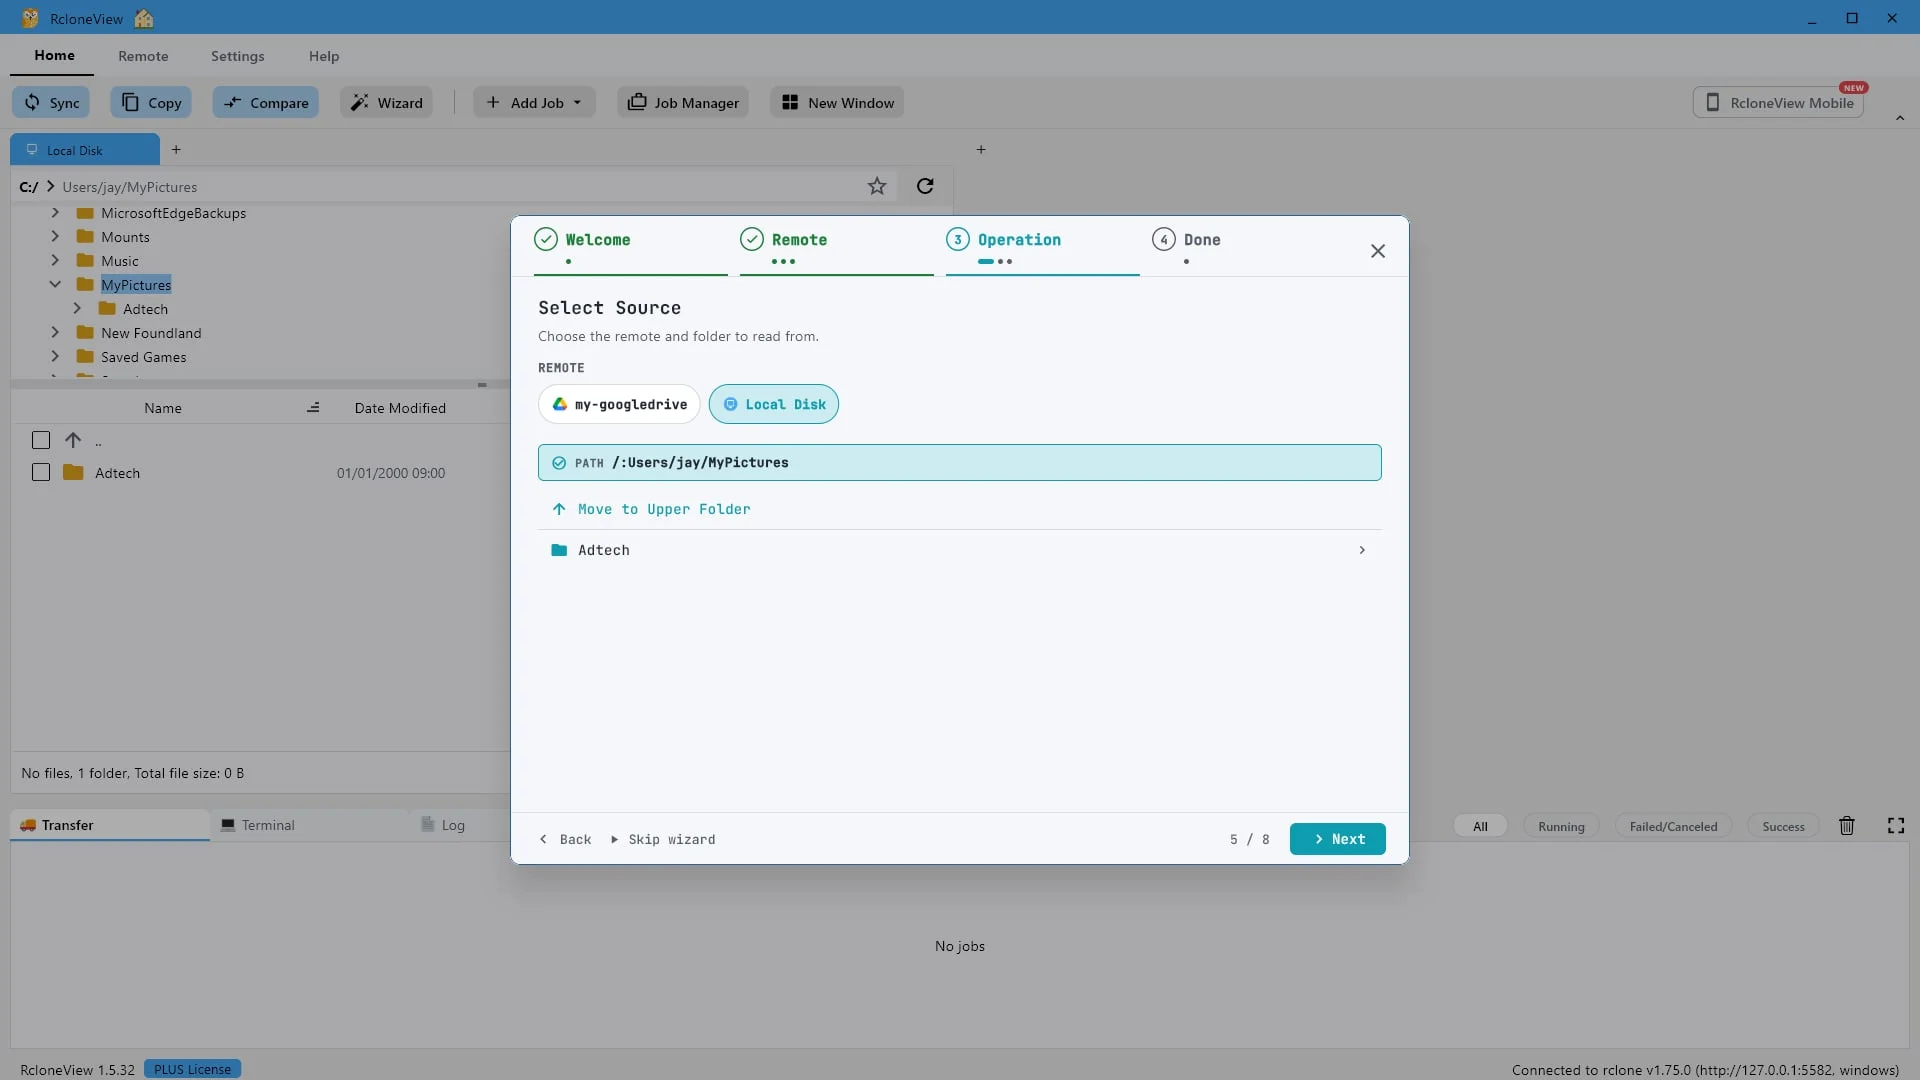
Open a folder to narrow the path, then click "Next".
We will use My Pictures. With the source set, click Next.
-
11Try this step ↗
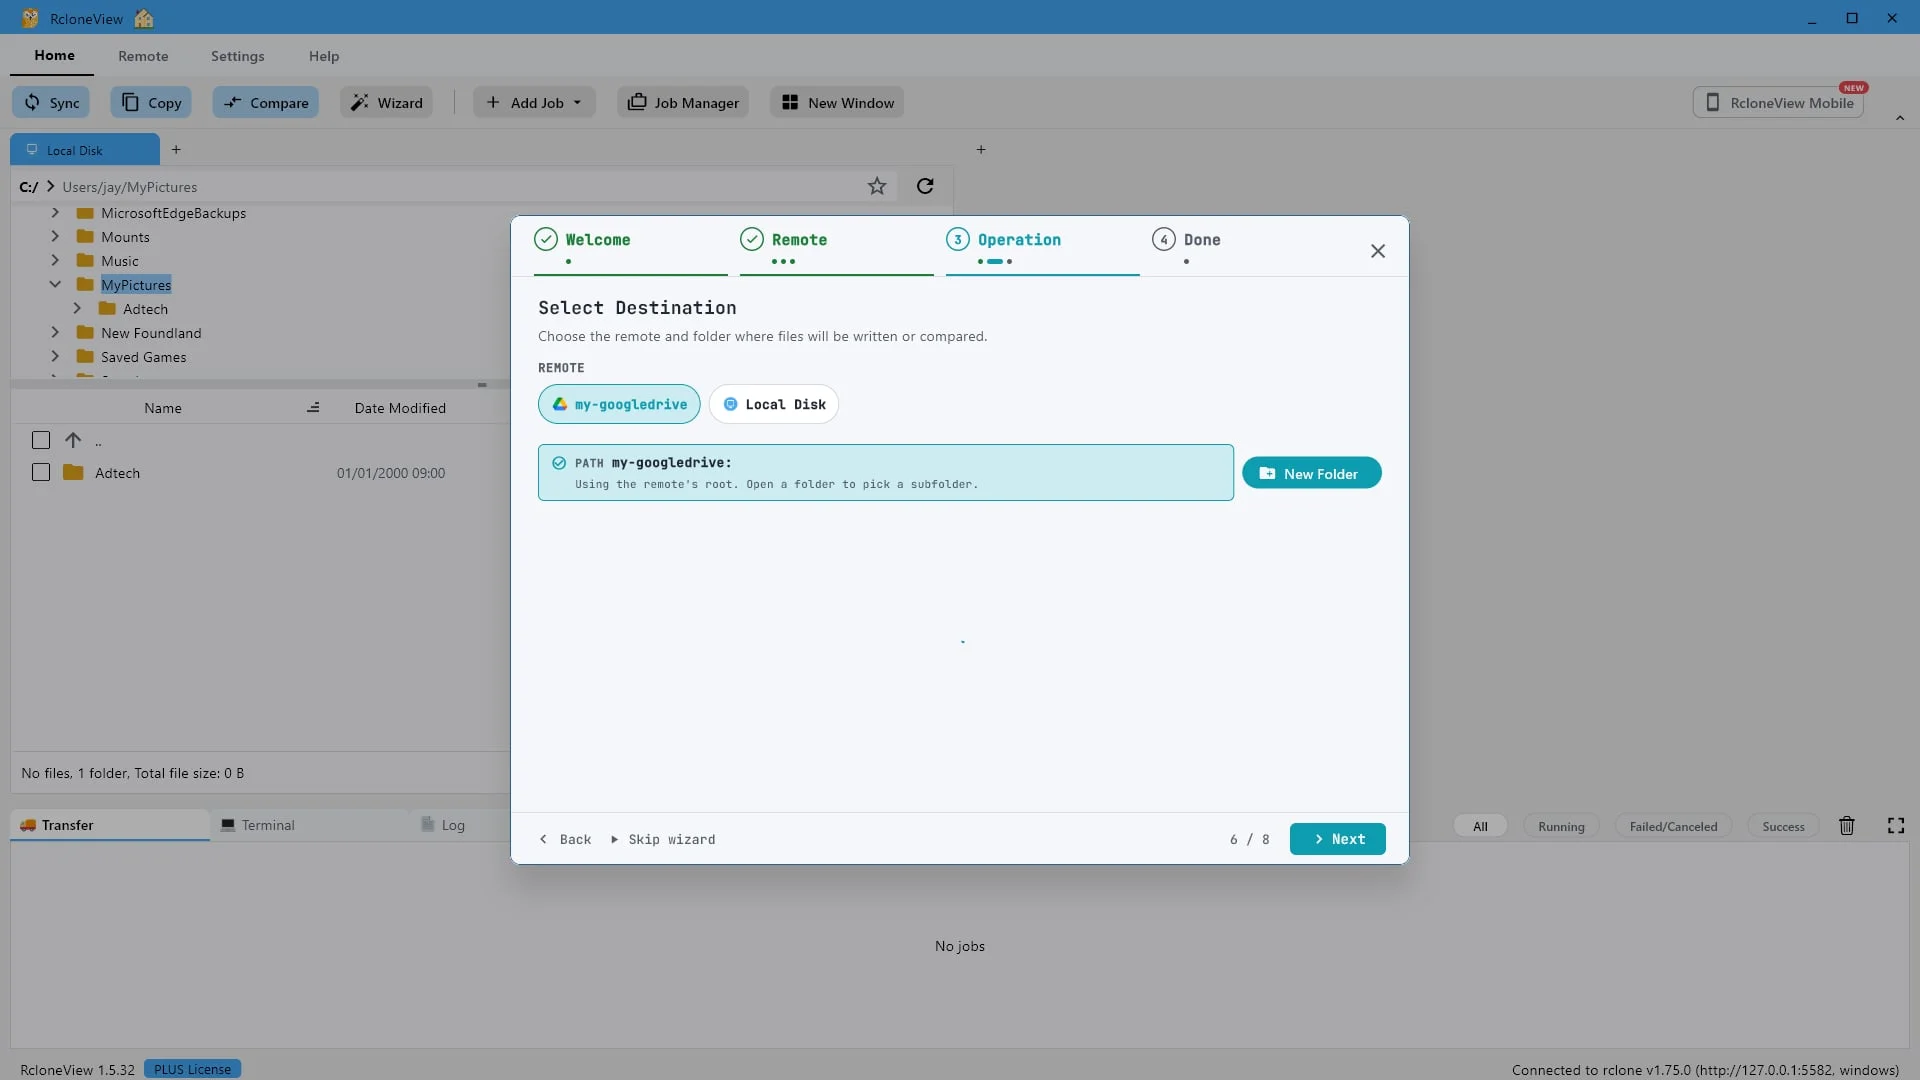
Now pick the other side - another cloud, another drive, or a different provider entirely.
The destination is the other side of the comparison, and it has no special requirements either. It can be a second cloud account, another folder on the same machine, or a completely different provider. Here we will pick my google drive.
-
12Try this step ↗
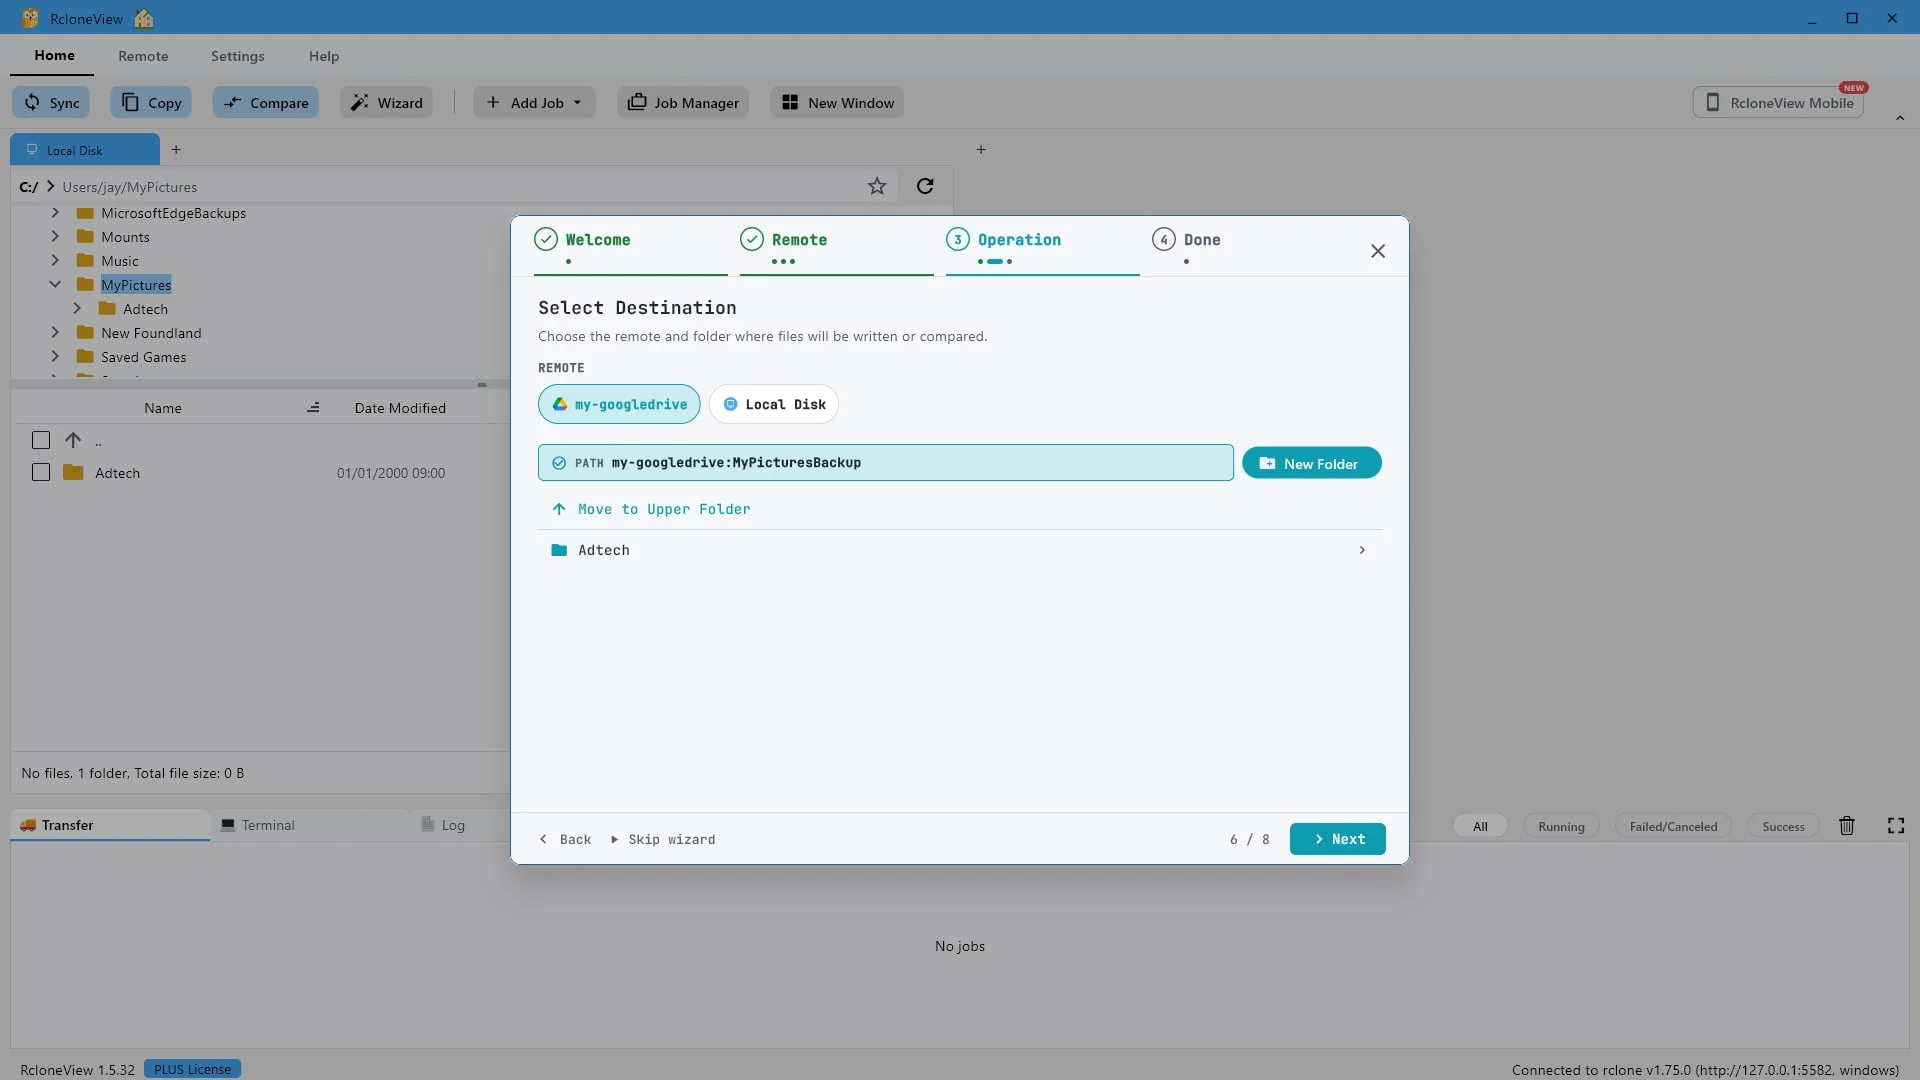
We'll compare against "MyPicturesBackup". Then click "Next".
Open the folder that is supposed to hold your backup. We will use My Pictures Backup. With both sides set, click Next.
-
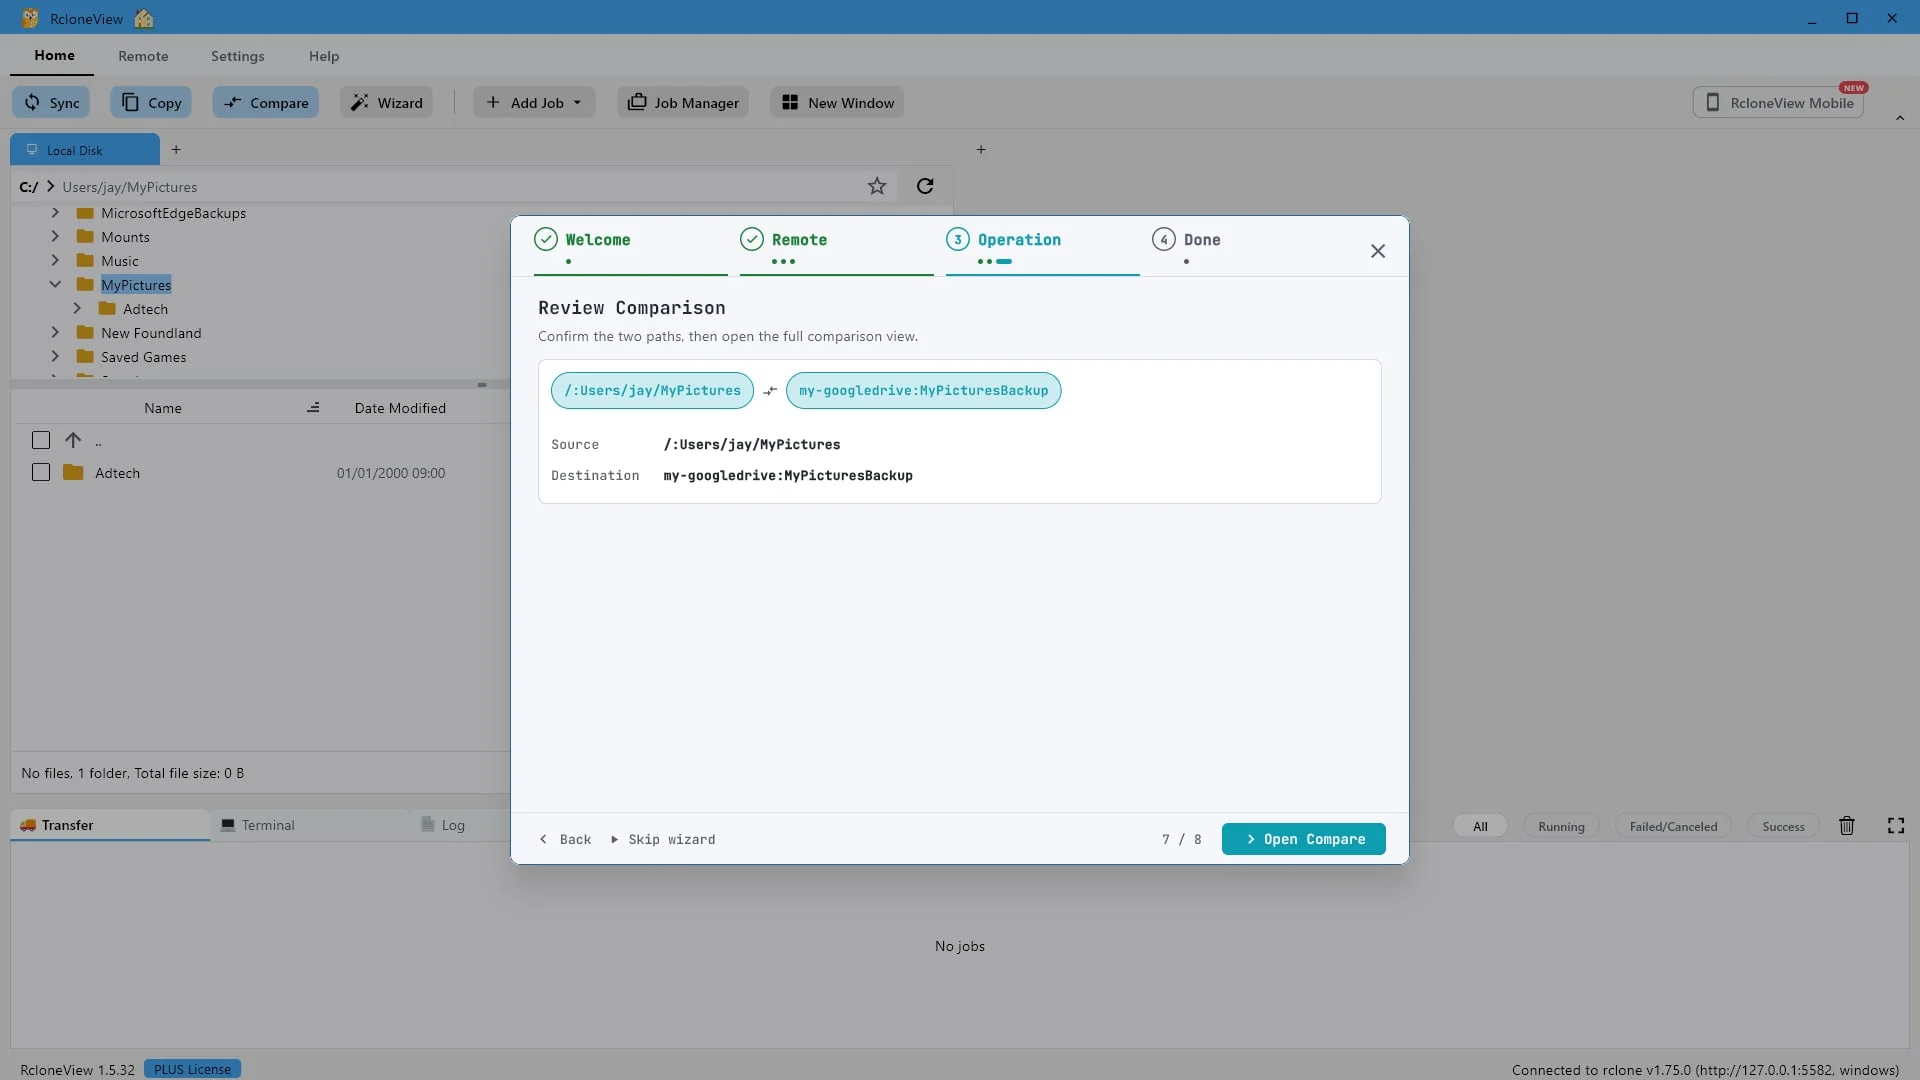
13Try this step ↗
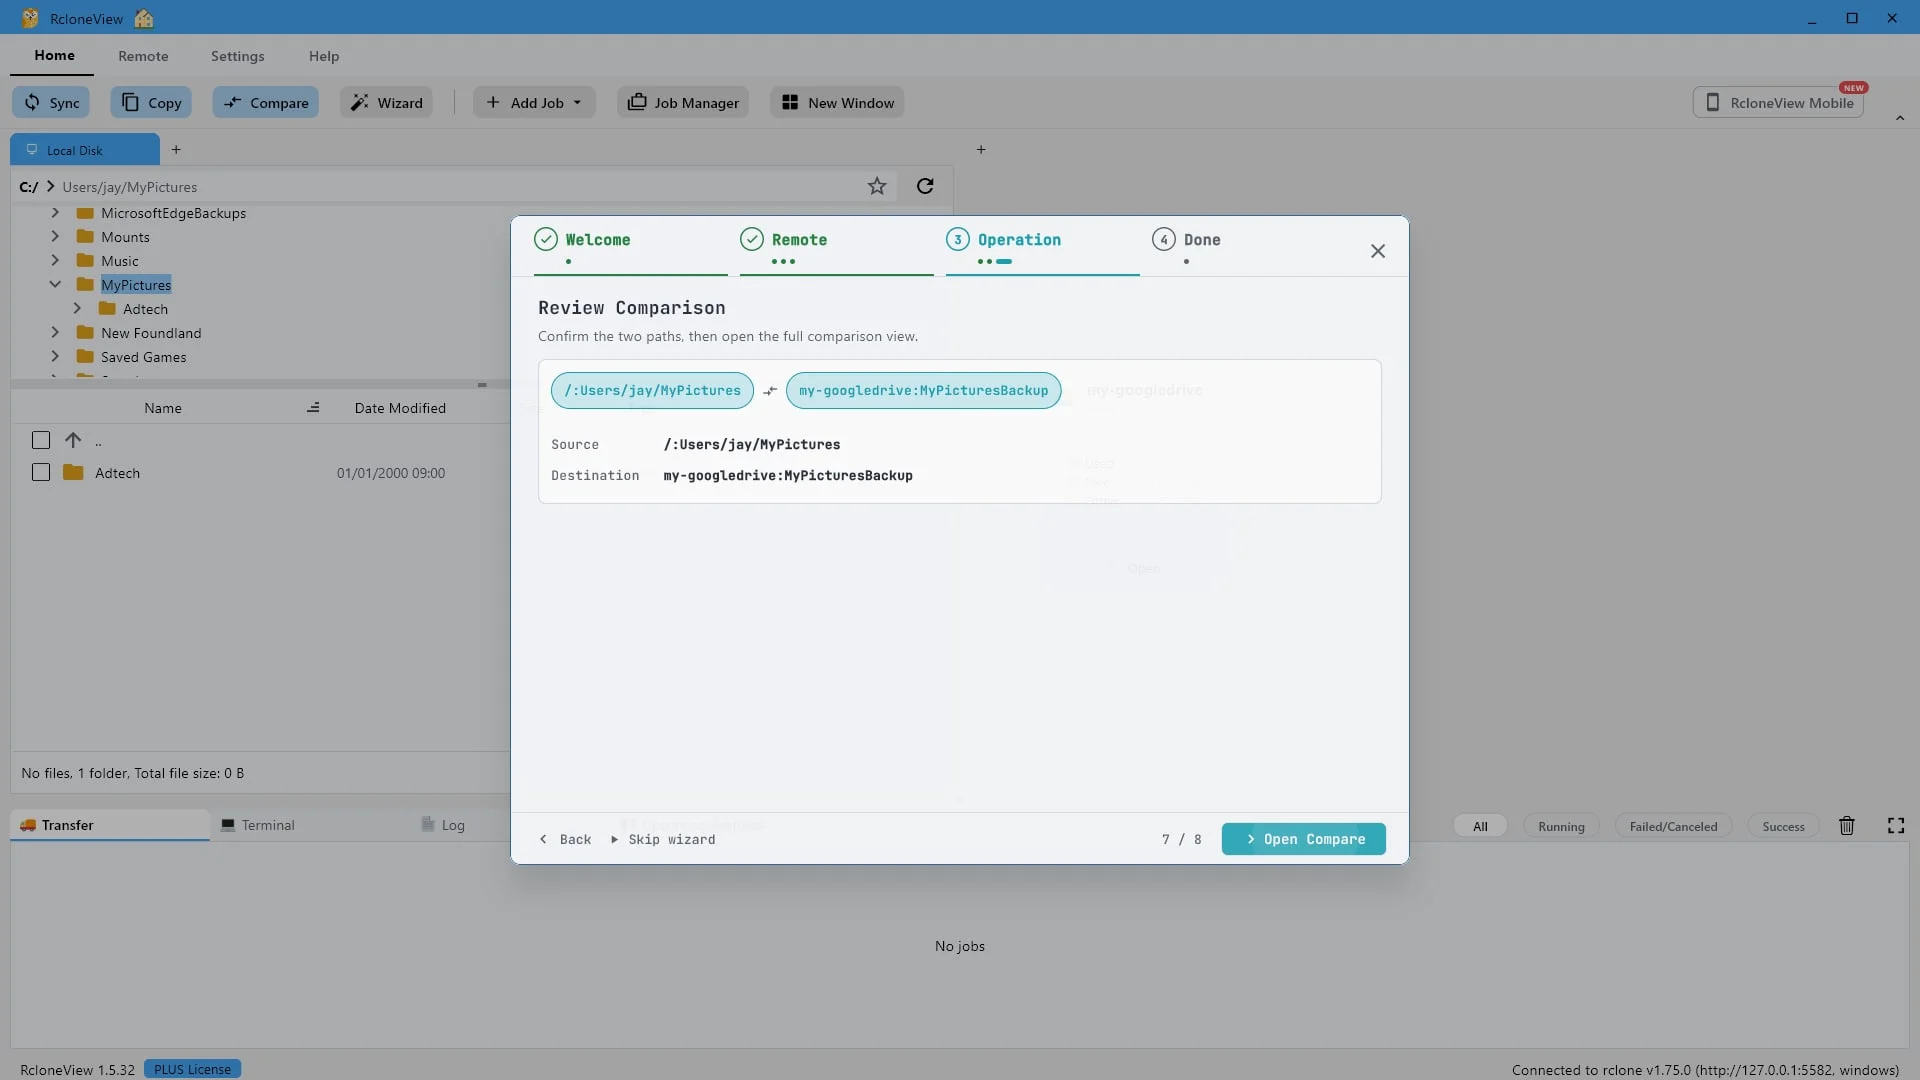
Check both paths before you run. Left is the source, right is the destination.
Take a moment to confirm the two paths. Whatever remotes you chose, the left side is always your source and the right side your destination. Nothing is written yet. This is a read only comparison.
-
-
15Try this step ↗
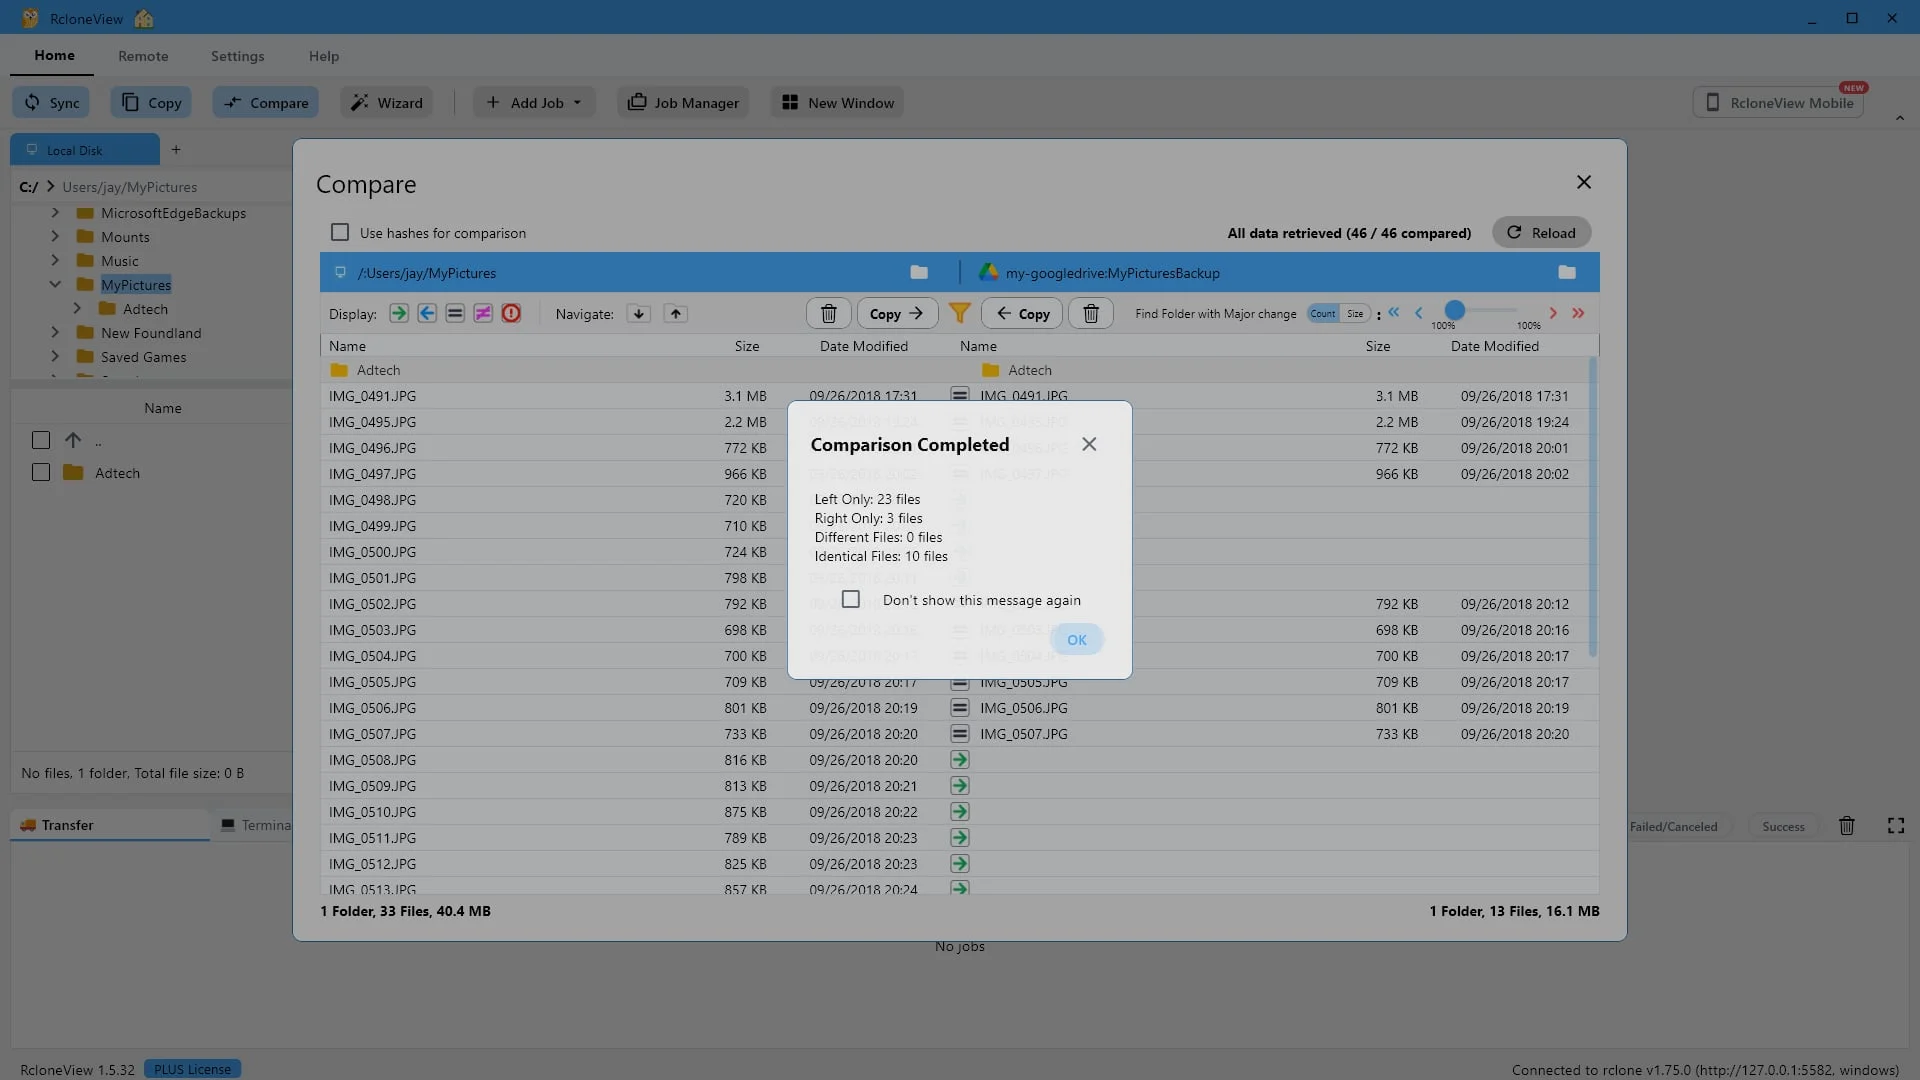
Your answer in one line: 23 files exist only on the left. Click "OK".
RcloneView scans both sides and answers the question straight away. Twenty three files exist only on the left, three exist only on the right, ten are identical, and nothing is in conflict. Click OK to see the detail.
-
16Try this step ↗
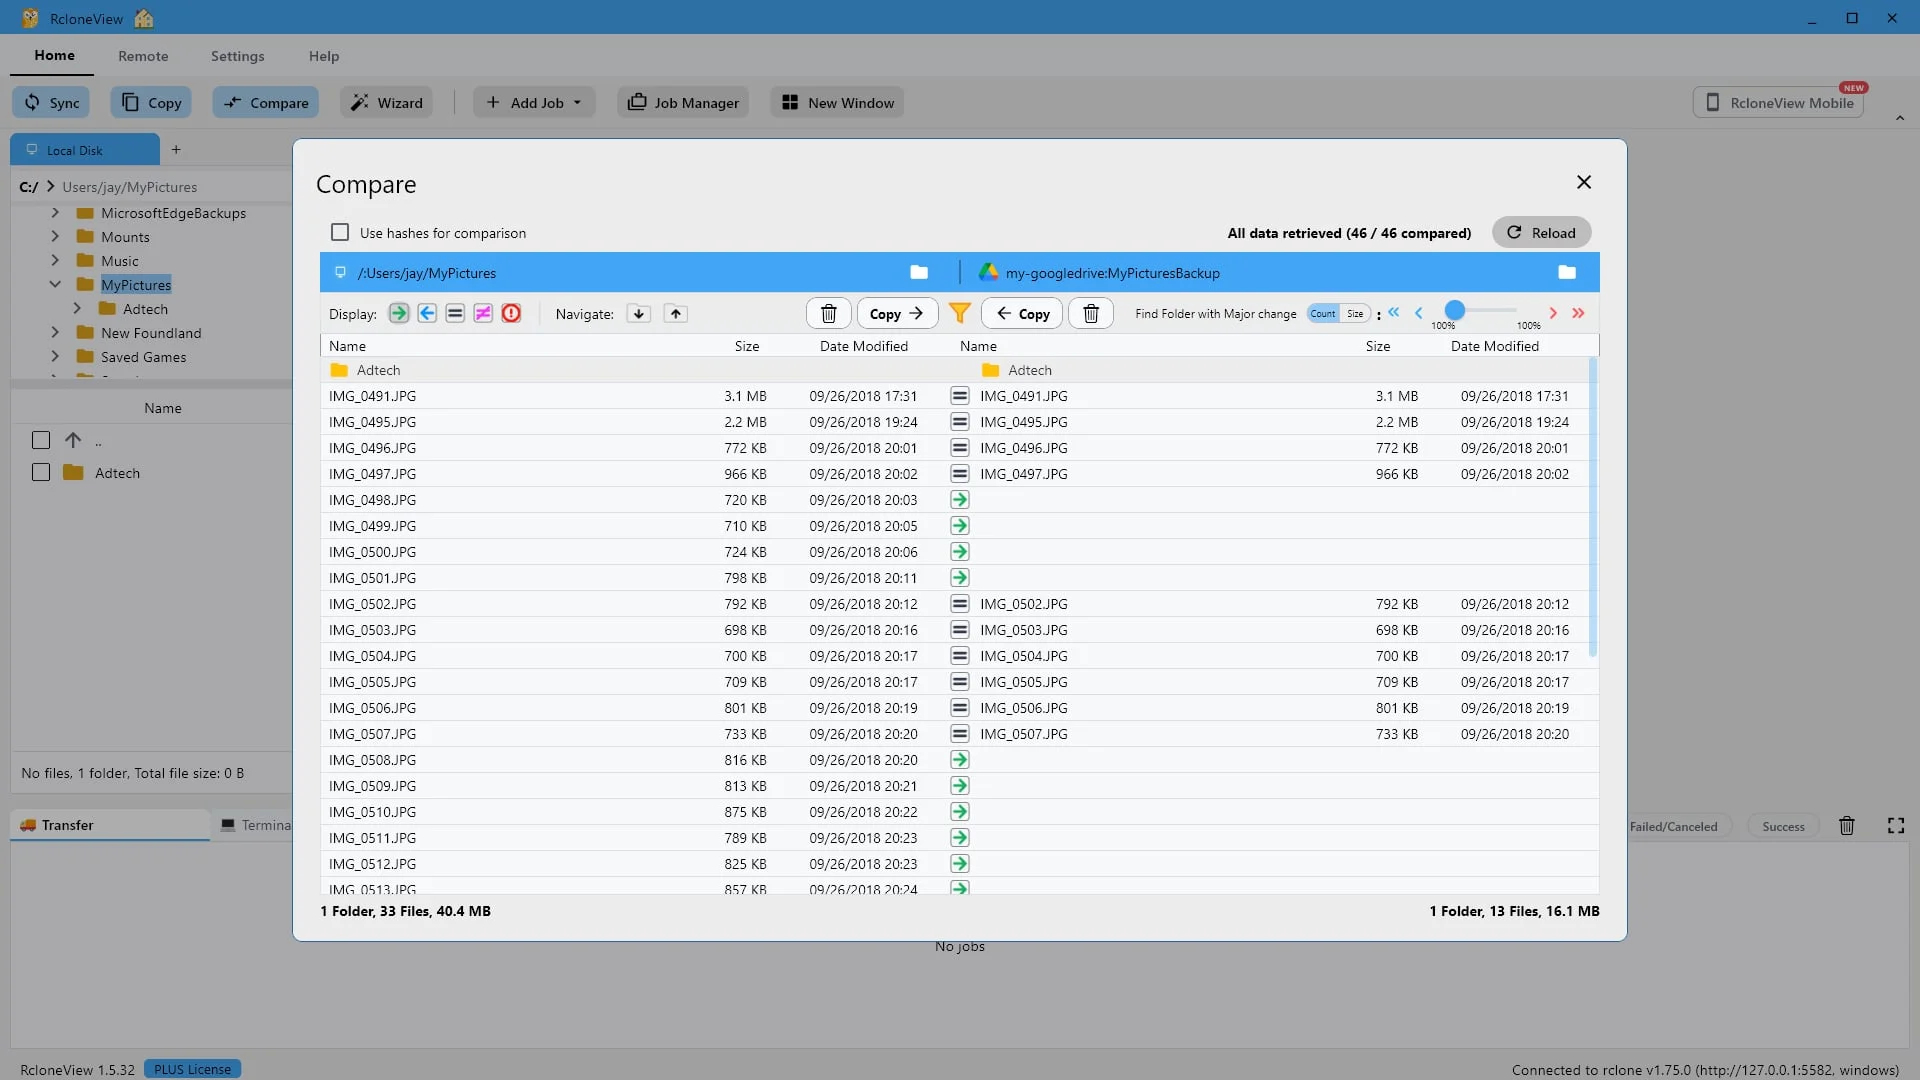
Same row, same file. An equals sign means identical, a green arrow means missing on the right.
Here is the full comparison, file by file. Matching files sit on the same row, so an equals sign means the two copies are identical in size and date, and a green arrow means that file exists on the left but is missing on the right. One screen, and you know the exact state of both locations.
-
17Try this step ↗
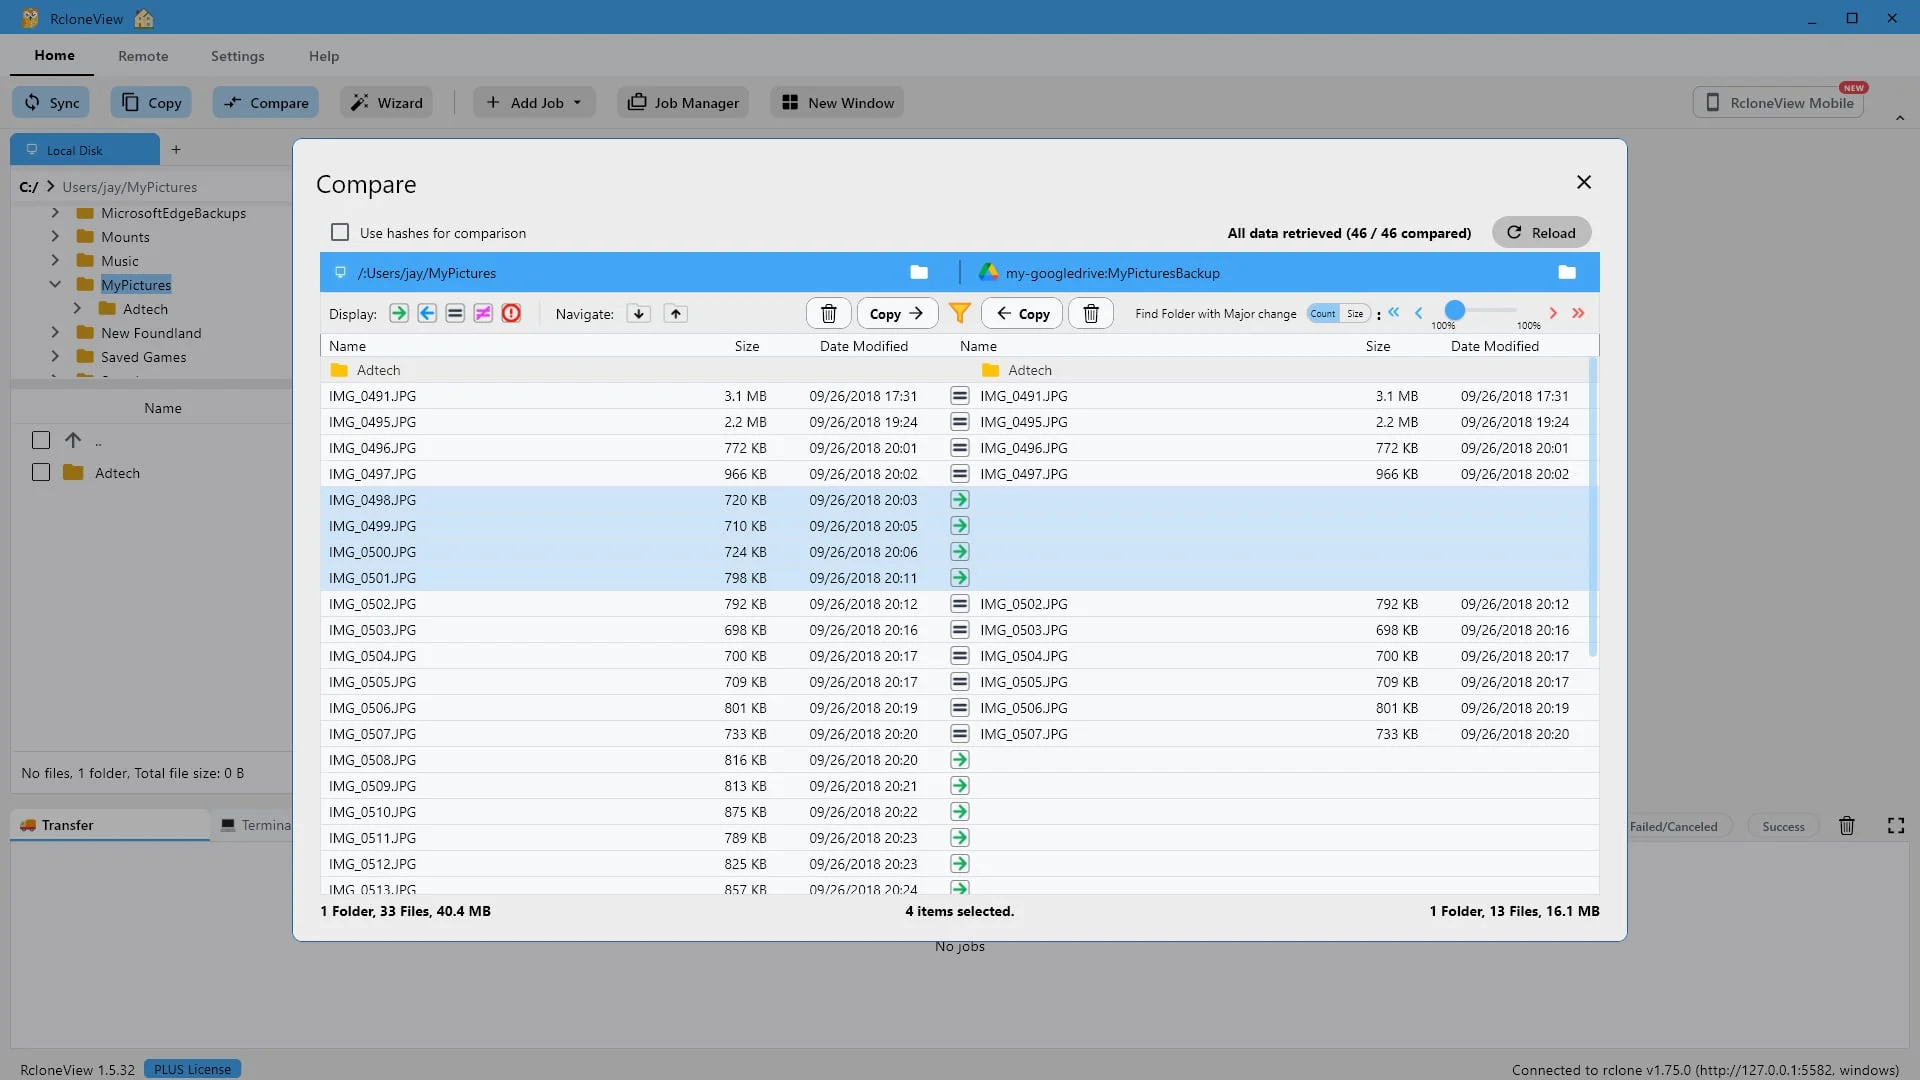
Select only the rows you want. You stay in control of what moves.
You are not forced into an all or nothing sync. Select just the rows you want, and only those files will move. Here we pick four of the missing photos.
-
18Try this step ↗
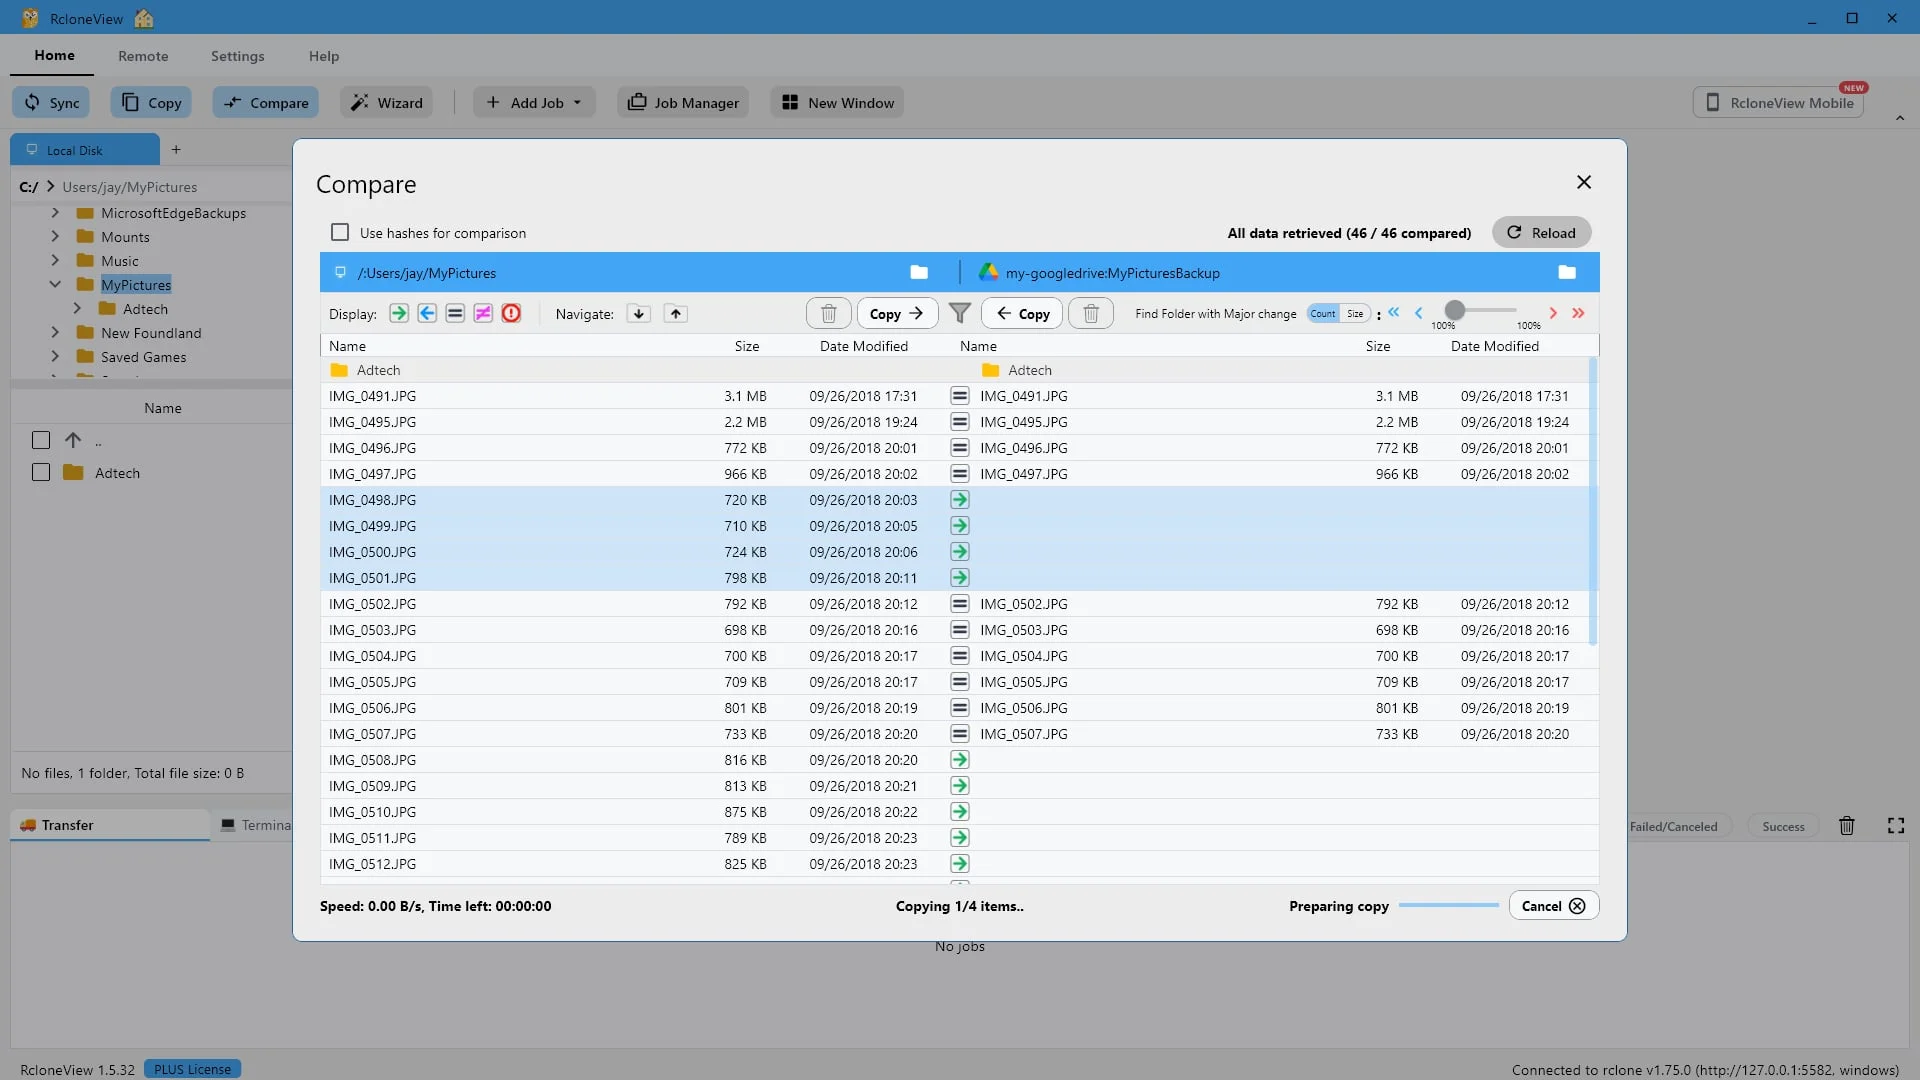
Click "Copy" with the right arrow to send the selected files to the other side.
The arrow always tells you which way the files are going, and copy works in either direction.
-
19Try this step ↗
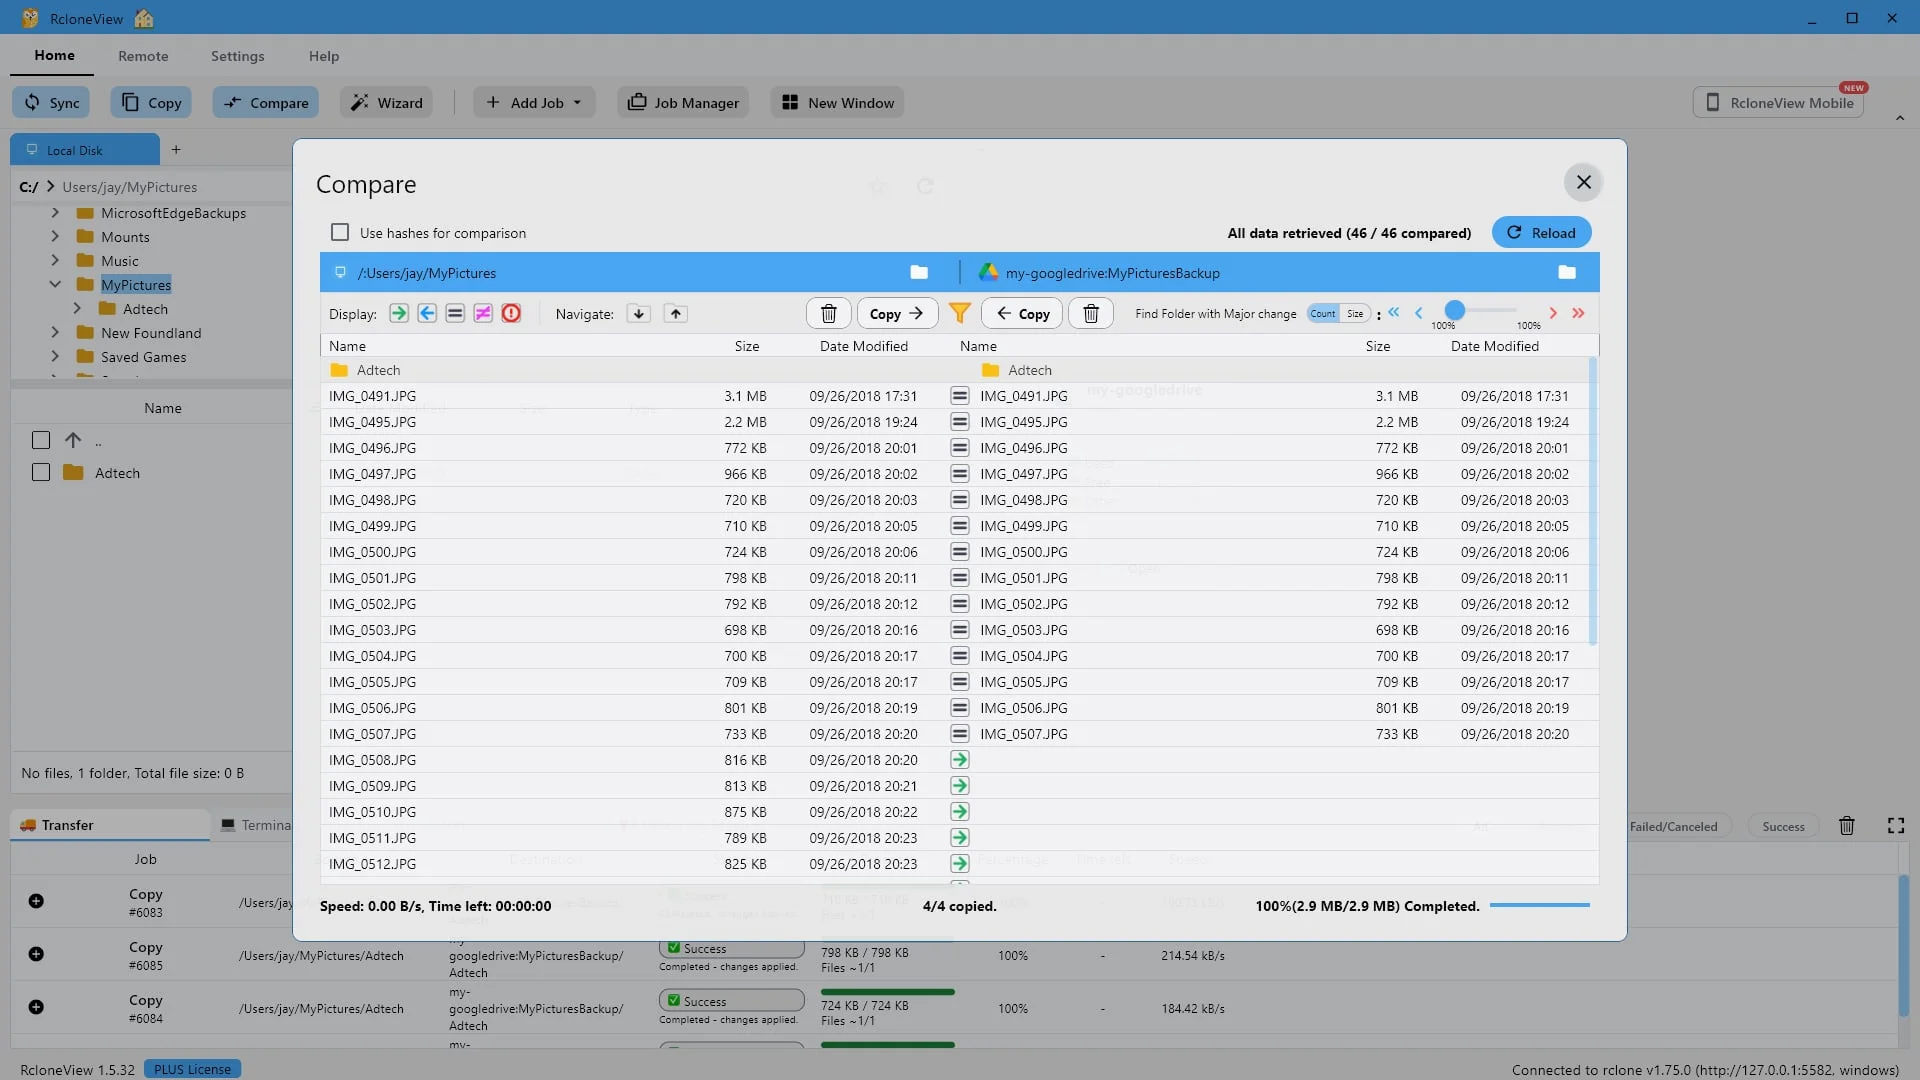
Four of four copied - and those rows now read as identical.
The transfer finishes in place. Four files, two point nine megabytes, copied. And the proof is on the same screen. Those four rows now show an equals sign on both sides, so they are no longer missing. They are identical.
-
20Try this step ↗
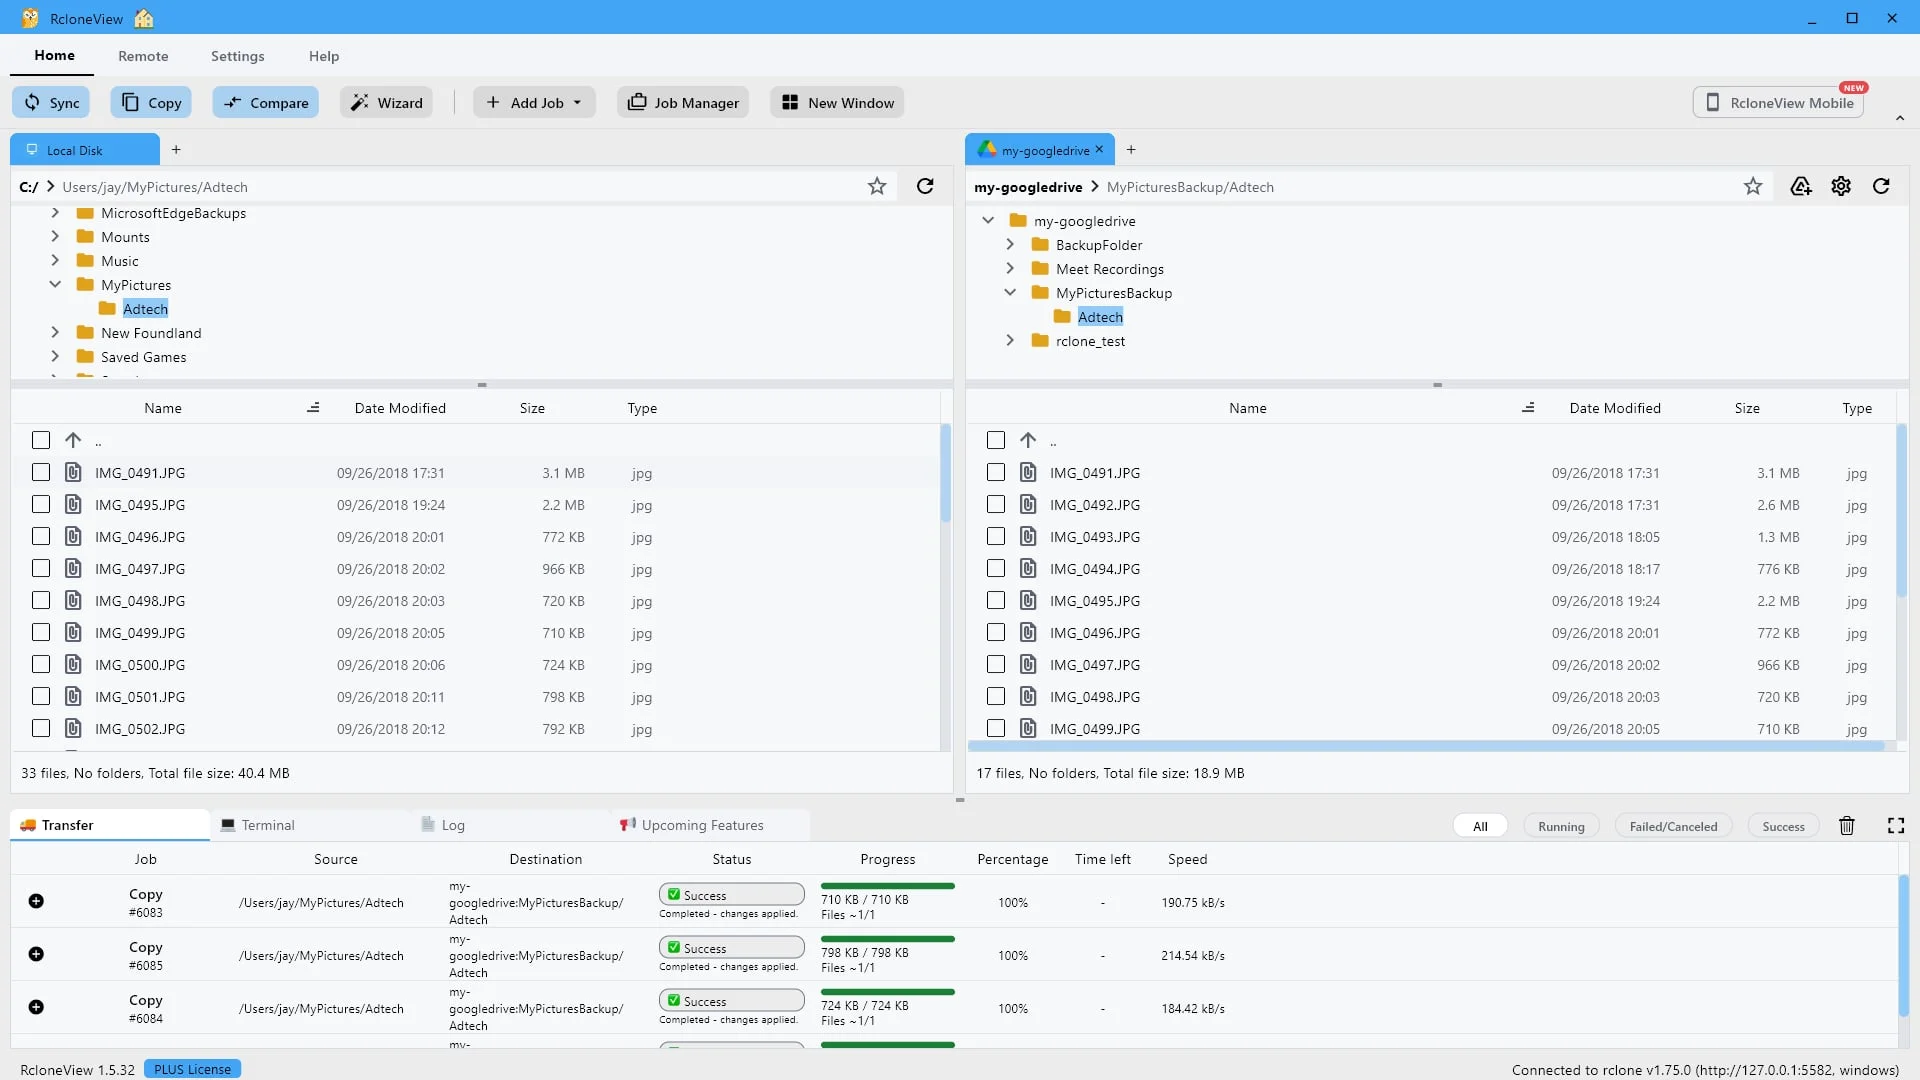
Or confirm it in the dual pane view - the destination folder now holds 17 files.
If you would rather confirm it from the destination side, open that remote in the dual pane view. The backup folder now holds seventeen files, up from thirteen. Same result, checked from the other direction.
-
Ready to try it yourself?Free for Windows, macOS and Linux.Get RcloneView Free